CarMiZa 33 Trunk Details Major Issue SOLVED
Continuing the progress of CarMiza, I just ran into a major issue that I solved in this video. Please like, subscribe, and enjoy!
Transcript
0:01
hey how's it going welcome back to Cara
0:03
this is going to be trunk details part
0:05
33 if you're looking for new content
0:08
unfortunately you've come to the wrong
0:09
video this time uh I had a major issue
0:12
with the design and build that I had to
0:15
correct this entire video is going to be
0:18
uh a short video relatively short for my
0:20
channel but it's going to show exactly
0:22
what I needed to do to solve the issue
0:24
so I hope you enjoy and I hope you've
0:26
been watching the series
0:30
I show The Good the Bad the Ugly I'm not
0:32
here to hide anything and I don't care
0:35
who says what people are going to have
0:38
mistakes issues errors and I had maybe
0:42
the biggest error mistake that I've had
0:44
in this entire build I misjudge the Gap
0:47
that I had between the trunk lid panel I
0:50
showed you in the last video and what I
0:52
call the near wall that piece I thought
0:54
I had about a fingers width about you
0:56
know about 38 of an inch turns out I had
0:58
about an eighth of an inch after I built
1:00
the panel very bad because everything's
1:02
going to be carpeted
1:04
so my pretty panel that I had needed to
1:07
go through a little bit of surgery right
1:09
now this is Midway through the surgery
1:12
so we're seeing uh it's kind of open
1:15
heart surgery I ended up having to knock
1:17
down this quite a bit to be able to get
1:19
the um Gap that I needed in doing so I
1:23
kind of this is all back filed so it's
1:25
still really solid and I can just fill
1:27
this all in not a big deal same as is
1:30
true over here but again this is the
1:31
kind of stuff that a lot of people won't
1:33
show you on their builds that really
1:34
does happen I also had to kind of redo
1:38
the near wall if you recall I made like
1:41
a cool little cover um that wasn't going
1:43
to fly because that was lifting you know
1:45
that was on top of this and it was made
1:47
of E8 inch uh abs and I also kind of
1:50
feathered the filler in there as well I
1:52
need every single you know Micron I can
1:56
get I ended up even sanding this down
1:58
this is a little bit thinner than it was
2:00
it's still it's not like paper but it's
2:03
I got to be gentle with it because it is
2:05
it is definitely thinner than it was so
2:08
this right here represents this is the
2:11
type of carpet I'll be using this is the
2:13
thickness of it again which is
2:15
approximately quarter of an inch if it's
2:16
not compressed now if I take the trunk
2:20
lid give it a decent close it closes now
2:24
I think a lot of times they say there's
2:25
always a silver lining um I do not like
2:30
I'm still really stuck on what these
2:32
things are going to end up looking like
2:33
there's a rubber bumper that goes in
2:35
here I've got it I happen to have it
2:36
right here it's this I've showed you
2:39
these before they go in there but the
2:41
problem is when they come down they're
2:43
going to put a dimple in the carpet a
2:45
little flat spot in the carpet which I
2:47
don't like so almost
2:50
thinking and again I'm uh it's late here
2:53
I'm working on this late at night I'm
2:55
almost thinking I just let it go carpet
2:58
to carpet it'll be even across there
3:00
it's not too much pressure
3:03
and it basically my alignment is really
3:07
really good this side is not it's off by
3:10
maybe I don't know right on the edge
3:13
there maybe a six tough to see but maybe
3:15
a 16th uh fun fact if you're not aware
3:17
this car was involved in an accident
3:20
Earl got rear ended and this back corner
3:22
was hit so there's bodyw work here I can
3:24
actually feel the filler um it's not
3:27
completely flat so I'll be spraying the
3:30
entire car when I do the the little bit
3:33
of body work the car needs I'll I'll
3:35
address this and get everything laid out
3:36
proper so I'm almost thinking again
3:40
maybe the Silver Lining I'm going to
3:41
kind of sleep on this but maybe now I
3:44
just filled this in and again all this
3:46
stuff I'll fill it'll be back to the way
3:47
it looked before I will have to repr
3:50
primer it not a big deal but I'll I'm
3:51
not going to shoot video on that you
3:53
guys have seen me do that in the last
3:54
video so um yeah so again The Good The
3:59
Bad ugly the place looks like a bomb
4:01
went off I've got dust on the milts over
4:04
there everything will be fine um but I
4:07
had to work inside because it's bitter
4:08
cold it's going to be like 28 degrees
4:10
tonight here in Arizona so again I just
4:13
wanted to show you this and uh back to
4:15
our regularly scheduled program enjoy
4:17
the rest of the video thanks for
4:19
watching all right this will be some
4:20
real quick road to repair documentation
4:23
the big nasty cuts that you saw in there
4:25
I just put some tape over them and then
4:27
I used a long strand fiberglass up till
4:30
this point I've been using short hair uh
4:32
this I used a long hair on and just
4:34
muttered it in that back there I did add
4:36
a little bit of fiberglass resin just to
4:39
give it a little bit thinner viscosity
4:40
so I can work it in there so this would
4:42
be nice and solid this thing is I'm hold
4:45
the whole panel by this piece it's still
4:47
curing even so that part's good this is
4:49
cured up see what it looks
4:52
like there you go could sand that down
4:55
and we'll be good to go but I'll do some
4:56
more fillings here as well all right
4:58
trunk liet panel is I'll call it
5:00
repaired we still need to do a little
5:01
bit of fill in prior to a respray of
5:04
primer uh but essentially it is built
5:07
back up where it needs to be it is super
5:09
solid everything is good um again I'm
5:12
not showing this part of it because it's
5:14
effectively the same thing and I did
5:15
when I built the entire panel to begin
5:17
with so I just needed to take a couple
5:19
of steps backwards to before I move
5:21
forward very happy with the way things
5:23
are coming out and again kind of a
5:24
silver lining I think this will end up
5:26
being better in the end so couple of
5:28
other things I want to show
5:30
uh executive decision here as you can
5:32
see I've decided to fill in these pieces
5:35
uh if you've been watching the series I
5:36
used a little I bought some little 1in
5:39
round pieces of wood to make the inside
5:41
radius for these things um and Joe Mo my
5:46
bad again I know you sent me a radius
5:48
kit I should have used that but I
5:50
overlooked that but uh anyway I plug
5:52
these holes skim coed over the top of
5:55
this these were the rubber bumpers that
5:57
were in there previously and when you
5:59
adjust these it allow you to adjust the
6:02
alignment of the the trunk lid when it
6:04
closes so it lines up at the fender I've
6:06
got the carpet going in again these
6:08
pieces just kind of mock up and
6:10
represent the thickness of the carpet
6:12
now also you can see like two fingers
6:15
closing it very light close everything
6:17
closes great so my gaps are good also
6:20
you can see here kind of tough to see
6:22
but this is like pretty much dead on
6:26
right so I don't think I'm going to need
6:28
those bumpers I didn't like the way they
6:30
were going to look um I I think it was
6:34
going to be a problem so when I close
6:36
this it's basically just carpet against
6:39
carpet I've got just enough of a gap
6:41
here where it's not going to be I don't
6:43
have to slam the trunk it's not going to
6:44
indent this I think it's the cleanest
6:47
kind of a result so um one other quick
6:50
thing I want to show too um I am
6:53
tweaking this Gap right here the
6:55
carpet's going to come up it's going to
6:57
roll underneath this uh completely under
7:00
I'm going to flush cut it on the on the
7:02
back side um and I'm I'm actually
7:05
considering with all these pieces does
7:06
it go to the edge does it roll over
7:08
completely like really thinking this
7:10
through building a spreadsheet to
7:12
catalog all of that uh when I go to a
7:14
poster but notice this Gap here it's a
7:17
little bit smaller in here so I'm kind
7:20
of painstakingly going through excuse me
7:23
painstakingly going through and you know
7:26
notating this kind of thing okay we've
7:27
got a little bit less of a gap here I've
7:29
got to mount the panel there's five
7:31
screws by myself and it's not super
7:34
light and I've got to get it in place
7:36
Mount it identify where these gaps are
7:39
off by a little bit mark it as you see
7:41
here pull it off sand it put it back
7:44
check it and and that I might be a half
7:46
dozen times at doing that but that's
7:48
what it takes to get the proper finished
7:50
Edge so again this panel I would say
7:53
we're aside from some little tiny
7:55
fill-ins as you see here I'll hit that
7:57
with Bondo um this panel is basically
8:00
ready for primer uh otherwise so I will
8:02
get the near wall is going to be in my
8:04
next project I've got to rebuild the
8:06
latch area I'll show you what I'm going
8:07
to do there not really rebuild it just
8:09
kind of fix it again okay working on the
8:11
latch cover uh kind of repair there as
8:14
well now I'm going through the back seat
8:17
area all I'm doing is making sure that
8:19
side to side the piece is where I want
8:21
it to be so as you can see I just have
8:23
it taped up let me show you what it
8:24
looks like from the other side all right
8:26
so again here all I did was tape these
8:28
pieces of ABS I was careful when I
8:30
remove them not to damage them um and I
8:33
just have them sitting over the top of
8:35
this this is the way they were
8:36
previously which again was part of my
8:38
problem cuz it's sticking up an eighth
8:40
of an inch so what I'm going to do is I
8:42
know where these go I'm going to
8:44
basically take this off I'll cut these
8:47
back and I'll glue them inside of this
8:49
area I'll CA glue them so that should do
8:52
it and we'll get that repaired all right
8:53
I've even upped my game a little bit
8:55
picked up myself a boroscope camera so
8:58
now I can look inside and be able to see
9:01
gaps and things like that so pretty cool
9:03
but if needed I'm still not too old to
9:06
get into the trunk close it and be able
9:09
to check gaps all right Next Step was to
9:13
just cut this piece down notice I ran it
9:16
a little bit fat here and then I'll
9:17
carefully sand up to it uh just so that
9:20
I can get it to fit into that piece and
9:22
kind of set down inside all right next
9:24
step's going to move to my incredible
9:25
sanding station little tiny Harbor
9:27
Freight sander it's all you need if you
9:29
do it right so here I'm just going to
9:31
again carefully sneak up on it uh slowly
9:35
trim it until I get it to fit nice and
9:37
tight inside of that Gap in the trunk
9:39
panel quick Pro tip on something like
9:41
this when I've got um sing I need to do
9:43
and I need to sneak up on it um I will
9:46
make myself a line even if the line is
9:49
further in than where I need to go that
9:50
way I stay parallel to the line to make
9:52
sure that my Edge stays straight okay
9:55
latch area is back to the way it looked
9:57
before again only instead of these
9:59
pieces being laying on top now they're
10:01
ins set and they're flush with this Edge
10:03
uh so now what I can do I can see this
10:05
is not perfectly straight I've got to
10:07
shape this I'll use Kitty hair and I'll
10:09
get this whole thing reshaped and ready
10:12
for primer all right filling complete
10:14
now it looks like it did before only it
10:16
is completely flush with this so that
10:19
part is done on to the next part all
10:21
right another really quick fold
10:22
disclosure thing I want to show you um I
10:24
had to sand this area down because there
10:26
was kind of a ridge here this was shaped
10:29
uh such that it was preventing the Gap
10:31
that I needed so I sanded it down but in
10:34
doing so it's a little bit flims I don't
10:37
know flimsy is not the right word but
10:39
not quite as rigid as the rest of it the
10:40
rest of it is like quarter of an inch
10:42
thick and Rock Solid the stuff that I
10:45
built um I can't go up on it but there's
10:48
room underneath if I put the piece in I
10:50
could push down and it's not there's
10:52
kind of a gap
10:53
between um the car and the panel so what
10:57
I'm going to do is as you can see I've
10:58
taped this off I will kind of butter
11:02
this up what I call back buttering it uh
11:05
I've scuffed this to ensure that I've
11:07
got good adhesion and I'll just lay a
11:09
bunch of kitty hair in here um press the
11:12
piece into the car let the kitty hair
11:15
cure and that'll give me hopefully a
11:17
nice good impression on the back side
11:19
and add strength to the panel let's see
11:21
how it goes all right don't mind the
11:22
compressor R this side I did you can see
11:25
it's kind of oozing out here a little
11:26
bit uh let's go ahead and pull it off
11:28
and see how it looks
11:30
exactly what I was after nice perfect
11:32
mold with that area it'll sit in there
11:34
perfect and it's probably maybe an in of
11:37
an inch or so material in there so it's
11:39
going to be stronger than it was
11:41
originally the same thing to the other
11:43
side I showed you the part that was kind
11:44
of oozing out on something like that I
11:46
took a razor blade and just very
11:49
carefully sliced it and then just did a
11:51
little tiny bit of finish sanding now
11:54
see if I can hold this up here if you
11:56
look at this side I can lift the whole
11:58
panel it's still hearing you still feel
12:00
the heat coming off but this is nice and
12:01
strong versus this side you can see the
12:04
flex there again I don't want to stress
12:06
it when I'm carping it so now we'll do
12:08
this side and that part will be done
12:10
took me 5 minutes and now I don't have
12:13
to do any additional sanding or filling
12:15
here and I maintain the Gap that I had
12:17
for the clearance of the carpet all
12:19
right there's the other side same thing
12:20
perfect mold of that hump I'll take the
12:22
razor blade slice this off to a little
12:24
finish sanding and we'll be good to go
12:26
that'll be much stronger than it was all
12:28
right disaster of everything is repaired
12:30
the only thing left to do is uh just
12:32
some little very minor Bondo uh fill-ins
12:36
and what I'm going to do next is I'm
12:38
going to pull the near wall the side
12:41
panels and the trunk lid panel uh I am
12:44
going to do a little bit more again
12:46
Bondo work get the pin holes I'm
12:49
actually going to re primer these side
12:51
panels um sand everything good and then
12:53
re primer all the pieces let them dry
12:57
I'll give them a last scuff kind of a
12:59
finish uh and then reinstall all the
13:01
panels and then I'll be back to where I
13:03
was at the beginning of this video but
13:05
all good this is what happens again the
13:07
good the bad the ugly right so I'll uh
13:10
continue working and I'll check back in
13:12
with you just a little bit all right if
13:14
you're new to following this build this
13:16
is what the trunk looks like with all
13:17
the stuff out of it kind of plain but
13:19
whole bunch of Dynamat um too windy to
13:22
primer tonight so I will Prim her
13:24
tomorrow all right at this point I've
13:26
got all the pieces ready to go all four
13:28
pieces um sanded primer or ready for
13:31
primer masked ready to go um the winds
13:34
died down but now it's too cold so can't
13:36
win uh still the same day uh that I've
13:38
been working on this stuff the other
13:40
thing that I did is spent a while
13:43
cleaning the garage including Misa I
13:45
wiped it down vacuumed it blew it out
13:48
inside and out um did the trunk um C32
13:53
is still filthy but got all the dust out
13:55
of the garage so everything is cleaned
13:58
restored after I uh primer these which
14:01
will be tomorrow
14:02
Sunday uh after I primer I normally go
14:05
over it with maybe an 80 grit just to
14:07
kind of scuff it up especially in
14:09
preparation for when I upholster them uh
14:11
that I'm going to do outside with the
14:13
garage doors closed so all right that's
14:15
going to be it for today tomorrow uh
14:17
we'll be primer and again I'm not going
14:19
to shoot that because it's the same
14:20
thing I did in the last video but uh I
14:23
will um get it done and we'll get these
14:25
pieces back in the car
14:28
[Music]
14:37
he
14:41
[Music]
14:52
[Music]
15:05
I decided to show you the painting part
15:07
the primer so uh sitting in the sun
15:09
we're going to let this dry up and then
15:11
next time we'll get these all sanded all
15:13
right it's a few days later been busy
15:15
with uh stuff around the house uh as you
15:17
can see once again I got everything out
15:19
of the trunk I've got all the pieces
15:21
sanded um and again I'm not worried that
15:24
I some of this I sand it down through
15:26
the primer that's totally fine this is
15:29
going to be carpeted over so I've got
15:31
this panel ready to go I got the Murs
15:33
out all cleaned out the zebra wood
15:35
floors is ready to go back in side
15:37
panels have been uh sanded as well as
15:40
the near wall and now I'll go ahead and
15:42
get it all assembled okay so when I go
15:44
to assembl this whole puzzle in case
15:46
you're wondering kind of the lower
15:47
portion the first thing that goes in is
15:49
these side panels um there are three or
15:52
four videos on my channel where I went
15:54
over how I built these it's over 100
15:56
hours of work they are between 3 and a/
15:59
an inch thick they are absolutely rock
16:02
solid uh there's one bolt that holds
16:04
them in uh Carl if you're watching I
16:06
call this Carl's bolt um one on each
16:09
side and the rest of it is held in place
16:13
by the zebra wood panel that's going to
16:15
kind of press against it and hold that
16:17
into place so the zebra wood will be the
16:18
next thing I will install all right so I
16:21
sat the zebrawood floor in and one quick
16:23
thing I want to um highlight here if
16:26
you've been a faithful follower since
16:28
the beginning of Misa you'll recall that
16:31
when my dad and I made this uh very
16:34
intricate piece of zebra wood um when we
16:37
had it re on some humidity escaped from
16:40
the wood causing it to warp I live again
16:42
in Arizona and it's super dry um it was
16:46
basically like like a potato chip it was
16:49
pretty bad and we did a bunch of things
16:50
to try to tame it um what I've been
16:53
doing is I had it bolted in place for
16:57
the last several months there's no bolts
16:59
in it right now it used to rock back and
17:01
forth on here you'll notice it's sitting
17:02
perfectly flat there the floor despite
17:05
being kind of convoluted like this is
17:07
perfectly level and you'll see here same
17:10
thing this used to stick up by almost A4
17:13
of an inch and you can see even without
17:15
any hardware it's sitting flat so uh
17:17
still have some stuff to do the the
17:19
wood's got to be finished and there's
17:20
this Gap that did appear in this seam
17:23
because of the humidity all of this gets
17:25
covered up but even still I'm going to
17:28
fill in that C very carefully so again
17:30
if you've been watching for a while you
17:32
know the struggle and frustration I went
17:33
through with the warping but I think it
17:35
might be under control fingers crossed
17:37
all right continuing on all right the
17:39
zebrawood floor is in the next piece of
17:41
the puzzle is what I call the near wall
17:43
this piece here which started out as the
17:45
factory piece but after heavy
17:47
modification it looks like this again
17:49
you'll notice on uh either end I've got
17:51
the counter sunk head of the screw which
17:55
goes into the piece of machine Hardware
17:57
right there so that hold holds that
17:59
tight and then I've got these screw
18:01
holes here um which you can see the the
18:04
screw kind of counter syns inside of
18:06
that these again will be this whole
18:08
thing will be carpeted over but I'll do
18:09
a little um three-sided cut on those
18:13
holes to be able to peel back and get to
18:15
the screws once I flop it back over
18:17
you'll never see the cuts so go ahead
18:19
and get this piece mounted okay the near
18:20
wall is installed and then I popped in
18:23
what I call the pull floor that's going
18:24
to be the floor again this is just a
18:26
template that I'm going to transfer over
18:29
to uh qu or 8 in aluminum uh more on
18:32
that later this is going to be something
18:34
I'm going to be building in an upcoming
18:36
video um and I think we're going to
18:38
motorize that we're going to go old
18:40
school motorization and have it open
18:42
like that to be able to reveal the Spyro
18:45
uh but you can see gaps are really nice
18:47
there I got a little bit of tweaking to
18:48
do in like this bottom corner of the
18:49
gaps but um we are really really close
18:53
so uh last piece of this puzzle just to
18:55
make sure everything is good after the
18:57
primer is to install
18:59
the trunk lid panel which I will do now
19:02
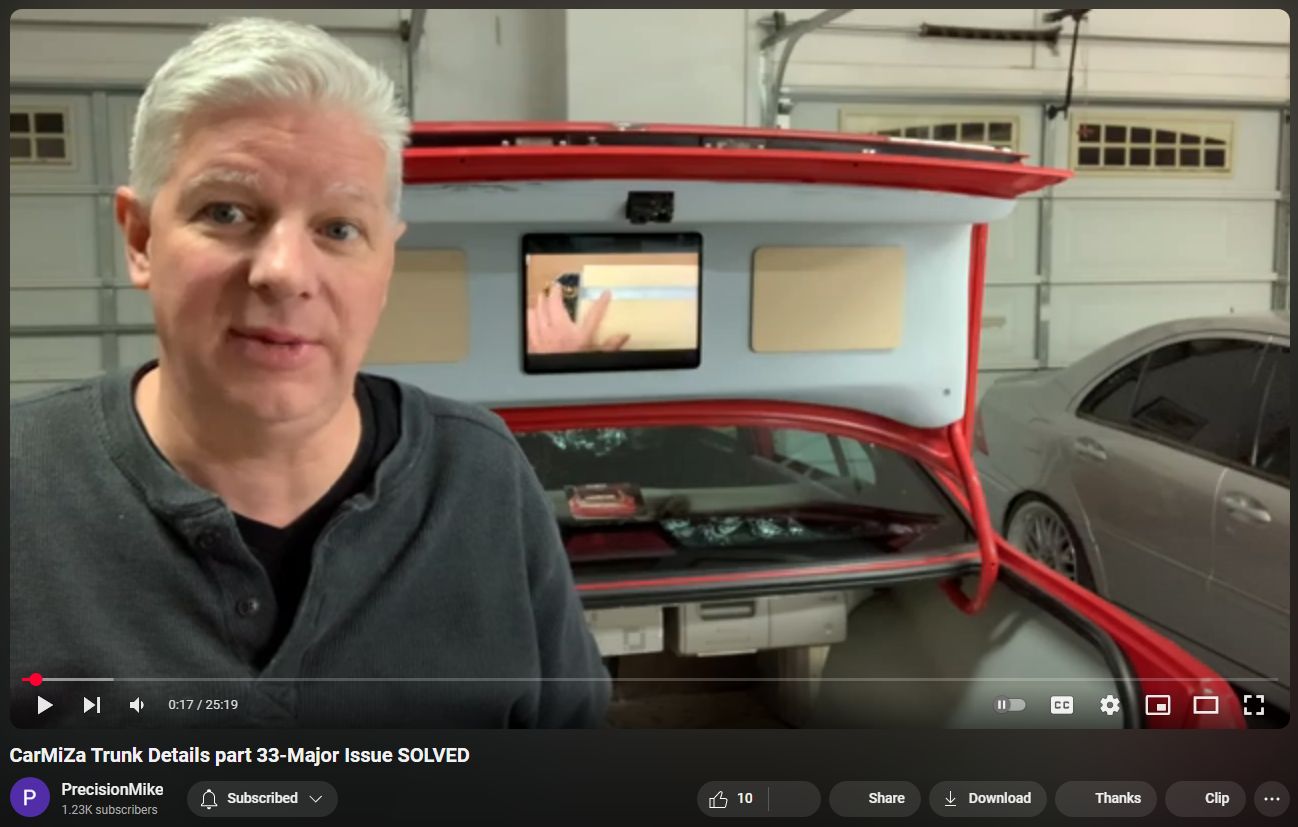
all right trunk lid panel is back in
19:04
place and if you're again new to the
19:05
channel um this features a 12.9 in Apple
19:09
iPad Pro the objective here is that so
19:11
videos like this showing the build can
19:13
be played on here um the video you're
19:16
watching now is an earlier video of me
19:18
building this panel um off on the sides
19:20
here these are going to be two display
19:23
um pieces which will show things like
19:25
system diagram QR code for my YouTube
19:27
channel things like like that um the
19:32
other couple of things I want to show
19:33
you uh and if you're not aware these
19:35
everything here is held in with really
19:37
strong neodymium magnets uh one or a few
19:41
Miss miscellaneous things I want to
19:42
review I'm kind of going back and forth
19:45
and listening to the volume of the iPad
19:48
I think it's going to be loud enough uh
19:50
I don't want it too loud so it doesn't
19:52
disrupt
19:53
demos but um I want to make sure you can
19:56
hear it over you know normal crowds and
19:59
and people walking around at car shows
20:00
so I think I'm going to be good there
20:01
I'll play around with it maybe I'll add
20:03
a Bluetooth speaker somewhere um another
20:05
thing I want to show is I have added a
20:09
little tiny
20:11
groove you can see there that I filed
20:13
pause this video
20:15
here and the objective of that is to
20:17
allow me to quickly and easily remove
20:19
these panels so um thanks again joeo I
20:22
used the very that very small round file
20:25
and I can carefully take a Curt pick
20:27
tool put it in there and I won't do it
20:29
because it needs I need two hands but I
20:31
can pull on this and easily remove this
20:34
panel I can do the same thing with the
20:36
iPad uh but for anybody who's trying to
20:39
seal my iPad it any shows there will be
20:41
another electronic lock behind the iPad
20:43
which will prevent you from doing so you
20:45
won't be able to move it it'll be
20:46
destroyed before it actually gets
20:48
removed um one other quick thing is
20:51
again I've got my test pieces of carpet
20:53
here just to make sure that my Gap is
20:56
good with the area that I needed to
20:57
modify as as you've seen throughout this
20:59
video
21:01
so that was kind of a weak close um
21:05
close the trunk everything is good my
21:07
gaps are good here you can
21:10
see kind of tough to see so everything
21:13
is lining up really nicely so I would
21:16
consider this problem solved so I think
21:20
that part is going to be a
21:22
wrap all right so in the end everything
21:25
worked out again the whole premise of
21:27
this video was to show that I completely
21:29
screwed up and I was able to solve it I
21:32
think a lot of people this is it was
21:34
very discouraging as one of those
21:35
situations where you know it would be
21:38
easy enough to throw a car cover on it
21:39
and say I want to take a break and I'll
21:41
come back to it later and then a year
21:43
goes by two years 5 years 10 years and
21:45
you forget about it right and end up
21:46
selling the thing cheap and that's it I
21:48
wasn't going to let that beat me down I
21:50
was going to solve it it took me
21:52
probably over 20 hours and I didn't have
21:55
to show that I I could have easily um
21:58
skip that part and you guys didn't see
22:00
it but again I'm trying to be very
22:01
transparent and give you a realistic
22:03
idea as to the degree and amount of time
22:06
that goes into a build like this and
22:08
again I get it I'm slow I'm a
22:10
perfectionist I'm not a professional and
22:13
I'm using kind of basic tools if you
22:15
will in my garage so um a few other
22:18
quick things before I close out this
22:19
video um please like And subscribe
22:22
obviously uh and I want to announce
22:25
we've got a new website called cara.com
22:27
mik Milbert uh the gentleman who owns
22:30
Milbert amplifiers those amazing tube
22:32
amplifiers that I've got going into the
22:34
car um has been getting behind this as
22:36
well he is the person I bought the car
22:38
from they own the car um after Earl it
22:41
changed hands and then Milbert um
22:43
acquired the car and he's been very
22:45
instrumental and helpful if you go to
22:47
their website there's a lot of content
22:49
about Misa both the the rebuild I'm
22:52
doing and you know kind of back when
22:53
Earl own the car as well so definitely
22:56
check out the new website is car me .c
22:59
simple enough um also I am wondering um
23:03
if you've watched this far you're
23:05
clearly dedicated to this and I
23:06
appreciate it I am looking for a graphic
23:10
designer these panels as you know are
23:12
just kind of mock-ups these are going to
23:14
be made into aluminum later and have a
23:16
system diagram on there I am looking for
23:19
someone that can do a system diagram so
23:21
if you do graphic design and something
23:23
you can help out with please let me know
23:25
in the comments or you can also get a
23:26
hold of me on Facebook um I would
23:28
greatly appreciate it very last thing
23:30
before I close out this video this video
23:33
you might look at and say well that kind
23:34
of sucked he didn't really do anything
23:36
more or anything new that's the way I
23:38
felt too certainly when I spent 20 plus
23:40
hours redoing this thing the next video
23:43
is probably going to be I think one of
23:45
the best coolest videos yet I'm going to
23:47
give you a little sneak peek and kind of
23:49
a teaser let me explain what's going on
23:51
next the next thing is still somewhat
23:53
related to the trunk liet it's dealing
23:55
with the wiring for the trunk liet this
23:58
is the Factory piece that covers up the
24:00
wiring uh the OEM wiring you can see
24:02
it's one of these typical clips that
24:05
Clips on here and you can see this
24:07
little bump out is the channel where the
24:09
wiring went to right so it goes in here
24:11
and it goes up underneath the rear deck
24:14
this is what it looked like when Earl
24:15
had it as well in the car to me no
24:18
disrespect Earl um it doesn't look good
24:22
uh it's plastic it kind of takes away I
24:24
think it degrades the classiness of the
24:26
look and there's got to be a better way
24:28
I have come up with something that I
24:30
think is is absolutely spot-on old
24:33
school creativity that I'm going to be
24:35
working on on the next video with any
24:37
look hopefully I don't want to commit to
24:39
it but I'm hoping I can get the entire
24:41
video done from start to finish with
24:43
what I'm going to do um it's going to be
24:47
awesome guys I think again if you're
24:49
into this old school car audio
24:50
creativity the stuff we used to do back
24:52
in the '90s it is spot-on and it's going
24:54
to look awesome I've never seen anybody
24:56
do this in any car any kind of show car
24:59
and I think it you guys will like it so
25:02
so again with that thank you very much
25:04
for watching um if you've made it this
25:06
far once again I really appreciate it
25:08
please like And subscribe if you have
25:09
not already and I will see you all
25:11
hopefully within maybe a couple of weeks
25:13
and we'll get this other uh new thing
25:16
done with the wiring thanks again take
25:18
care