CarMiZa 27 Old School Car Audio Rebuild Trunk Details
In this video, I finish the near wall in the trunk. Please let me know if you have any questions, and enjoy!
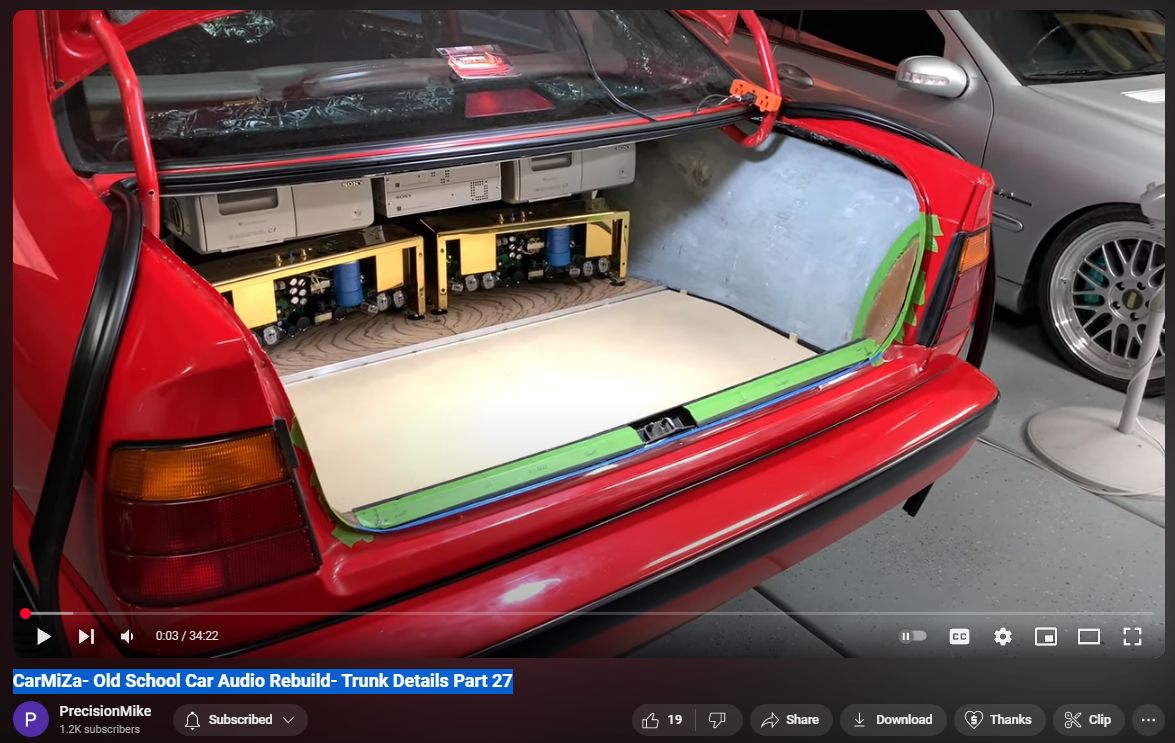
This car is a very extensive audio build, and I have added a great deal of weight to the car. This includes the Dynamat & sound deadening related for over 200 lbs, steel kick panels baffles at 21lb each, all the items added to the trunk, etc, etc. When complete, I would estimate that I will be adding about 300 lbs overall.
In the blog post titled “CarMiZa 27 Old School Car Audio Rebuild Trunk Details,” published on September 11, 2024, Michael details the completion of the “near wall” in the trunk of the BMW 3.0. He focuses on reinforcing the panel using fiberglass filler, commonly referred to as “Kitty hair,” to enhance its rigidity and achieve the desired shape. Michael also discusses the importance of precise alignment and the use of practical tools, such as release agents and tape, to ensure a seamless fit. The post includes a video and transcript that provide a step-by-step walkthrough of the process, highlighting techniques for creating robust and smooth panel designs while integrating functional elements like lighting components and ensuring accessibility for hardware.
The webpage documents the meticulous steps involved in the 27th phase of the CarMiZa project—a detailed old-school car audio rebuild focusing on the BMW trunk. It includes a video and transcript explaining techniques like using fiberglass filler (“Kitty hair”) for panel reinforcement, aligning parts with precision, and employing practical tools like release agents and tape.
Mike Michne demonstrates how to create robust, smooth panel designs while integrating functional elements such as lighting components and accessibility for hardware. This entry is part of an ongoing series combining craftsmanship with car audio restoration expertise.
Transcript
0:00hey how’s it going welcome back to the channel this is once again Cara part 27
0:06on the trunk details holy cow lot of uh lot to do on this thing all right in this video the plan is to get this near
0:14wall again the piece I’m calling the near wall with these little wings completed um my next step is going to be
0:22to uh get these kind of built up you can see they’re kind of flimsy there there’s
0:28not much to them they’re just a rough shape uh so to do that first thing I’ll do is remove the pull floor I’ll pull
0:34these out I’m going to redo the tape along this Edge I’ll do probably a little bit more masking and we’ll
0:39prepare to build these up all right as you can see my tape’s gotten a little bit beat up cuz I’ve had this panel in
0:46and out so many times so this is where I’ll replace put a Fresh coat of paint of tape on it excuse me and then we’ll
0:52get ready to Mud this up okay hopefully the fan is not annoying um it is still
0:58summer here and uh over 100 degrees after it’s almost: clock and it’s still
1:04over 100 degrees um all right so my next thing I’m going to do is this is the
1:10side panel I built and this fill in piece is going to come up and butt up against here and there needs to be this
1:16needs to be a removable seam I want my goal here is to get this as tight as possible to this and conformed to this
1:22Edge so I’ve got the as you can see the panel kind of roughed out uh just mildly
1:28gaining the shape there so now what I’m going to do is build it up to build it up I need to have when I put it up here
1:35I’m going to do it in the car you’ll see me do that and and I need to have some kind of a release agent so it doesn’t
1:40stick to the tape so sorry I just used a little bit of Pam cooking spray uh I
1:46used to do this years ago in car audio dab it on a brush um this could be used
1:53again for you know you’re doing pillars in a car and you don’t want to get stuff
1:58sticking Pam cooking spray is a good release agent you just want to be careful not to put too much um because
2:05if it gets underneath the tape it’ll compromise the Integrity of the tape so I’ll do this along this Edge to both
2:11sides and I will get it ready to build up all right I have installed the near
2:17wall panel uh if you missed the last video this is basically started out as the omm piece of plastic and then I
2:23added these pieces of ABS plastic to help kind of smooth it this will also act as a seating surface for the
2:29lighting which will light up the three soning components on the top and also
2:35the two mber tube amplifiers uh so more on that later um one thing I didn’t
2:41mention in the last video too and and uh buddy of mine asked with these holes what I’m going to do is prior to
2:48upholstery um or excuse me after they’re upholstered I will take a very sharp
2:54razor blade and cut three slits 1 2 3 and then and that’ll act in the carpet
3:01and then that’ll act as a flap where I can lift it up and then put my allen wrench in here to be able to get into the bolts the bolts are inside here and
3:08I use Riv nuts with stainless steel Hardware so this thing is is really solid um all right so I got the panel in
3:15now I can start building up uh the the uh what I’m calling the wings there with
3:21uh what I call Kitty hair which is short strained fiberglass um reinforced filler all
3:28right if you have not seen my other videos this is the product that I use to do these fill-ins um there’s a brand
3:34called Kitty hair or a model of this filler called Kitty hair that’s where I got the name it’s kind of an old school
3:41body guys use that that term Kitty hair uh it’s a two-part comes with the cream
3:46hardener um this is not as critical as using fiberglass resin in terms of the
3:51amount that you use um you want to make sure that you use enough to get the hardener to catalyze and harden up but
3:59not too much that it really reduces your open time I’m working with a controllable amount and then I’ve got
4:06these scrapers I picked up from Harbor Fred as well I also will use these rubber 4in um pads as scrapers as well
4:14so let me get this mixed up I’ll get the camera in the car and I’ll show you how this goes okay all mixed up I’ve got it
4:21here I’ll just set it in the car I’ve got it on some cardboard and just
4:26basically start filling it in the
4:32uh these panels again are quite flimsy still so as I add this I call it mud
4:40this will really help to R you know get them really rigid and kind of uh build them up it’ll take several applications
4:48and again if you notice right here I’m okay going right up to this Edge because I’ve got that
4:54release my heavy duty fancy release agent which is Dam cooking spread
5:01I’ll try to get this Edge defined here as well at this point I also want to try to
5:08minimize the sanding right so I want to try to have it conform as best I can as
5:13I go the least sanding possible the better
5:19notice I’m holding this in place too cuz I want to kind of influence this while while this cures and I want to get it to
5:26stick a little bit better up in this corner
5:33and again this this this whole process this technique could be used for
5:39doing anything you know uh pillars or any kind of I can already feel this
5:46getting getting tight here this is starting to cure up which is perfect
5:52so and then when I do something like this notice I’ll scrape right up to this
5:58Edge I’ll do one side and then go to the other side and then you know while I’m
6:04doing the driver’s side this will cure up by the time I get back here this will be firmed up enough where I can continue
6:11to work on it it’ll probably take a few coats before I pull it out of the car and
6:18start doing any kind of work to it and I will also uh fill in the back side as
6:24well just for added string I don’t know yet I’ve kind of got on my to-do list um
6:29I don’t know if I’m going to do any kind of a cleat in there like a like a red angle cleat maybe with some couple of
6:35magnets Neo dii a magnets to help hold it in place we’ll see what it looks like uh once it’s done and how tight it is so
6:42all right I will let this cure up give it a couple of minutes here with my finger on it and then I’ll do the other
6:47side and I’ll check in with you in just a moment all right it’s the next evening and this side came out good I uh just
6:54put the one application on and uh had to do some other stuff last night so uh I’ll continue working on this I’ve also
7:00put this little clamp in I put this in right after I applied the mud uh just to help because this was just again kind of
7:06flimsy and I wanted to hold it in place I’ll leave this here until this is built off enough where it is very solid uh I
7:13also just added the same thing on the dver side and started getting that built
7:20up so again I’ll continue building this up and uh we’ll go from there okay bringing you along for a little bit more
7:26uh I’ve switched over to the plastic or r rubber scraper uh just cuz it’s more
7:31flexible I wanted to do the um the metal One to begin with because I wanted to
7:38really make sure I got into all the nooks and crannies uh now at this point
7:44I’m starting to do kind of my finished coats if you will probably should have started on the top on this but
7:52um so now I’m just really starting to feather this in
8:01and I’ll do this area as well I’m going to bring it right up to the body line of the car and again trim it back
8:08later I guess this really isn’t the this definitely isn’t the finish this is still heavily into the mudding portion
8:15of it but it’s the Finish aspect of of
8:21doing that and this again will add a lot of
8:27rigidity and give me that final shape I’m looking
8:38for actually peel my tape back here probably should have done that earlier as
8:45well this is really going to start to get nice and strong and solid and rigid that’s one of the biggest things I’m
8:51after here too I also made sure
8:58that when I build this up I don’t end up with a clearance issue with the trunk lid uh so I got it in the trunk and
9:05closed it and made sure I had plenty of room uh and don’t have any concerns or
9:10issues there so all right that is starting to harden up I’ll do um same kind of thing on the other side I’ll
9:17probably let that cure for a little bit and then be able to pull it out and then work on the panel outside of the car
9:23once I’ve got the shape really solid and the form where it’s not moving
9:28around a lot I can do my build up my additional buildup out of the car and now both sides are built up maybe a
9:35little bit more than they need to be there might be some high spots now but that’s okay it’s really easy to sand this stuff and I’m going to give it you
9:43know maybe a half hour or so a little bit more and let this cure up before I pull that out of the car uh if you’ve
9:49never worked with this stuff before a good indicator of it being cure is the temperature um there’s a chemical
9:56reaction that takes place uh with it between the the main component and the
10:01hardener and it it sends off heat when it’s curing so when it’s ambient
10:07temperature you know it’s fully cured or close to it it will cure I think it will cure for a good I don’t know 6 to 12
10:14hours even after that um so it’s it’s very easy to sand and cut uh before it
10:20fully cures the next day it’s a little bit harder so um all right we’re going to give this a little bit and then we’ll
10:26go ahead and very carefully pull the piece out of the car and start to work on it out of the car okay was able to
10:33pull it out of the car wasn’t too bad again thanks to the Pam cooking spray what I’ll do next is you can see my kind
10:40of defined edge here I’ll take a razor blade and cut this extra off I’m going to put it back in the car and let it
10:48cure up a little bit because it’s still a little bit flexible and I’m very very
10:54particular about the way this is going to go I think what I’ll do maybe I’ll mud the back of it put a good couple of
11:01you know a good coat on each side put it in the car really quick clamp it and then let the whole thing cure up I think
11:07that’s probably the best bet so all right I’ll go ahead and do that next all right it is a couple of days later and I
11:13am out here I’ve been really busy with a lot of you know life stuff and all that and it’s a really hot day so let’s see
11:21how hot the car is 116 in the garage right now and it is
11:26humid we’re actually um likely to get thunderstorm so I’m trying as best I can
11:32to work out here drinking a ton of water but it’s really uncomfortable so uh no complaints no excuses uh let’s keep
11:38moving so uh what I’ve done I did mud the back of this I’ll show you this in a little while it’s still not it’s it
11:46conforms quite nicely you can see like perfectly there but it still wants to kind of pull up a little bit I’ve
11:52decided I’m going to add a magnet and a bracket to the back side of this that it’ll kind of hold it right where I
11:58wanted to so that will happen later um again you can see the additional Kitty
12:04hair I’ve got here same over here the other thing I needed to do was uh make sure I can get the piece in and out very
12:11easily the first time I took it out uh I I did have to fight it quite a bit uh
12:16which was not cool so what I’ve determined is I’m going to leave and that’s again because of the angles right
12:22because this piece is basically at an angle and I keep talking about this but
12:28it ends up and where this thing is like wedged in place right um so here’s my solution to that this side I’m going to
12:35leave kind of you know deep and I’m fine there this side I basically sanded the
12:41near wall at an angle like this so now if I put my finger in this hole for the
12:47bolt I’m able to pull this out nice and easy so it’s there’s no fighting it
12:53there’s no risk of you know breaking it bending it whatever I can just pull it
12:59out and again back in there um and I’ll do a
13:05magnet on this side as well that’ll hold that into place so um quite a bit of fitment still to do in terms of the mud
13:12the shape that goes pretty quick so I’m going to bring this outside I am in the shade in the Dy boy thank God uh I’m
13:18going to start kind of getting my shape here I’m also going to start knocking down this Edge I’m just going to use a
13:24uh random orbital sander I’ll scuff up the plastic uh uh and then I’ll start to
13:30continue my fill-ins as you see here so I will go ahead and get working on that
13:36nothing crazy there so I got a video it but uh I’ll give you an update here in just a little bit all right I lied I’ll
13:42show you a little bit of this it’s pretty straightforward I’m just using a 5 in um random orbital and knocking down
13:50the high spots I’m also going to um start working on my final shape on the
13:57where all my seams are on the panel so I’ll show you what I’m
14:09[Music]
14:15doing getting rid of the extra CA glue as well and then again I’ll do this part
14:21of this also is going to be to scuff it because the kitty hair doesn’t like to stick to this unless it’s scuffed up um
14:27and also eventually I think I may throw a coat of what’s called slick sand uh you guys haven’t seen me use that yet um
14:35but I may do that on this entire piece so I’ll continue scrubbing along in the
14:40Heat and I’ll be with you shortly quick check in here so I’ve got the entire
14:45thing scuffed and knocked down all my high spots I still have some fill in to
14:51do here that’s the fun part we’ll do that later and also fill in the four holes uh next what I’m doing is kind of
14:57tweaking all of this again attacking the high spots you can see it’s pretty rough
15:02still but I’m being really cautious about that seam and if you notice it’s
15:08very very solid very tight and again these panels are bolted in now they’re
15:13not going to move um once I add my magnet up here I get a really really
15:19nice tight Edge there so I think that edge is good I got to tweak the bottom a little bit I’m going to tweak this
15:25figure out exactly how I want to do this area if I’m going to bring the carpet
15:30straight over or if I’m going to roll the carpet um that decision dictates
15:36what I do here if I leave a g or not um but it’s coming along just slow and
15:41steady and uh sanding and filling and the least amount of sanding possible is the name of the game okay another quick
15:48check in um show you what I’m doing here I took a piece of uh dino tape uh the
15:54Dynamat tape uh about 1 in by 1 in put it underneath each of these holes these were for the factory Hardware which I’m
16:00no longer going to use and as you can see I filled them with Kitty hair um
16:06again when the panel was in that Earl had they just left the holes um and the
16:12carpet is going to be so thick you’ll probably never see it but I’m not going to take any chances I’m continuing
16:17working on molding and shaping this side and you can see that’s that’s just
16:23sitting there without any magnets or anything like that I’m rethinking the magnet idea I think I may have a different idea which I’ll uh explore
16:31here in a little bit but this is um a little bit tedious it’s just trying to sand and fill and fill in sand uh again
16:39minimizing the amount of sanding required and trying to I like to build it up as much as I possibly can with
16:44Kitty hair before I hit it with Bondo um Kitty hair is a lot stronger so I’ll continue working on this side I still
16:51have to get this Ridge uh and all the little cracks down here again that’s
16:57getting really fussy but uh I’ll take care of that and continue working on it all right another check in here um I’ve
17:04got the piece mounted I put the trunk gasket in just up to here I just want to see what my line Looks like I’ve got a
17:10little tiny bit of tweaking to do in here but we’re looking really nice here it’s sitting up
17:17maybe um less than a 16th but I think I’ve got a new idea instead of magnets
17:23I’m actually going to counter sync Flathead screws a couple of Flathead screws and then hide those under the
17:28carp much like I’ll do these and I’ll have a bar back there a
17:34piece of flat bar with a threaded insert in it and then that will allow me the tighter I make this it’ll allow me to
17:40control the height of this piece relative to this piece so I can really tweak it when I carpet this the goal is
17:47to basically carpet over the whole thing slice it with a razor blade and then when you kind of fluff it up you don’t
17:53see the seam so that’s kind of what I’m after so not going to be fun to carpet this piece but but um we’ll deal with
18:00that later um I think this looks really good my transition came out nice and and now you can see where this is all molded
18:07this is you know it’s got a slight bevel to it this way just like the side panel does and it’s you know kind of
18:14consistent it looks like it was intended even though I used the factory panel to start so um a little bit more tweaking
18:21to do on this side then I got the other side to finish up um and we’ll continue
18:26on all right that last video was on Sunday it’s now Thursday so it’s been a crazy busy week I have not been into
18:34Misa much but really want to try to push to get this thing done um this panel
18:40well the car too but uh let’s focus on the panel um so I’ve got my tape removed
18:45uh it’s tough to see in the video I’m really really really close here I’m within a 16th give or take on that seam
18:51it’s got to be perfect um what I’m going to do next is pull everything apart pull I got to pull the milts out the milber
18:58flo the side panels and I’m going to build the backing bracket that I talked
19:03about that’ll allow me to bolt these into place once I do that and I bolt them into place then I’ll do my final
19:09fitment and sanding so uh you can see that side we go over here you can see
19:15that side as well and then let me carefully get back here and you can see kind of the overall
19:23picture I think it look it’s going to look really clean and then just a little bit too we’ll deal with uh what I’m going to do here once I get the rest of
19:30this ready to go so I’m going go ahead and get everything pulled out we’ll work on these little bracket tabs to hold the
19:37um those tops of These Wings in place couple of really quick things um for those of you who have been watching the
19:43whole series you know that I’ve been fighting this zebra wood it’s been warping on me and and all of that from
19:49the start um it is now the middle of summer it is um early August and I think
19:56all of the drying and warping and all that has subsided if anything I’ve had it bolted into the car and it’s actually
20:02quite a bit flatter which is good I do still have this nasty Gap here which
20:09hasn’t gotten any worse over the last month or two so I’m going to just let it keep going until I need to and then I’ll
20:16fill this in uh with glue and then sand it and be able to get rid of that again most of this will be hidden because
20:22there’s the 845 display tube that goes here and I have to do a little tiny bit of tweak and I’ve got to maybe a 16th of
20:29an inch Gap there as well but this isn’t finished yet obviously right so I still have to do all the Finish there um one
20:35other quick thing for those again who uh maybe you haven’t seen all of the
20:41build so far the way the car is set up it’s got a pretty cool little tub underneath where the Milbert floor is so
20:48that’s going to allow for slack from my wiring the speaker wire I’m using is 58
20:53of an inch diameter so it’s uh or I don’t know half inch it’s huge um uh it
20:59is straight wire Maestro from back in the ’90s OR 80s um the old home audio
21:04cable so uh that’s what it looks like so next I’m going to pull these side panels out uh pull the near wall out I’ve
21:11already got that out actually and um work on these brackets so I just wanted to show you that real quick passenger
21:16side brackets coming along uh as you can see I’ve got a piece of uh 1in flat bar cut at 1 in or 2 in long so 1 in for
21:24each side counter sunk I’ve got a42 stainless Ste Flathead bolt uh I will
21:30mud this over uh with Kitty hair when I’m done this is kind of think of this as being permanent and on the back side
21:37you can see um NY one insert stainless Ste nut got a washer on there you could lift the
21:44whole thing by this bracket so it’s very strong uh in just a moment I will show
21:49you what I’m going to do next to be able to put a uh Riv nut into this for this
21:54other piece to bolt into okay it’s the next day and I’m getting ready to put the riv nut on the bracket I had to do a
22:01little bit more mudding of the kitty hair in this section here just to get a really really nice type fit then I’ve
22:08been playing around with the idea how I’m going to do this bracket and the riv nut and all that and I need to allow for
22:14a little bit of adjustment but also I wanted to kind of lock into place so what I ended up doing is I filled this
22:20area with Kitty hair let it cure up for I don’t know a minute or two just enough
22:26uh so it wasn’t dripping off of this I put it into the car and as you can see I pressed it up against the bracket and
22:32made a nice indentation so that gives me a nice seating area it’s quite hot still
22:38uh it’s curing but that gives me a nice seating area I’ll do the same thing on the other side now I’ll drill through
22:43and I’ll do the uh insert right in here and we’ll have a nice machine screw holding this in okay the bracket went
22:49really well um very very solid um quarter inch bolts one inch piece of
22:55flat bar aluminum e inch thick these things are made it together for sure so
23:01what I need to do now I need to tweak this Edge a little bit there’s you know I can catch my finger nail there so I’m
23:07going to level this all out uh do my final shaping just to make sure everything’s good make sure both sides
23:12are perfectly symmetrical and then I’ll do a little bit of Bondo filling there’s just some
23:19little minor things here or there I’ll touch up with Bondo again I’m going to leave this pocket open for now cuz I
23:25might do lights in there if I don’t I’ll fill that in later but this is coming out nice I’m almost done with the near
23:31wall so we’ll get this tightened up and then the last piece of the puzzle which hopefully I’ll do on this video is
23:37figuring out what I’m going to do here I want this to be really clean I’m I think I’m going to do some kind of a fill-in insert this is all going to be carpet
23:44again this I might do a piece of um make it out of aluminum or ABS plastic have
23:50magnets hold it in place and then texture paint it uh there will be some little things like that some uh some
23:57trim pieces um I’m going to do trunk bars similar to for example my C32 that’s where I got
24:04the idea it’s got these nice plastic covers so I’m going to see if I can go to a junkyard and find plastic covers
24:11that are similar in shape to the trunk bars on the BMW or even newer BMWs again
24:19I just need to find something with a similar shape I can always tweak it but um those will be texture
24:24painted and uh also the trim around the iPad things like that uh will be texture
24:30painted and those will be painted tan to match the the tan carpet so uh all right I will keep tweaking this and then I’ll
24:36get this back out and I’ll show you what I did uh with the bracket just to get that piece finished all right it’s the
24:42next eing um a little bit more detail I want to show here I took a Dremel with
24:49a um it had one of those uh cylinder shaped Sanders on it and I took about I
24:57don’t know 3 30 seconds off of this inside so that so if you look at the
25:05car the because these Riv nuts have like a little bit of a lip that allows it to
25:11sit flush in there so that’s the detail on the back side there that is there so now at this point
25:17I’m going to put the panel back in I get everything all my gaps are good and everything and I’m going to do my final
25:22alignment of these two seams and then the Gap here as well all right got everything back in the car are tightened
25:29down my gaps are good once again so now I need to make sure that this Edge is
25:36really consistent and also want to make sure it’s flat right at the seam I don’t
25:41want to have it dipping in or anything like that because again this is where the seam in the carpet is so I figure
25:46the two pieces of carpet buted up against each other if it’s flat there I’ve got my best chance of hiding the seam so I took a piece of 1in flop our
25:54Aluminum stock and made a sanding stick just double-sided tape now I’ll take it
25:59and basically just go like this until I got both I’ve got both surfaces nice and
26:05flat I may skim coat it basically there’s two things I’m doing here getting this seam cuz again I can can
26:12see like it’s high there right so getting the seam completely flat that’s
26:17one step the other step is just finalizing the Gap here um this is
26:22probably the worst of it it might be maybe an e if that but uh those those
26:28are the two steps I’m working on now all right got a case of uh what comes first chicken or the egg doing the gap or
26:34leveling it I’m going to do both at the same time so what I’m going to do is I’ve taped this up this side up now I’m
26:40going to put I did it on the other side too I’ll put the panel in and then I’m just going to Mud the whole thing all
26:46the way down the seam and then take my uh scraper and basically scrape it up
26:52get myself a nice Edge let it cure up a little bit and then I’ll pull it off I’ll hit it with a little bit of the Pam
26:57cooking sprays is a release agent all right I’m bringing you along with here we
27:04go this is going to get pretty pretty rough I think I’m actually
27:10going to switch scrapers I was on fence about which scraper to use plastic or
27:16the metal I want this to be built up but I’ve got to be able to
27:23get the two pieces apart
27:29I’m totally fine too if I go over these bolts not over them per se but you’ll
27:41see I’m going to sneak over and do the other side
27:51also let me stop this all right let’s see if this works I hope it will uh so
27:57what I’ve done is is I did two coats of uh Kitty hair so it’s real nice and
28:03smooth didit that on both sides then I’m going to take the a sheetrock knife sit
28:09right in the car so I got a really nice good angle and I’ll hold it up against the side panel and then brand new blade
28:14in that and carefully just make one cut leaning against the side panel one cut
28:20and go all the way down and hopefully I’ve got a nice clean seam I’ll take it out and then do the finish work all
28:25right that definitely didn’t go like I hope but I can easily recover when I cut
28:31the line I cut into the side panel um I’ll show you in a second but this I’m
28:37just going to have to knock this down I’ll get to where I need to be it’s not hard I’m just going to sand this down do
28:43the same thing on this Edge sand this down and then if you look again good the
28:48bad the ugly I’m showing you everything even the nasty stuff oops so I’ll just
28:54mud this up but now I know I’ve got my my height to find same thing over here
29:01I’ll just mud this up a little bit clean it up and sand them and then I’ll show you in just a moment I should be able to
29:06get a nice even surface there with a tight seat all right I am at my final pre-
29:13Bondo check so this is going to be the finalization of uh all the kitty hair I’ve got everything good I’ve got a
29:20really nice consistent Gap there just enough to be able to fit a razor blade into to slice the carpet uh more on that
29:26later and and I’ve got a really nice tight edge here C to pull this back you
29:32can see it’s right up against there uh it’s thick enough where it’s going to be solid I even went in and kind of just
29:40ran my hands down both sides simultaneously to make sure that the both sides are nice and
29:45symmetrical uh so the other side done as well so at this point I’ll do my Bondo
29:52and then uh Bondo is just going to be just filling in the little irregularities here and there things
29:58like this um and we’ll get that taken care of
30:03all right I ended up uh scrapping the Pondo and there was only a handful of little spots and I took care of those
30:08with uh Kitty hair so now you’re looking at the backside I mudded this up a couple last layers the whole thing is
30:15probably a/4 to 38 of an inch thick so it’s real solid and again it’s over the top of the fleece so they initially put
30:22down next I’m going to hit the back side of this with just this cheap as I could get black spray paint uh just because
30:30again if anyone ever sees the back of this I like things to be somewhat finished all right black spray paint is
30:39complete and we’re on to the next part okay it’s the next night and I am ready
30:45to spray some primer um I decided I’m going to do the side panels as well uh
30:50just cuz they’re kind of ugly I guess it’s going to be a little bit before they’re upholstered I was going to use a
30:55product called slick sand I had some I went to open it and it was completely hardened up even though I kept it inside
31:02I stored it indoors um I’ve had it for a few years probably and it’s shot so I’m
31:08going to use this um this will do plenty good for what I need to do I’ve got the
31:15uh near wall as you can see there all ready to go so I’ll go ahead and get probably three or four coats on this and
31:23uh we’ll see what it looks like all right it is almost a month later um I
31:28have been away from Misa for a very long time uh dealing and working on our pool
31:34and our pool fence uh I have another channel that I’m going to be starting called Mikey land and uh on that channel
31:42uh there is a bunch of details about the pool and the fence and some other things that I’ve done so that’s really kind of
31:48occupied my time and unfortunately I have not had much time to work on Misa as you can see I was able to put a few
31:55coats of primer on this is still a little bit rough I need to sand it but I wanted to get this video done buttoned
32:01up and get it posted ju just uh so you guys can see the progress here um this
32:08area I still need to do something here I’m going to build some kind of a cover to like a beauty cover to kind of clean
32:15that area up a little bit but um the panels themselves and the near Wall came
32:20out really really nice you can see I’ve got a really nice seam going down there
32:27and there there’s one screw as you can see on each side that’s going to be buried underneath the carpet and you
32:33won’t see it the carpet will kind of pull back they’ll be a little kind of a hidden tab if you will um which will
32:39allow me access um it’s really tough I feel like to to see like how nice this
32:48came out um it is it flows so nicely very very clean and just a real nice
32:55clean look that’s what I was after this side panels and the near wall my
33:01objective was to make them basically just kind of disappear and really put you know accentuate the focus on all of
33:08that so I think it looks really good so far again there’s a few little Loose Ends I’m going to button up I’ll do
33:14those and I’ll give you on the next video I’ll kind of show you what I did here um upcoming things are going to include um doing the final version of
33:21the pull floor uh some different things I might do with that uh more details to
33:27come on that and then I’ve got to do what I’m calling the car floor the underneath area uh not
33:32the spare tire W just yet but basically the floor of the car itself um and then
33:38I might be also doing a it should be pretty quick what I’m calling a luggage wall so basically a wall I can put in
33:45and it will protect all the electronics uh again hopefully someday I get this thing done and I can kind of go
33:51on tour and I may actually have luggage back here so I want to way to be able to really protect all of this uh so those
33:57will be the upcoming things that I’ll be working on now at this point the pool is up and going and I can really start
34:04getting back into Misa it’s starting to cool off it’s supposed to be under 100° later this week which is great so thank
34:10you very much for watching if you have any questions uh please add those to the comment section if you have not already
34:16please like And subscribe and I will see you in the next video thanks very much for watching take care