CarMiZa 21 A Legendary Car Audio Rebuild Trunk Details Side Panels
In this video, I continue working on the trunk side panels. I hoped to get further than I did, but I am very happy with the results. Enjoy!
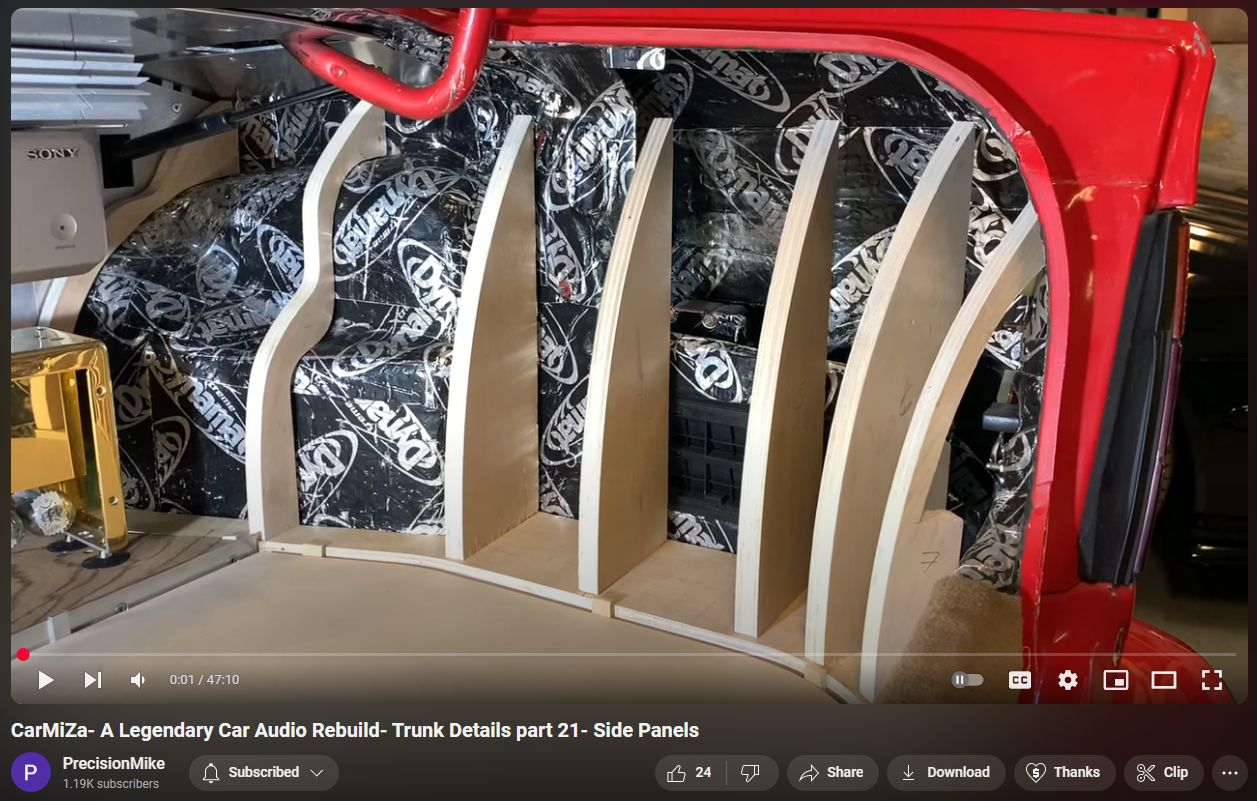
In the blog post titled “CarMiZa 21: A Legendary Car Audio Rebuild Trunk Details Side Panels,” dated April 22, 2024, Michael continues his work on the trunk side panels of the BMW 3.0. He begins by defining the desired shape using 1-inch strips of cardstock paper to create templates. These templates are then transferred to 8-inch by half-inch flat aluminum bars, which are bent to form the framework for the side panels. Michael emphasizes the importance of symmetry in the design and ensures that the panels are as tight to the car’s interior as possible to achieve a grandiose appearance when the trunk is opened. He also takes into account potential obstructions, such as the trunk’s support bars, to ensure proper fitment. The post includes a video that provides a detailed walkthrough of the fabrication process.
Transcript
0:01
hey how's it going welcome back to Cara I know it's been a little while sorry for the delay uh this video we're going
0:07
to get further along in the trunk here and work on these side panels I didn't get as much done as I had hoped in the
0:13
video but um you'll be able to start seeing kind of how this shape began to
0:19
take place and me building in this whole process so let's go ahead and get things started and thanks for
0:26
watching all right so very briefly I'm not going to spend too much time talking about the design and what I need to do
0:33
so um but what I will tell you is I've been brainstorming about these side panels for a while I know I've been
0:38
talking about it forever I'm sick of hearing myself talk about it what I've done is come up with a list of different
0:45
criteria uh questions and things I need to figure out and then different ideas that I've got so from here I just need
0:52
to pick up some material and start getting to work and trying things if I don't like it I can redo it but there's
0:58
a lot to consider uh again one of the biggest things is it's got to be symmetrical they have to be
1:04
symmetrical and I'm thinking like as tight to the car as possible just so that you know it kind of looks grandiose
1:09
when you open the trunk and again in terms of being symmetrical as we know already um I've got the gas filler over
1:16
on this side so I'm going to start I think I'm going to grab some aluminum flat bar and start shaping that and
1:22
putting it in place and figuring that out as my kind of my ribs if you will of
1:27
the skeleton that I'll eventually transfer to plywood and then uh lay fleece over that so let's go ahead and
1:34
get started with that all right to start things off I need to define the shape this is kind of what I'm thinking as you
1:41
can see I just took a 1-in strip of uh that card stock paper I have and put it
1:46
in there I'll now transfer this to a piece of aluminum uh 8 in or yeah 8 inch
1:51
by half in flat bar bend it and then if that looks okay I'll continue and
1:58
that'll represent kind of the template for the back side of the ribs okay got my piece of uh flat bar aluminum in
2:05
there again this is just going to be a template for the wood ribs I kind of like that I like the flow and everything
2:11
now what I've got to be careful of is this bar gets in the way that's why the the car is kind of carved out here so as
2:18
I shape continue shaping these pieces I need to account for that to make sure I'm not going to have a problem uh so
2:25
I'm going to just continue on I'm thinking I'm going to make probably four ribs
2:30
there's one two three four and then I got to deal with this section but first
2:35
thing I need to do is get past this kind of cut this in half um just from a
2:42
planning perspective so all right let's go on and make the next uh template one other quick thing as I make each of
2:48
these pieces I'm going to flip it over and put it in the opposite side you know I'm going to start on the passenger side
2:54
cuz it's the tallest and biggest but I'll just put these in to make sure that they're going to look good cuz again
2:59
again the whole thing should be symmetrical I should be able to use these templates for both sides so far
3:05
looks good okay second rib template is in and if you notice I'm looking through
3:13
the tail light hole so again just making sure I've got
3:19
enough clearance uh for the trunk bars the shock think if this is representing
3:24
the back side of the rib again so uh number two was done I'll luckely have to do something in between these two but
3:30
I'll deal with that later to form that pocket that you see I'm going to again basically just emulate what's going on
3:37
here with this shape for the most part uh now we'll go on to the third piece and then continue on back
3:43
here couple quick details I want to show if you notice I did a 1 in marking all
3:49
the way down here uh did the same thing on the other piece and I've also
3:55
indicated on here where my ribs are going to fall so that's number one
4:00
that's number two that's number three did the same thing over here to make sure that the placement is consistent uh
4:07
also again as I'm bending these I'm dry running both sides just to make sure everything looks good and you can see
4:14
that one's going to be good as well for the uh trunk bar okay rib number three
4:20
is bent and in place and again I'm kind of Imagining the shape that this will be
4:26
when it's uh built out of fleece all right quick check on the driver side fit
4:32
everything's looking really good I only made one set of these jigs um and the
4:38
objective here is again the whole thought is that I'm going to make the side panels symmetrical so I just took
4:45
them off the driver or passenger side flipped them over put them in here and they're lining up at exactly the same
4:52
point um and you can see everything lines up as it did on the passenger side
4:59
now I've got a figure out these kind of this area which uh I have some ideas but
5:05
uh give me just a bit let me see what I can come up with okay work in progress as I go here um if you notice I just
5:12
took a piece of uh that cardboard thick thicker cardboard stuff put it up in
5:17
there um thinking about something there my first objective right now is just to
5:23
get these pieces in place and get an idea of how this panel will be shaped uh I like it and I'm also I've
5:31
been fighting with the design of what I'm going to do here and I'm thinking what I'll do is this side panel will
5:37
stop at the edge of this um and then there'll be another piece that I build that goes over here
5:45
which will be magnetic and that'll allow me to pop this off to be able to service the tail lights should I need to so um
5:52
looking good so far um and now what I'm going to do is transfer all these pieces over to the
5:58
other side just double check make sure everything looks okay and lines up the same and here is the driver's side
6:05
everything lines up very very nicely look at the difference it's pretty crazy uh now you can really kind of see the
6:11
difference between the two sides um number two and number three were right up against the side of the car on the uh
6:19
passenger side you can see the difference there so um all right so this part is good now it's time to go on to
6:27
the next part which I have to figure out okay I decided to make um two sets of
6:32
these just because I want to see what it looks like in the car before I get ready for the next step and as you can see I'm
6:38
just betting them by hand just using one as a template for the other and coming
6:43
out very nice very much the same okay it is Monday a couple days later or
6:50
whatever a day or two later I had some stuff to do around the house um and I
6:56
have all of these the uh five pieces on each side done bent in in place I think
7:03
I mentioned that I've been really kind of struggling with this too the shock Tower cover repair if you will that was
7:10
kind of challenging to figure out this too I'm I'm still I've been still really struggling with the final shape I've got
7:17
some different ideas and kind of thought about different ways to do this and then last night I was sound asleep 2:00 in
7:24
the morning I had some ideas started tossing and turning got up and spent about an hour taking notes and kind of
7:30
coming up with the ideas and everything just kind of fell out of my head hopefully it's going to all work but
7:36
let's see how it goes I came up with some really cool things probably once again over engineering things going a little crazy but I think I've got this
7:45
whole thing and even the integration into this near wall with the tail light covers kind of figured out so uh with
7:52
that let's go ahead and talk about uh moving to the next step here that I've now that I've got these these five metal
7:59
pieces uh in place okay first thing I need to do is make sure that all these are vertical uh I went through with the
8:07
level and checked all of these in their vertical that's going to be important on the next step next I went through and
8:13
made sure that this piece the base is level it's not this is not does not have
8:20
to be dead nuts accurate it's just foring a red angle here and you'll see why when we go to the next part next
8:27
thing is I'm measuring basically the width of of the uh base at each
8:33
location uh in other words from the aluminum to this Edge for all five of
8:38
the pieces don't worry I'm still making templates this time it's going to be out of this cardboard I figure I want to
8:45
build everything out of this cardboard and then transfer it to the plywood so here's what I'm going to do this is
8:51
square to the floor in the car so it should be able to do this draw a line here measure from here out to here here
8:59
and that's going to be where the edge is on the floor you'll see you in a minute okay so while I had my Square in place I
9:06
had this piece I drew the backs side of this that's going to represent kind of the line where the body of the car is
9:13
this 2 in is going to bring me right to the edge of the base plate now what I'm going to do is determine this curve this
9:21
curve is basically going to be the other part of what will become my plywood rib
9:26
this curve is also going to dictate the shape um of the finished panel and this is
9:32
kind of where I have some ideas I don't know how this is going to go uh but it's going to be once again a work in
9:39
progress one other thing here I do know that I I want to have a curve obviously
9:44
I have to have a curve to this and I don't want this to be too straight for too long because because then this
9:52
that's going to mean that this wall is very you know consider it like perfectly vertical and then when I go to do the
9:58
pole floor open that up and down it's more that's going to rub as the floor
10:04
moves back and forth I just want the floor to set in here and then have this to be at somewhat of an angle so again
10:10
it's in my head you'll see it as we go all right next thing I did was take a piece of aluminum flat bar this is 16th
10:17
of an inch by/ in uh which bends real nicely and I made this curve the curve
10:24
doesn't have to be a perfect you know radius or whatever as long as I use use
10:29
this for all the pieces I'll have a consistent Bend you know in that same range there's the objective here is for
10:35
this to be curved right ultimately when you look at it I don't know if this is what I'm going to have as a finished
10:41
piece but this is what I want to start with so now I'll take my pencil trace it here cut out that Center piece put it in
10:48
the car and then that starts to give me an idea as to where the rib will line up
10:53
the other two things I need to consider are the gas shock and and the trunk bar so when I do
11:02
these I'm going to have to put a small Notch just like I did on this back side here but I want to try to Mellow this
11:09
out this is too too rough for me it's too too deep of a cut into this area and
11:14
there's like three in between this bottom of this um the um bar for the
11:20
trunk lid and this bottom you know BMW went crazy here so I'm going to kind of mellow that out with this curve let's
11:27
see how it goes okay so so there's my drawing of what the first rib could look like potentially and again this is so
11:34
this is just a side view of it and you can see now this is not going to be perfectly vertical right you can see
11:40
just at the very end is where the the floor is going to lay in and fit so let
11:46
me go ahead and cut this put it in the car see what it looks like all right first piece is cut let's put it in the car and see what it looks like okay
11:54
interesting um as you can see as predicted the gast rut is pretty darn
12:00
close I'd have to just put a little notch in it there for the Gast strut um also I don't know what happened with my
12:06
measurement down there um I'm off by a little bit but I do want to allow for
12:13
the space for the fleece uh because I'm going to wrap this whole thing in fleece I'm not really sure yet if I if I like
12:20
that let's see the lighting kind of get that light out of your face that might give it kind of a cool
12:28
again kind of curving it in and make it kind of dramatic but uh I'm going to continue I'll do the next one in this
12:34
one I'll do the same thing with that piece of 16th um 16th of an inch thick
12:40
flat bar and I'll do the same curve and I know for sure I'm going to cut out I'll have to cut out Notch for the trunk
12:46
bar uh but to do that I'll just slowly close the trunk until I see where it hits and that's where I'll know to notch
12:52
it so let's go ahead and do that one same procedure here put my Square laid this out Drew my line now I measured I
13:00
measured from here to Here let see if I measure this one more accurately and then we'll get that curve in there all right now when I went to do this line
13:07
I'm just basically taking this and just using this just to get a curve just a slope I actually had to open up the
13:15
radius which is good because I don't want this to be perfectly flat as you look at it you know if you were to look
13:20
at it from here there's that's the whole point there's going to be curves to this which again with the lighting that's
13:27
going to really the lighting will accentuate it and cause shadows and things like that which I think will look really cool all right so this is our
13:33
next one now I'm going to go ahead and cut this out put it in there and see what it looks like by the way if this is
13:39
a total flop um this stuff's $125 at the dollar store um and I'm less than an
13:46
hour doing this maybe 30 minutes so uh I got to do something to just just get
13:51
going and see what this thing will look like all right I don't hate it kind of cool uh I haven't checked the trunk bar
13:58
but I'm sure it's going to be in way and again not a problem I can build a very mellow Notch there you notice the Gap up
14:05
here originally I was thinking I was going to angle these up like this but now I'm thinking that it's going to be
14:11
better to go this way but let's see how it goes little Pro tip here if you're going to be using this stuff which I
14:16
love it's uh again I get it at the dollar store it is uh see if I have a I
14:23
don't have the name of it I'll find it in a minute here tell you what it is a $125 for like a 30 by 30 in sheet
14:30
something like that um when you're cutting it you want to make sure you don't cut it at an angle because if you
14:36
do it's it's about an eighth of an inch thick um and that's going to screw up your Dimensions so you want to you know
14:42
if you're cutting something like this you want to keep your cut nice and straight that way there is no front and
14:47
back if you will so hopefully that's helpful here's the stuff it's called ready board um if you go to your local
14:54
dollar store and again if you see it um snag as much of the white stuff as you can they make white and then they make
15:00
like a dark gray or black um I find the white a lot easier to work with you can see your pencil lines and things like
15:06
that um and they seem to run out of the white all right here's my metal pattern number three and I decided
15:14
I can slide this over a little bit and then instead of having to do this crazy curve I just did that and
15:26
now there we go and this just needs to straddle I need to make sure that obviously I you know this is the high
15:33
point so I need to make sure that the fleece covers that again I'm not 100% convinced this is what I want to do in
15:40
the end but this is a it's actually going really quick and it works out quite well this piece this is basically
15:48
just square and this is just a straight wall I can just do a couple more of these and then and you know evenly space
15:54
them and that part will be good so I'll knock those out now lots of cardboard what do you think
16:01
imagine those are 3/4 inch plywood and then everything is wrapped in fleece I
16:07
think it's going to give a really nice curve along you know like this Edge and
16:14
it's going to kind of accentuate this line right here all these lines and curves are really really important and I
16:20
have this vision of what this thing kind of like again like a big tunnel um it's got to have Dimension and
16:26
shape and and look look unique and kind of draw your your eye in and I think
16:31
especially the way I'm going to curve these underneath it's going to it's going to really do that I think so I'm a
16:38
big fan um there is a lot to do this just opens up okay now I got a whole bunch of other things I I need to
16:44
consider um so real quick on some of the design aspect this is just a proof of
16:50
concept right um and you can see those aren't perfectly straight it's just to get an idea of the general shape am I
16:56
going to like what this looks like and again you can see kind of the way that's going to go I think it'll look
17:02
really sharp nice subtle curves won't be too hard to upholster but some of the things that
17:08
I'll need to consider um I'm going to have to Bevel
17:13
the top of this I can't have a square edge here because when I staple it I'll have kind of a weird Jagged Edge so um
17:21
the objective from my experience doing like fiberglass with um fleece is to get
17:27
it as good as you possibly can um and use the least amount of body filler and all that kind of stuff cuz
17:33
that can take a while so that's that's just one thing uh the other thing is I
17:38
don't want to disrupt this Edge because this was routered right me this thing is like a perfect Edge It lines up really
17:44
good with this floor again this is just my template for the aluminum but I can't
17:49
Mar this Edge so one of the things I'll do here is I'll spray this with just
17:55
some black spray paint so that I know if if I try if I start sanding and doing
18:00
something if I sand away the paint I know I'm I'm screwing off this Edge I'm going to build you'll see it when I get
18:07
to it but this is one of the things that came up with at 2 a.m. last night I'm going to cut a little chunk out of each
18:12
of these and then I'm going to build a piece of plywood that goes along the floor that's going to be my Leading Edge
18:19
for my fleece I'll stape the staple the fleece to the bottom of that slip it in
18:24
and then put my fleece up and roll it around the back side that way there are no visible Staples here and when I go to
18:31
fiberglass it I'll get a really nice clean Edge and I shouldn't have to mess with this hopefully at all so again more
18:37
uh less with the jaw more with the saw so um one of the other things I haven't even looked at yet is I need to do some
18:46
gentle uh kind of notching in here for the trunk lid bar that's pretty easy I'm
18:51
not too worried about that but again but again I think I'm feeling that whole
18:57
Edge the other thing is the integration here what I think I'm going to do is
19:02
probably leave this piece I've got more of these oen pieces of plastic I think
19:08
what I'll do is probably leave it like this and then the the this
19:14
piece um I don't know I'll probably stop my
19:19
fleece right along this Edge and then I'll build another piece that goes kind of where my hand is here that lays in
19:27
here and is uh held in with magnets Neo Neo dimia magnets and then that will
19:32
allow me to get in here to be able to service the uh tail lights if needed so all right proof of concept I would say
19:40
is a success I got to do some more tweaks now I've got to sit here and and do some more thought with all of the
19:46
things that this now kind of brings up right I got to do an insert up top there
19:52
because when I upholster that I'm going to upholster this piece in the car and
19:57
the the carpet will basically Beyond here and then the the side panel
20:02
will be carpeted outside of the car fit in there and the way that those two pieces are going to meet hopefully
20:08
there's little to no seam visible so all right got to keep working on the design but I'm liking it so far one a uh really
20:16
quick thing my daughter just came in the garage and I like to get her opinion she's very very artistic and I kind of
20:22
you know explain what was going to be happening here showed her the the curvature it's almost going to like twist see that the way the curves are
20:28
set up and she said the whole thing reminds her of like an Amphitheater um and that's pretty cool
20:35
because that's kind of the vision I wanted to be like again very artistic and kind of presenting ultimately
20:41
drawing your eye into the center where the milbert's and all the stuff will be so pretty cool I'm totally digging this
20:47
feel really good about it now I just have to go through again and work out the details all right I just spent about
20:54
the last I don't know hour and a half 2 hours going through and you know taking notes and looking at everything I need
21:02
to do this to give you an idea this is all the things I've come up with so far this is all the same day that uh you
21:08
know I worked on these cardboard templates but that gives you an idea of the amount of thought and consideration
21:14
I put into this uh and even still I run into things where I screw up or I don't consider things and run into problems
21:21
like the C1 changer fit right I had that issue so um that's going to be it for
21:26
tonight tomorrow I'll be working on the car some more and and I think I've got a good handle on everything I just want to
21:32
check a few things and then basically L all the steps and start getting to work to really get these side panels
21:39
completed okay it is the next day and as you can see I just popped in the
21:44
Changers and the milts just to get an idea again what this thing is going to look like visually um I you know went
21:52
back through the design um kind of the elements of it that I'm slightly hung up on um the one
22:00
thing I'm not 100% sure of is what I'm going to do with this I think I may extend this another inch inch and a half
22:06
and I'll probably stop this rib here and then when I do the tail light cover
22:12
it'll be a piece that goes in here and then there'll be a carpet seam there and there but hopefully you don't see it
22:18
this stuff when you fluff it up like there's a seam right there that you really can't even see and this is really old and kind of in rough shaped
22:25
30-year-old carpet so um I am good there and then I went through all of my
22:32
planning my steps just spent another hour or so going back through figuring out kind of the order of operations and
22:39
uh I feel good about everything so um I am going to go ahead and pull the stuff
22:45
back out uh the MTS and the Changers at least those are just really easy to get back out and then I'm going to start out
22:52
the first thing I need to do is get the bases kind of everything 100% with the bases which which is going to include
22:59
their final placement and mounting the bases which is ultimately going to mount the side panel so let me get everything
23:05
out we'll talk about how I'm going to do that all right so the first thing I need to do as I mentioned is get the bases um
23:13
where they're going to be they need to be it needs to be kind of a predictable repeatable process um meaning when I put
23:21
the panel in I bolt it down and it goes in the same exact spot every time maybe
23:26
there's a little tiny bit of adjustment like a 16th of an inch just if I need it
23:31
um but effectively it lands in the same spot every single time that's been the case with all these pieces that I have
23:39
built so to do that with these bases and ultimately the side panels here's what I did I put in shims as you can see there
23:47
that represent the thickness of the carpet as needed in some cases it's double layer carpet so the carpet's 1/8
23:53
of an inch approximately for one layer so a double layer would be 1/ qu inch so
23:58
I've got a qu inch piece of MDF there as you can see right there and then there's an E8 in piece of
24:04
aluminum um and then I basically went around and did that
24:10
everywhere that I needed it and I even put an e/ in shim on this
24:17
piece just to get everything placed where it's going to be then I also made sure that both the bases are Level
24:24
that's going to play a role again when I'm using the square and basically building the plate uh the the ribs so
24:31
now all that's left to do on the plates these base plates is to mount them and to do that um again I need to consider
24:39
the way that this is all going to be put together so let me grab one of the ribs and I'll show you what I'm doing there okay I literally just set this in just
24:45
to show you guys but that's approximately where rib number five is going to go that's the end rib and this
24:52
base is going to still be there when I do the fleece it's going to come over like this and it'll stop right at this
24:58
Edge so basically this will be uh visible and available right that that
25:03
little section right here um and again I'll have the tail light cover here
25:08
which will be magnetic uh I'll be able to probably just grab on the carpet and pop that off and then get to this bolt
25:15
there will be only one bolt holding in the side panels other than that it's going to be a pressure fit up there and
25:21
the rest of it's basically going to kind of you know it's going to be tucked up underneath that lip or right up against
25:27
that lip so I'm confident it'll stay in place it's going to be you know a bit heavy too by the time I'm done so it's
25:33
not going to go anywhere so I'm going to just put one bolt here and I'm going to
25:39
use a Furniture bolt quar 20 and then I'll do a threaded insert into the body of the car like I've done elsewhere I've
25:44
already checked to make sure fuel tank starts up here uh so I'm plenty clear of
25:50
that I'll triple check uh but that'll be the next step and then we'll go ahead and get these bases uh bolted in and
25:56
mounted quick funny story for you uh it is eight
26:02
days later uh I have not touched the BMW um I can make excuses again but life got
26:08
in the way and all of that one of the things that happened also was I sent Earl pictures of this side here and said
26:16
this is what I'm thinking and kind of explain what I was going to do he misunderstood uh what I had described
26:24
and said that's going to look terrible I don't like that you know I thought you were going to do like a extend this line
26:29
and do that kind of a thing so then I started over with a design and basically
26:34
said all right what if I did that and I redo the floor and extend the line this
26:40
way but if I do that the floor becomes giant like way bigger than it would be and it's not going to look right so I
26:46
got really frustrated stepped away for a few days and then I asked Earl to come over and he came over and when I did
26:53
when he did I had this setup which is kind of like the after the plan B if you will and then I had the original set up
27:00
in here he comes over and I say all right so let me show you what I got here this was the original design and this
27:06
would all be covered in fleece and as soon as he looked at it he said that's what you need to do that's exactly the
27:12
look he kind of a couple things I think misunderstood the way I was going to lay things out and he said the perception
27:19
the angle and the way it was going to look when he saw in person compared to on video or in you know a photo uh was
27:26
drastically different so really it looks good I I'm confident with it so moral
27:32
the story there is we're going to continue with this design so what I'm going to do at this point is um before I
27:38
go further you know obviously I was I was just a moment ago I was talking about mounting these bases before I do
27:44
that I'm going to do a final mockup with these pieces of foam which I would have done later anyway I was going to these
27:51
were just kind of rough cut I was going to do them a little bit cleaner I'm going to do that on both sides uh cuz I
27:57
don't like for example Le see the way it curves behind the Milbert I kind of like
28:02
on that one something more like that where I've got more parallel lines so
28:07
I'll go ahead there are five of these per side I'll go ahead and get those
28:12
completed uh and then come back to the video and then from there I should be able to continue back to where I was
28:18
with the bases and and go from there so all right hang tight let me go cut a bunch of cardboard okay the passenger side um as
28:27
you may know is larger than the um driver's side so this one is the one I'm
28:33
starting with this is my final answer on these cardboard templates so as you can see I've got number one and I've kind of
28:40
tucked that in there CU I like the way it's going to see that the way that's going to line up and also it allows you
28:47
to see still that the shock Tower is curved I really wanted to preserve that this will also cause the fleece to go in
28:53
there and I'll do a little bit of a sculpted Contour right there I've also not out for the shock Tower Rod there's
29:00
going to be a trim piece that goes over that um the hole will be much smaller where the rod comes through and then I
29:06
also um carve this out to allow for the trunk bar um this is going to it looks
29:14
kind of ugly now or maybe tough to imagine but I'm confident that this is going to when I attach the fleece in
29:20
here that's going to give me some really cool sculpture to this like a little pocket I may need to run um some cleats
29:27
kind of long inside there um but I'm confident that that'll look good so now
29:33
I'll transfer this cardboard over to the driver's side and be done with cardboard so let me go ahead and knock that out
29:40
all right there we go cardboard done uh you can see again if you can imagine the
29:45
way that's going to look you'll get an idea of the general shape so um I'm going to change up the order a little bit too I was going to do the base Mount
29:51
the bases to the car next uh in this video I want to be able to show something pretty tangible so I am going
29:58
to next go ahead and cut all of the ribs uh out of plywood uh so this is going to
30:04
wrap up what I'm doing tonight so tomorrow night we'll reconvene um and I will get you know the
30:11
the uh jigsaw table set up and be able to get to cutting these ribs so have a
30:17
good night tonight see you tomorrow okay it's actually the day after the next day uh I had some stuff
30:23
come up last night I had to tend to um so we are getting ready to to cut the
30:28
ribs so I've got my uh little drum sander thing here set up this is going
30:35
to allow me to do the interior curves and kind of sand those and tweak those as needed also have my Giant Disc Sander
30:42
right here that I'll use to do certain edges as I need uh yeah my finger is
30:47
taped up with Tessa tape by the way uh for those of you who may have noticed it uh slammed it in the dishwasher uh it
30:54
hurt like hell and my fingernails falling off it's pretty gross so let's keep that covered um the other thing I'm
31:00
doing I'm using the old piece of plywood the extra plywood from when I did the bases here's a cool little Pro tip so
31:08
I've got my template out of cardboard and these again don't have to be exact I'm going to cut this oversized and then I'll use
31:15
all these amazing sanding tools to get it really kind of dialed in but here's kind of a cool little thing I wanted to
31:20
show if I put this down like this and try to minimize waste right and I go and
31:26
do a pencil around around here this is kind of flimsy see this so it can move a
31:33
quarter of an inch no problem that's going to really screw up the shape so what I've done this one I've already
31:38
taken off I got a couple pieces of double-side tape that I'll put on lay
31:43
this down and then be able to trace it to really ensure that I've mimic the same shape so um you guys have seen me
31:50
cut with a jigsaw it's pretty straight forward let me go ahead and get this one cut shaped and I'll show you what it looks like in the car all right not bad
31:58
there's number one I did a little bit of sanding and tweaking just to uh you know
32:04
kind of clean up the edges a little bit The Inside Edge obviously does not have to be perfect that's just sitting
32:10
against the car it's this outside edge right here that's going to dictate the shape but um I like it um I do see where
32:18
I'm going to have a challenge attaching this one to the floor more on that later we'll deal with that later but um it
32:24
looks good I tried this one on the opposite side over there and it's really really close it's
32:32
probably within 3/16 to an eigh of an inch of being like a perfect fit but the
32:37
car is not perfectly symmetrical as we know so the the obvious goal here is to get the shape symmetrical when we're
32:43
done so I was thinking maybe I could use a flush trim bit knock out one side just flush trim it bring it to the other side
32:50
but I can't do that because of the differences in the car but um looking good all right let's go on and do number
32:55
two which was a little more gnarly and uh see how that fits all right you guys have seen me cut stuff nothing crazy to
33:02
this but I figured I'd show it cuz I'm not showing a whole lot of me working in this particular video um so with that
33:12
let me go ahead and as you can see I rough cut most of this um but you can see the line there
33:18
where I still need to cut that out this stuff is a um believe it's a birch plywood I picked up from Home Depot not
33:25
cheap um and it's like a seven ply or whatever 3/4 in but it cuts with a new
33:32
blade and this amazing jigsaw I've got it cuts like butter I mean you got to
33:38
you actually got to pull the the saw back and really keep it slow I've got it down to a slower speed um just CU
33:45
otherwise it'll just fly right through and you'll go past your line so all right here we go
34:13
I just again I've been to this before I've got this little curved piece but I use this piece of scrap that's got a
34:18
hole in it um and I'm just straddling this over the hole it makes it easier to
34:24
cut more stable
34:34
and there I've got basically the tightest part so I'll just work up to that from the other end so you get the
34:41
idea there let me go ahead and get this cut and then I'll show you how I'm sanding this and getting to fit all right so again hopefully you
34:47
guys can see the line here it's the lighting is kind of crazy cuz it's really bright out but hopefully you can see my pencil line so I I stayed within
34:55
you know I went a little bit over maybe an eighth of an inch or so and this looks like crap right it looks does not
35:01
look good the line is pretty Jagged now what I'm doing is I've got my line but
35:07
I'm flipping it over and I'm by eye I'm making sure I've got a nice good Edge on
35:13
it right you can see where it's kind of jacked up there so I'll basically just use this a little belt sander thing this
35:21
Disc Sander and the piece saw in the drill press and just get the shape the first thing I'll do is the inside so
35:27
that it goes in and fits into the car properly um and and make sure that is good so to that point let me go ahead
35:34
and show you what I'm doing here on this dis sander to get these these edges I'll do as much as I can with
35:52
this anywhere I can't reach because of the Inside Edge I'll use the drill press
35:58
uh excuse me got a bunch of s um I use the for that this too I'll
36:04
make sure I'm Square here I'll put square on it but just hitting this with the
36:13
sander pretty straight so all right let me continue working on this we'll see what it looks like in the car all right
36:19
this is a pretty basic uh setup I got just a 2in little drum here couldn't find my original one it's somewhere over
36:25
there in my Messa tool so I had to order one on off Amazon the only one I could get today was this really cheap one and
36:32
it wobbles like crazy but it'll get the job done so I'll show you what I'm doing here again on these uh you can see on
36:38
these inside lines here see where I I ran this this part right here on that
36:43
disc Center got a nice Edge but I've got to clean up in here and in here which I'll do next so if you do these by the
36:50
way I cut a um it's a 2in um sander and
36:56
then I cut a 2 and 1 e in hole into the piece of wood um which you can hear the thing rubbing so
37:03
it's it's not perfectly uh Square which is okay again so here we
37:12
go this is an 80 grit too in case you're wondering it doesn't uh doesn't chew it
37:20
up really fast I have the the drill press on a really low speed
37:25
intentionally just so I can work it [Music]
37:34
the important thing here is to just keep it nice and square the saw house is getting me
37:40
[Music]
37:46
tonight and just uh make it look like a three-year-old didn't cut it so you can
37:51
see a much better cut there so again I'll do the same thing in this area and then we'll go ahead and see what it looks like in the car all right so as
37:58
you can see there I haven't tried it in the car yet but I'm just worried about this Inside Edge just again not looking
38:03
all nasty and Jagged it's pretty nice and smooth now we'll put it in the car let's actually go ahead and do that um
38:10
and we'll take a look to see where it's going to hit and you can always cut more
38:16
can't cut less right um and then chances are this won't fit if everything goes as
38:22
planned this shouldn't fit because I should need to I'm going to pull this shim out
38:28
just double side tape hang on one sec okay I was trying to do that with one hand it wasn't going to work so um what I was saying was it shouldn't fit
38:35
because if things go as I had planned I cut a little bit big so I should have to
38:41
sneak up on it and that's all I'm doing here so I can see where it's hitting at the top I'll I'll continue to sand it it
38:48
could take eight or 10 tweaks before I get it you know that's what I had to do with the number one so I'll keep doing
38:53
that this is sticking out too far here and I've got a gap here so again it's just a matter of tweaking it with the
38:59
Sanders and getting it to fit so I'll go ahead and get it done all right rib number two fits good in the car now I'm
39:07
got to go through and again tweak this exterior Edge get that really um the way
39:12
I like it and we'll keep going looking good though I like it all right got
39:17
number two tweaked um I may have a little bit more to do here again I can always cut more um I'm also using my
39:25
level um just a little small level just to make sure when I put it in there um
39:31
that I'm leveled this way and also even ensured like that this should be vertical in my opinion because that's
39:37
going to be basically the line where the hood rod or the trunk Rod area comes down so I think it' look cool if that's
39:44
perfectly vertical and it is with the level so um all of that looks good now I'm going to go on to these which
39:52
there's some some items I got to figure out here so I'm going to go ahead and do that next pass passer side is done and
39:59
it's not even quite dark out um all right so here are some things I've identified um if you notice I want about
40:06
a quart of an inch um of a gap here because I'm going to staple the fleece
40:11
these are just sitting obviously uh staple the fleece to these and then it's going to come down I think I'm going to
40:17
do also kind of a cleat along the bottom here that I'll staple too as well figure that out I got some ideas on that um but
40:24
I'm also going to have to Bevel some of these so if you notice this what I want is is for this to kind of
40:30
look like it's curving as it goes around here to kind of mimic this curve right so it's all kind of sculpted that's why
40:36
this one sticks out further than this one because of the curve but when I staple the fleece I don't want to have
40:41
like squared off edges so these two should be fine this one again if you can imagine the way the fleece is going to
40:48
go I may just have to knock down you know the front edge of that which is fine I'll just do that with a little
40:53
palm sander so for now I think this side is good uh now what I'm going to do is
40:59
do um all of the ribs for the other side um which I might be able to flush trim
41:06
some of these but uh let me go ahead and take a look at that and give it a shot but so far I'm really liking it um I
41:12
like the way the shape is going to look I think and again what I can do is um
41:18
one other quick design thing I am going to use machine screws as I always do and
41:23
um threaded inserts into these ribs so I'll be able to you know Bolt the ribs to the floor this base and then I'm
41:30
going to just wrap the whole thing in fleece to take a look at it maybe just put a few Staples in here or there just to get an idea of the shape if I don't
41:37
like it I can take these off if I want to square these off or you know do something different I'll be able to do
41:42
that so again that's the beauty of using machine hardware and not permanently fixing um like you know uh using Staples
41:49
to attach these or welding when I did the shock Tower covers that's why I did all those bolts cuz obviously I needed
41:55
to go back in and you know open it up for the changers for example so all right let's take a look and see how this
42:01
is going to go into the driver side quick interesting uh little tidbit here
42:06
for you um these are I was just outside and I had my headlamp on and I'm cutting
42:13
outside because I've got my E55 in the garage and I don't want to uncover it yet I'm going to a car show with it
42:19
first thing in the morning at Cars and Coffee so I figured I leave the cover on it and I'll blow the any sawdust I get
42:25
you know off the cover um and then get the car I'll detail it out in the morning before I go to the car show so
42:31
I'm out there you know my saw horses and I'm I'm like oh I need a head lamp and I'm like wow I'm getting really crazy
42:36
here I'm outside working in the dark I thought of something and I just want to share this I thought this is pretty cool
42:43
these are pictures of the dashboard I built 20 years ago for this car this was a white 525i I
42:52
bought it 25 years ago car was in really great shape and my whole goal this was
42:57
long before I owned Misa was to replicate what Earl had or you know do
43:03
my best to so this is going back I looked at one of the pictures just a moment ago was March of 20 of
43:10
2004 um so quite a while back this dashboard I built um I got it finished I
43:18
never I started to upholster it never got it finished but I wanted I thought about this and I wanted to show you
43:23
something cool so here's me doing some of the work in the garage but you could see the fiberglass work if you notice
43:29
this right here I thought of this and I'm like I wonder if I have this picture if you look at this picture you can see
43:36
out there there's snow on the ground this was my shed at our house in Saratoga New York I still remember I
43:43
needed a fiberglass and my kids were young uh at the time we had our son and
43:49
our middle child our middle daughter and could not you know the wife says no fiberglassing in the house it was a real
43:55
small house and all that because of the smell so I took my salamander heater at 11:00 at night dragged it through 2 ft
44:02
of snow to our shed to heat up the shed to be able to get the temperature up to be able to do fiberglass resin on the
44:09
dashboard so this is how long and how hard I've been chasing this dream of getting this sound so I thought that was
44:15
pretty interesting pretty cool little story all right back to building these ribs I'm not done I came up with
44:22
something better if it's not Precision keep going until it is right so all
44:27
right here's what I've got now I I uh here's some of the changes I did um
44:33
pretty straightforward work so I didn't bother recording and I I added a 8 in aluminum spacers back behind this uh
44:40
first rib because the shock Tower carpet will be carpeted when I carpet the side
44:45
panel I'll cut the carpet flush with that edge and then when I stick that in there and kind of fluff up the carpet
44:51
you likely really won't see the seam it'll look really nice I think um I added a a
44:57
[Music] third uh piece to this area uh and then
45:03
I did this which I really like hopefully you guys like this I sent a video of this to Earl he liked it um so let me
45:10
show you from the top here so what this is going to do is basically follow the same
45:18
curvature of the floor and this is going to bend up like this and if you notice I've got a gap right here I'm going to
45:25
build a separate piece that fills in here and Contours to the car here and
45:31
then goes right up along this Edge and then along the the floor there this piece will be removable it'll just pop
45:37
out and allow me to service the tail lights uh as needed
45:43
right so I can get in there I'll basically just pull the bolts out and pop the tail light out if I need to um I
45:48
might even be able to take this piece and extend it to this all is one piece I
45:55
got to see because of the I don't if it's going to fit in the way I want but either way I can do a separate little
46:00
filler piece here and when I do the carpet I'll basically have these pieces
46:06
in upholster over everything and then do my cuts after in the carpet and you likely wouldn't be able to see the seam
46:12
so um I think that'll be pretty cool so um all right so with that I'm going to go ahead and close out this video I know
46:19
I didn't get nearly as much done as we hoped I was hoping to be able to get this whole side panel both side panels
46:25
like done in this video uh not the case this is turning into a little bit more
46:30
work than I had thought but I'm very very happy with the results that's what it's all about so uh in the next video I
46:36
will definitely make more progress we're going to talk about um getting these mounted to the to the base get the base
46:42
mounted to the car and then I've got to do basically some fill-ins along the top
46:48
to basically uh create a line like a defined line there which is where the fleece will wrap over and then also do a
46:55
fill in in this are area right here so uh more to come on that but uh that should be it again for this video thank
47:02
you very much for watching please like And subscribe if you have not already and tell your friends thanks again talk
47:08
to you soon bye-bye