CarMiZa 20 A Legendary Car Audio Details Sony C1 Changer Fit Modification
In this video, I solve a slight issue I ran into. When I built the shock tower covers, despite my best design efforts, the back of the Sony C1 changers hit the shock tower covers. As a result, I was stuck and frustrated. Here, I determine a solution and remedy the issue. Enjoy!
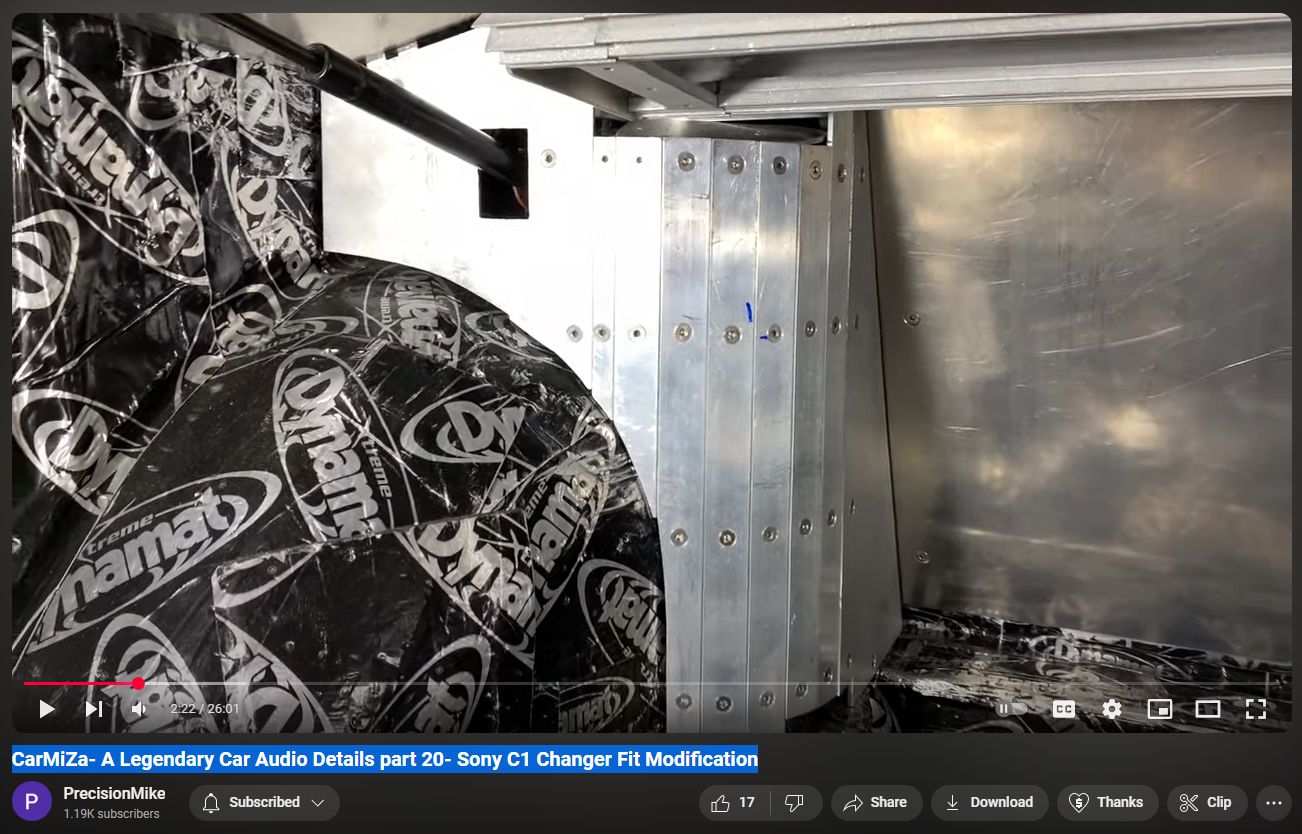
In the blog post titled “CarMiZa 20: A Legendary Car Audio Details Sony C1 Changer Fit Modification,” dated March 28, 2024, Michael discusses a challenge encountered during the installation of Sony C1 CD changers in CarMiZa, the rebirth of Earl Zausmer’s legendary BMW 540 audio competition car from the 1990s. The rear of the changers was obstructed by the shock tower covers, hindering proper fitment. To address this, Michael removed the back panels of the changers, each approximately an inch thick, allowing them to fit correctly. He also marked the areas on the shock tower covers where the interference occurred and considered further modifications to ensure a seamless installation. The post includes a video detailing the troubleshooting and resolution process.
Transcript
0:00
hey how's it going welcome back to Cara
0:03
this is going to be trunk details part
0:05
20 um not much progress lately with the
0:09
BMW folks I uh I can make excuses but uh
0:13
at the end of the day um I have not put
0:16
time into the car recently uh My Buddy
0:18
Joe shout out to Joe in New York uh
0:21
texted me this morning and said any
0:23
progress on the BMW and my short answer
0:25
was no so we uh I really need to roll up
0:28
my sleeves and get to work on this
0:30
um the last thing I ran into with the
0:34
install is the back of the C1 Changers
0:38
are hitting the what I'm calling the
0:40
shock Tower covers back here the
0:41
aluminum curved pieces um I had people
0:45
overs you if you're been watching the
0:47
channel uh for the expo here in town um
0:52
that Brian Schmidt put on and when
0:55
people came over I wanted them to see
0:56
the trunk so I pulled the backs of the
0:58
Changers off there was basically just a
1:00
panel that removes it's about an inch
1:02
thick and that allowed me to fit the
1:04
Changers so um as you know too I've been
1:08
talking about doing these silly side
1:10
panels forever uh I got to get on those
1:12
but in my fashion I don't go to the next
1:15
part until I've taken care of you know
1:18
done everything I can up to this point
1:19
so I certainly don't want to leave the
1:22
issue with the Changers so uh in this
1:24
video I am going to solve that I don't
1:26
know how I'm going to do it yet but this
1:28
is probably part of the reason why I've
1:31
been delayed working on it I'm stuck
1:33
right so as I mentioned with the build I
1:36
want you guys to see everything The Good
1:38
the Bad the Ugly um so this is one of
1:41
those things I have not been motivated
1:43
to work on the car um I'm loving the way
1:45
it's coming out but I'm just kind of
1:47
stuck so with that I'm going to go ahead
1:49
and remove the pull floor I'll take
1:52
these side panel bases out I'll take the
1:55
whole Milbert piece out I'll take the P1
1:58
and X1 out and just have the Changers
2:00
with the one zapco and then kind of get
2:02
an idea as to how I'm going to solve the
2:05
problem of these hitting so with that
2:07
let's go ahead and get
2:09
started okay so I've got uh everything
2:13
removed that I needed to remove and as
2:16
you can see I just took a blue Sharpie
2:18
and marked a couple of places on the
2:20
shock Tower covers where the changer was
2:23
hitting on this side I've removed the
2:25
shock Tower cover I had to pull off the
2:28
end link for the one zapco to be able to
2:30
get the cover off those those shock
2:32
Tower covers I'm thinking once I put
2:34
them in for the final time they'll be
2:36
able to come out um they're kind of a
2:38
pain but they're not going to be coming
2:40
in and out very often uh there's really
2:42
nothing that's going to be behind there
2:43
now let me show you the changer on the
2:45
bench okay so here is the changer from
2:49
the passenger side and again if you've
2:51
been following along you know that I
2:53
built uh this piece of uh 8 in aluminum
2:57
that basically acts as kind of the
2:59
bracket to hold it this changer is just
3:01
a mockup uh in fact it's
3:04
Hollow um just for weight savings and to
3:07
be able to do the mockup you can see
3:09
this one's got a pretty big scratch on
3:10
it I have uh several of these and I've
3:12
got a couple of more that are pristine
3:14
so this is the back of the changer on
3:17
these c1s these things are really heavy
3:19
duty so this is the part that's hitting
3:22
so when it's in the car it would
3:25
basically hit right here so now I got to
3:27
figure out after building this monster
3:30
right and this has got the brackets in
3:32
the back how am I going to go through
3:37
and modify this also considering the way
3:40
I'm going to upholster it um and do it
3:43
in such a way where I don't uh
3:45
jeopardize the Str structural Integrity
3:47
here but I also I need to kind of Notch
3:50
this out if you will just kind of
3:52
imagine you were just taking a a big saw
3:54
and chopping this piece out and be able
3:57
to do that without um
4:00
again you know ruining the structural
4:02
Integrity I don't want to have to redo
4:04
those straps there is a lot of drilling
4:07
there so hopefully I can figure out
4:09
something so I'm going to brainstorm and
4:12
continue working on
4:14
this okay while I work for a uh kind of
4:17
working on a solution here I also need
4:19
to make sure the changer itself was
4:21
going to fit okay with the shock Tower
4:23
itself and you can see there's it's kind
4:25
of tough to see at this angle but
4:27
there's plenty of room there's 2 or 3
4:28
Ines in between the back of the changer
4:31
and the shock Tower uh this is with the
4:33
changer cover on the back of the cover I
4:36
just have a couple of screws again it's
4:38
all machine Hardware just a couple of
4:40
screws there holding the hollow changer
4:43
in place so that part I know I'm okay
4:45
with now I have to try to figure out how
4:47
I'm going to modify the shock Tower
4:49
cover at this point I'm going to kind of
4:51
dig into this panel so what I've done if
4:53
you notice I've taken off the uh little
4:56
pocket I made for the one zapco um
5:00
and I'm going to take off these three
5:03
panels these three uh pieces of flat bar
5:05
notice I've numbered them that way I can
5:07
replicate put it all back together
5:09
without a problem I'll take those off
5:12
and then I think I may have an idea what
5:14
I'm going to do on the back side of this
5:15
strap and how I'm going to notch it so
5:17
we'll continue on okay got this piece
5:20
stripped down um and you might be
5:22
thinking too um am I kicking myself for
5:26
building this thing with all these
5:27
straps and and it took forever to build
5:30
and now I have to modify it um am I mad
5:33
at myself for the way I designed it the
5:34
answer is no because I still have the
5:37
ability to go in and modify it uh if
5:40
anything it it is in some ways easier to
5:43
do that it's not one whole complete
5:45
thing I've got to cut out and try to
5:47
notch something else back in so I'm
5:49
perfectly fine with that so um now what
5:52
I'm thinking
5:54
is I think what I'll end up doing these
5:57
two straps are the only straps in
5:59
question cuz changer only hangs down to
6:01
about the bottom of this strap so these
6:03
two are fine these I'm probably just
6:05
going to cut maybe even flush here and
6:10
then I'll run a new piece of
6:13
strap between this nut in this nut that
6:16
is curved on the back side
6:19
here and then I will take these pieces
6:24
and I will cut those this is where the
6:26
changer the bottom of the changer goes
6:27
and I'll have to allow for about a half
6:29
an inch in uh for carpet and I want to
6:31
have clearance and all that so I'll cut
6:33
all three of these like
6:36
that put them back in and then they're
6:39
going to kind of Notch in much like the
6:41
the area is for the one zap C that's
6:43
kind of what I'm thinking but uh I'm
6:45
going to play around with it and give it
6:47
some more thought and see if that's the
6:48
direction I go all right I think the
6:51
first thing I need to do is make it so
6:53
the changer fits and then worry about
6:57
rebuilding the you know the back side of
7:00
this thing so no turning back now uh as
7:02
you can see I trimmed these straps right
7:05
here here's the
7:07
offcuts right
7:09
there and this at this point the changer
7:12
should fit I'll put it back in the car
7:14
and double check what's cool is that
7:17
this thing is even with just the two
7:19
straps without the other pieces in there
7:21
it's still very very solid again call me
7:23
crazy for over engineering but um I'm
7:27
able to do the modifications I need to
7:28
do and also you know you might think
7:32
well you should have caught this you
7:34
should have seen this coming with the
7:36
Changers um as you guys know if you've
7:38
been following along I do everything I
7:40
can to pre-plan lay things out but I
7:42
think this build um there's a whole
7:44
bunch of things in this in this area of
7:46
the car it's very sophisticated and it
7:48
would have been really difficult to see
7:50
this coming so I'm not too worried about
7:51
it I'll get it fixed so all right let's
7:53
continue on sorry one other quick thing
7:56
um I know I like showing the work on I
7:58
didn't show with this but I'm really
8:00
eager to come up with a solution here so
8:02
when to do the other side I'll show you
8:03
the work I just Ed a jigsaw uh to cut
8:06
this to to trim these four Cuts uh
8:09
without taking anything apart so it was
8:11
pretty easy all right let's continue on
8:13
all right the changer fits uh the back
8:16
is on the changer as you can
8:18
see
8:20
and I got it to fit uh now I have to
8:23
fabricate you know again modify the rest
8:26
of it to to fit in there if you notice
8:29
from
8:30
the this panel to here the Gap right
8:33
there is a half an inch but here it's a
8:35
little bit bigger so what I'll do is
8:38
when I take these pieces and cut them I
8:41
want to cut them so that there's a/ inch
8:43
between the bottom of the changer and
8:45
the top of these three pieces but this
8:47
one I'll actually slice so I have a
8:49
consistent half inch Gap all the way
8:51
around so that when that's all done in
8:54
upholstered um there's the carpet's
8:56
roughly you know an e/ or so to a
8:58
quarter so so I have a a small but um
9:02
nice consistent G there um one of the
9:04
other things I've considered too on the
9:07
Changers on either side of the changer
9:09
there is on one side it's Optical and
9:11
the other side it's the unilink so I
9:14
need to integrate um getting the cable
9:17
into the side of the changer as well so
9:19
that'll be part of this kind of a
9:20
reconstructive design but um feeling
9:23
good about this is the first step is get
9:24
it to fit now I need to make it look
9:26
pretty so all right let's continue on
9:30
shock Tower cover is back out of the car
9:33
I marked this represents the bottom of
9:35
the changer and again I want a half inch
9:37
Gap so I measured a/2 in there and then
9:40
I'm going to take my three
9:42
pieces and I've already done this on
9:46
this one uh put it in place where it was
9:49
previously and Mark it and then I'll do
9:52
the same for the other two and again on
9:54
this one I'm going to slice it and then
9:57
that should get this piece kind of
9:58
restored back into place all right I
10:01
trimmed this with a jigsaw and again
10:04
even taken the care to make sure it is
10:06
very Square so now this this is number
10:09
one I'll go ahead and bu this one back
10:11
into place and again I'll bring you
10:13
along for the cuts on the driver side
10:16
okay all three pieces are trimmed and I
10:19
realized uh when I real you know uh
10:22
determine how much I needed to trim off
10:24
this one I'm going to go through the old
10:26
holes so that's not good enough it's not
10:28
precision I could do better so I'm going
10:31
to put this in the car mock it up and
10:33
just make sure my clearances are good
10:35
and everything is good I thought about
10:37
that as I was cutting this I said well
10:39
you're going to see these cut you know
10:40
the the old holes I'm going to put it in
10:43
the car do a final mockup as far as this
10:46
you know this area goes make sure that
10:49
looks good and then I'll uh cut a new
10:51
piece of aluminum I don't have any more
10:53
1 in um I thought I had more but uh I
10:57
bought about a mile of it but apparently
10:59
obviously I've used it so I'll go back
11:00
to Home Depot and get more so let's get
11:03
it in the car see how it fits okay it's
11:06
the next day I went to Home Depot got
11:08
more aluminum um and at this point let's
11:11
see if I can slide over here you can see
11:13
I just put a little clamp in here just
11:14
to be safe because I can't I don't have
11:16
the uh end cap for the one zapco to
11:19
screw into um but you can see the Gap
11:22
with that rough cut piece that I'm going
11:24
to replace looks good I got my Gap
11:26
underneath looks good and a gap behind
11:29
looks good as well so that all looks
11:31
good so at this point I will replace
11:34
piece number three I'll go ahead and get
11:36
that cut and then do the same slice and
11:38
then get it mounted in there uh and then
11:40
go to the next step all right piece
11:42
number three has been replaced with
11:44
piece number 3A and as you can see no
11:47
holes here so I just uh replicated this
11:51
and fabricated this piece again when I
11:53
do the other side I'll bring you along
11:54
for uh the cuts and things like that so
11:58
now um I'm confident that this Gap my
12:01
gaps are going to be good here now I've
12:03
got to figure out how I'm going to do
12:04
kind of a pocket in here and then what's
12:06
going to happen with this piece this was
12:08
the top pocket piece that I made for the
12:11
one zap code as you can see I removed
12:14
the cleat where this was was catching
12:17
right so I've got to figure out now what
12:19
I'm going to have to do to modify this
12:21
piece um and kind of see how the whole
12:23
thing fits together and then again
12:25
fitting in something here to build kind
12:28
of a pock for my uphol stre so I'll give
12:31
this some thought and let's see what I
12:33
come up
12:34
with the one zapco pocket is now back
12:38
into the uh shock Tower cover um I've
12:41
removed this bracket um I'm still going
12:43
to figure out what I'm going to do there
12:46
uh but now I'm going to put this back in
12:47
the car just cuz I don't want to take
12:49
anything for granted at this point make
12:50
sure everything looks good it fits and
12:52
then the last piece of the puzzle is
12:53
going to be figuring out how I'm going
12:54
to fabricate this area here um I have
12:58
some ideas but Let's uh get it in the
13:00
car make sure it all looks good and
13:01
we'll go from there okay got the piece
13:05
back in the car I put the end Link in
13:07
for the one zap go just have one bolt
13:08
holding it in place and then I've got
13:10
the changer in there as well and now you
13:13
can see it's not the exact same Gap here
13:16
and here uh it's within a 16th or
13:19
whatever but that is good I I want to be
13:22
able to maintain as much of the shock
13:25
Tower cover as possible it look like it
13:27
was intentionally notched out for these
13:28
pie pces back behind the changer what
13:31
I'm actually thinking
13:33
is at least for now I'll give it some
13:36
more thought and I know I'm all about
13:37
you know don't go to the next spot until
13:39
the next thing until the current thing
13:41
is as good as I can get it it's not a
13:43
question of it being good or not but I'm
13:45
thinking that I'm going to just leave it
13:48
with nothing back there when I upholster
13:50
this I will put carpet over the entire
13:53
piece and then I will steam it and take
13:56
pressure and basically push the carpet
13:58
if ly stretching the carpet back in that
14:01
corner the changer goes into that area
14:04
by 38 of an inch so I don't have to do
14:07
much and I think I can um basically just
14:11
get the carpet in there without any
14:12
issue so that's going to be the plan all
14:15
right got the piece back out now I'm
14:17
looking at when it was in there it was
14:19
kind of tough I was just holding things
14:20
and all that and this I'm going to leave
14:24
this piece in and these brackets these
14:25
brackets actually really strengthen the
14:27
whole thing up especially because I cut
14:29
these two so the thing is again it's
14:31
still super solid um but now what I'm
14:34
going to do is the back of the changer
14:37
comes a little bit closer than I want to
14:38
this area so I'll trim this this was
14:42
where the screw went for the bracket
14:44
somewhere around here here's a bracket
14:46
it was a right angle bracket that went
14:49
in like this just a little piece of
14:52
galvanized uh Plumbing strap and that
14:55
basically held it to here so what I'm
14:57
going to do instead is I'll still reuse
14:59
this hole and I'll put another hole
15:02
right here and I'll just do a bracket to
15:04
this back side so then that this is
15:06
still going to be very very solid and
15:08
the whole thing should be good so I'll
15:10
go ahead and do that now and then do the
15:12
final fitment and then should be go good
15:15
at that point to go to the next
15:17
side all right holy cow all right so I
15:20
trimmed this I added a little cleat just
15:23
out of that galvanized back strap back
15:26
here that keeps this really nice and
15:29
solid and then I also this was a little
15:31
bit flimsy here um so I added a little
15:34
cleat with a kind of an offset back
15:37
there you can see that again just using
15:40
that uh galvanized steel strap so now
15:42
the whole thing is back to being super
15:44
solid and I've got it notched out for
15:46
the changer so that is that side done
15:49
I'm going to put it in the car do one
15:51
last dry run of everything with the one
15:53
zap go link the changer um get in there
15:56
and make sure everything looks good with
15:58
the spacing of that especially up in
16:00
this corner that was a little bit wonky
16:02
but I think since I trim this will be
16:04
good and then from there be able to move
16:06
on to the other side hey how's it going
16:09
it is Mike um on the shock Tower covers
16:14
I am going to get this passenger side in
16:18
put all the parts in and uh show you
16:20
what that looks like and make sure it's
16:22
100% I am going to I I know I talked
16:25
about walking you through all the
16:27
changes um on the driver side shock
16:29
Tower to show you everything it's
16:31
basically the same kind of work that I
16:33
did when I initially built those so
16:35
there's really nothing crazy there and
16:36
it takes me a bit longer to do the work
16:39
when I am filming so I will knock that
16:41
out and then before this video is
16:43
concluded I'll show you both sides and
16:45
we'll be able to check the box and say
16:47
okay shock Tower covers are done
16:49
Changers fit everything is really good
16:51
then that'll wrap this video up and then
16:54
the next video is going to be finally
16:57
these side panels I really am looking
16:58
for to getting these things uh
17:00
especially being able to get them to
17:01
where like the fleece is on them I've
17:03
got the skeleton built we'll put the
17:05
fleece on and then as my buddy Joe said
17:08
start slinging some fiberglass and get
17:10
these things done and then from there
17:12
that the trunk is trimmed out then it's
17:14
going to be a matter of going back
17:15
through things and going into more
17:17
detail where I'll be doing like
17:19
paintings zapco and things like that so
17:22
all right so with that let me go ahead
17:23
and get this uh passenger uh shock Tower
17:27
cover installed with all parts and let's
17:29
take a look and make sure it is
17:32
100% okay passenger side is back
17:35
together and again see the Gap that I
17:37
have there kind of going down here
17:39
trying to keep
17:40
it pretty consistent when the carpet is
17:43
in there again I'm just going to push
17:46
the carpet in as much as I have to to be
17:48
able to fit the changer and then the
17:50
cable will come through the carpet as
17:51
well you'll see more of that when we get
17:52
to the upholstery stage um I also put
17:55
the floor in I've removed the mil BS and
17:59
all that stuff just because I want to
18:00
triple check clearances my gaps there um
18:04
I built myself a very sophisticated
18:08
gauge it's a piece of aluminum that I Ed
18:10
to double check on my gaps I want an
18:12
eighth of an inch uh so you can see the
18:14
gap between the zebrawood and the shock
18:15
Tower cover for example is exactly an
18:18
eighth of an inch on both sides um and
18:21
as I do you know I'm kind of wrestling
18:23
around with things I had that shock
18:25
Tower cover in and out 20 times probably
18:28
I want to make sure everything is still
18:29
lining up so all right so this side is
18:32
good we're 100% the back of the changer
18:35
is is on there the problem is solv so
18:37
now at this point I'm going to do the
18:39
driver's side and again I'll only record
18:41
things that are material I'm not going
18:42
to walk you through the whole process so
18:44
that I can get this knocked out and then
18:46
get over to these side panel
18:49
covers all right working on the driver's
18:51
side I just want to show this you can
18:53
see barely that line that I drew right
18:56
there on the PL number one and that is
19:01
the same exact measurement as what I
19:04
have over on this side obviously to keep
19:06
them symmetrical and before I cut it I
19:10
made that uh Mark measured it out laid
19:14
it out and then just did a visual to
19:16
make sure it's good because if you
19:17
recall that piece number one I'm not
19:19
going to use I'm going to scrap that and
19:21
I'm going to build a new piece because I
19:23
don't want to have those screw holes
19:24
visible so now I can take it out make
19:28
that piece number one and then cut the
19:30
other two pieces and I should be able to
19:32
pop it back in um put everything back in
19:34
place the one zapco end up here um the
19:39
milberg floor and just make sure
19:40
everything's 100% all my spacing is good
19:43
again if there's anything material um
19:45
that I find as I'm doing that I'll be
19:47
sure to add that to this video but uh
19:49
standby let's get this thing cut and uh
19:52
and then I'll have to put the back of
19:53
the changer on obviously that changer
19:55
has the back and that one does not so
19:58
all right let me continue on and I'll
20:00
show you what I get to all right I
20:02
figured I couldn't do a video without
20:04
showing
20:05
something um this is pretty sketchy uh
20:08
and I want to show this because you guys
20:10
always see me doing things you know
20:13
really taking my time and doing it the
20:15
proper way um and that's what I try to
20:17
do as I am Precision mic right that I
20:20
call myself so but here I need to cut
20:24
these straps I did this on the other one
20:27
and they're curved right there's no I
20:29
can't put them on a on any kind of a saw
20:31
that I own at least to be able to cut
20:33
them so I have to do it freehand with a
20:35
jigsa like this right and it's a little
20:38
bit sketchy so this would be an example
20:40
again I want to show you guys The Good
20:42
the Bad the Ugly all of that so I'm
20:44
going to go ahead and I'll cut one of
20:46
these out just to show you how I do this
20:47
again being really careful that the saw
20:50
doesn't get caught up on anything uh
20:52
that's another reason I flushed in the
20:54
hardware right so if I have to do stuff
20:55
like this I don't have a problem um and
20:58
also I'm running it at a really low
20:59
speed so let's go ahead and cut this
21:24
one all right that one is cut
21:27
through you can see right there and
21:31
that's basically I'll do the same thing
21:32
on the other side nice and slow take my
21:34
time and uh that'll be cut so uh let me
21:37
go ahead and do that and then I'll get
21:39
the other uh pie the two pieces cut that
21:41
I need to cut and then I need to make
21:43
that number one uh bar from scratch all
21:47
right I got both straps cut as you can
21:50
see there the other two and then I'll go
21:52
in with a file um and just clean up the
21:54
edge but it's quite quite a clean cut as
21:56
you can see I just used the the existing
21:59
piece of flat bar is my guide all right
22:02
let me show you at least part of this so
22:04
this is the new piece number one and as
22:07
you can see I need to cut that amount
22:10
out so once again I'm going to use the
22:12
jigsaw slow speed and I've got some WD40
22:16
on the blade I'll put a little bit more
22:18
on because I'm going to do the long cut
22:21
first and this too is pretty sketchy so
22:24
I've got
22:25
my just a workbench here and I've got a
22:28
hole cut in it this allows me to get
22:30
kind of things like this to be able to
22:32
uh get it right up to this to this Edge
22:35
like this so I me let me show you how to
22:37
do
22:55
this and that's basically
22:59
um the cool thing about this piece of
23:01
wood if you notice there's all kinds of
23:02
cuts in it I just replace the piece of
23:05
wood when it's totally shot and I don't
23:07
mind if I go into it I'd rather be safe
23:09
and not to have this hanging off the
23:11
edge like this flopping around and and
23:14
potentially the saw gets loose I'd
23:16
rather have it right up like this work
23:18
it and then I just kind of sneak it out
23:20
that way so all right let me go ahead
23:22
and get this one cut and ready to go all
23:25
right I've got the new number one piece
23:27
cut I've got my holes uh lined up and
23:31
redrilled and counter sunk and as you
23:34
can see I've got the cut made um but
23:37
it's not perfect so this I'll take a
23:39
file uh with a straight edge uh I showed
23:42
that earlier in the video and then just
23:43
clean up that edge and make sure it's
23:45
perfectly straight use my file and now
23:48
you can see that's nice and straight uh
23:50
especially when you consider there's
23:51
going to be carpet going over it that's
23:53
an eighth of an inch thick you're never
23:55
going to see any kind of flaws but again
23:57
I want to be accurate all right right uh
23:59
now I will be able to add this piece
24:01
back to the shock Tower cover and I'll
24:03
get the other two pieces trimmed okay I
24:05
got both pieces cut and again I'm going
24:07
to take a square and a file and make
24:10
sure these are perfectly
24:12
Square all right I got the back on the
24:14
changer and I've got the panel set to go
24:17
in the car so let's give it a test fit
24:19
see how it looks I do still have to
24:21
modify the pocket I'm calling it for the
24:24
one zapco which is these two pieces here
24:27
and I have to add a cleat for the number
24:29
one piece in the shock Tower cover but I
24:31
want to test fit it make sure it's all
24:33
good all right there is our Gap and
24:36
everything looks good it looks very
24:37
symmetrical compared to the other side
24:40
so now I'll pull everything back out and
24:43
um deal with the zap Co pocket and then
24:45
again I'll add a screw right on the top
24:47
of the uh number one piece that I cut
24:50
cuz otherwise it's kind of flimsy and
24:51
it'll Bend when I go to upholster
24:54
it I am officially
24:57
unstuck so everything came up great on
25:00
this side again that's the notch out on
25:04
the other side same thing you can see
25:06
the same thing there so at this point I
25:09
am done with getting the Changers to fit
25:12
that was um I don't know how many hours
25:14
of work but a decent amount of work to
25:16
get myself out of the jam that I was in
25:19
it wasn't a big deal I know I'd come up
25:20
with something but I had to just grab
25:22
some tools and get to work and start
25:24
doing it so that is going to close out
25:27
this video um I apologize for the um
25:31
delay in getting out Misa videos it's
25:34
again I'm I can make excuses but I
25:36
really need to roll my sleeves up and
25:38
get to work in the next video we are
25:40
going to uh make some progress hopefully
25:43
build these things in entirety in the
25:45
side panel so I'm pretty much sick of
25:47
hearing myself talk about it it's time
25:49
to get those going so thank you very
25:51
much for watching I certainly appreciate
25:53
it uh if you have not yet please
25:55
subscribe tell your friends and I will
25:57
see you in the next video thank you very
25:59
much take care