CarMiZa Dynamat Preparation
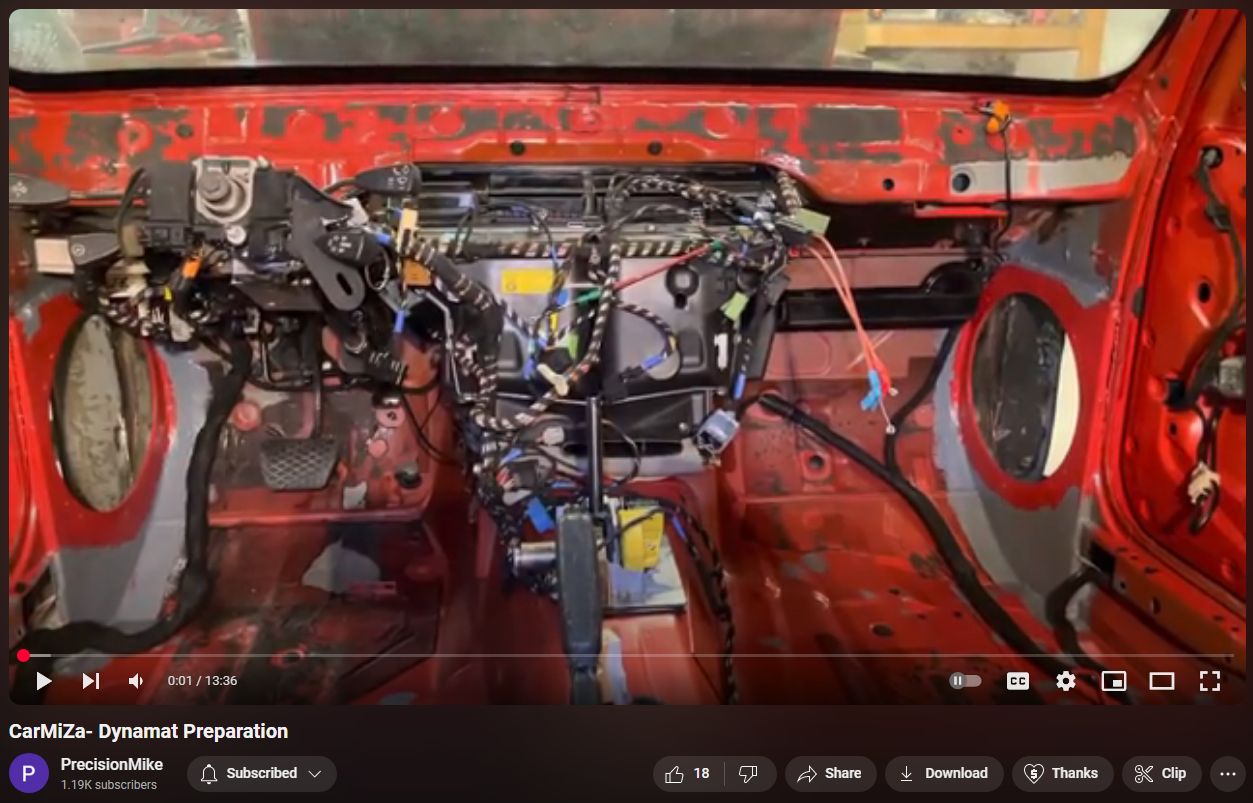
The blog post titled “CarMiZa Dynamat Preparation” on carmiza.com, dated January 16, 2025, details the extensive process undertaken to prepare a BMW 3.0 for new Dynamat installation. The author, Michael, explains that after addressing the OEM wiring, he spent approximately 57 hours removing the original Dynamat, which had been installed in 1994 and was deteriorating. Following the removal, he meticulously cleaned all surfaces and applied epoxy primer to any exposed metal areas to prevent corrosion. The post includes a video that provides a comprehensive walkthrough of the preparation process.
Transcript
0:01
hey how's it going welcome back to
0:03
carmiza uh if you're not familiar with
0:06
the name miza m-i-z-a it's mcnee is my
0:09
last name so that's the mi and za is for
0:12
zausmer earl zausmer the original owner
0:15
of this car
0:16
uh today is
0:18
thurs or uh gosh
0:21
wednesday august 31st
0:24
2022 and the subject of this video is
0:27
dynamat prep so the last video i posted
0:30
uh was everything to do about the oem
0:32
wiring and getting that sorted and
0:34
routed and cleaned up what i've done
0:36
since then is kind of undid the mounting
0:40
of the wiring if you will so if you look
0:42
down here these covers are now off i've
0:45
got the battery out
0:46
um
0:47
and effectively i am moving it out of
0:50
the way to prepare for dynamat okay so
0:53
that again is the purpose of this whole
0:54
video is to talk about everything i did
0:56
to prepare for dynamite the car is now
0:58
100 ready to start dynamatic um
1:02
since i've did the oem wiring video to
1:06
get to this point and everything i'm
1:07
going to discuss in this video took me
1:09
57 hours so far so uh first thing i want
1:13
to describe is basically the prep i had
1:15
to remove the old dynamat there was
1:18
my garbage man is probably still pissed
1:21
at me because of how much dynamite i
1:23
pulled out of the car
1:24
this had the original dynamat 6260
1:27
series the super dynamite
1:29
there was also dynamite light there was
1:31
a bunch of different versions of
1:32
dynamite in the car
1:34
um that earl and henry put in back in
1:36
1994 so
1:38
um coming up on 30 years that was the
1:41
asphalt based product and some of it was
1:44
still sticking but for the majority of
1:46
it it was kind of peeling and falling
1:48
off so i made a decision at that point
1:51
once i got the car kind of stripped down
1:53
to remove all the old dynamat
1:55
clean the entire car every surface and i
1:59
got it uh
2:01
you know it's
2:02
squeaky clean basically
2:05
this took
2:06
an incredible amount of time to remove
2:08
all the old dynamite from inside the
2:10
doors from all over the car
2:12
and get the car ready so that was one of
2:14
the first things i did the next thing i
2:16
did you'll notice obviously we've got
2:18
the
2:19
baffles are prepared those are all ready
2:21
to go for the bowers and wilkins uh
2:24
matrix 801 they're a 13-inch woofer
2:27
so once i completed the steel it was
2:30
bare metal as you can see everything
2:32
gray there is epoxy primer so epoxy
2:35
primer was applied to not only the kick
2:37
panel areas where there was bare metal
2:39
but anywhere else in the car that i
2:41
found that had bare metal so i went
2:44
through
2:46
and basically just made sure there was
2:48
no bare metal even though i'm going to
2:49
dynamite over the top of it i didn't
2:51
want anything to corrode later this area
2:53
had been modified there's a
2:56
a new metal floor in there for the dual
2:58
batteries that were in the car
3:00
and so i want to do epoxy primer that
3:03
whole area this
3:04
this hump right here where the back seat
3:06
goes that was all kind of
3:08
scratched up and everything so again i
3:09
didn't want any bare metal to possibly
3:11
corrode so that got taken care of um
3:15
next you'll notice
3:16
in the kick panel areas and along the
3:18
the
3:19
kind of the door opening there i painted
3:21
that area red the reason i did that
3:24
is because i want after i'm done
3:27
dynomatting i want everything that
3:29
you're going to see to be red even
3:31
though the interior is going to go in
3:32
and all of them very fussy in particular
3:35
if you're not aware the way i'm doing
3:37
the woofers and the baffles the woofer
3:39
is going to mount directly to that
3:41
baffle there will be no gasket the
3:43
intention is to in intentionally
3:46
couple the woofer to the car i know a
3:49
lot of people say oh decouple the woofer
3:51
all of that that was one of the secrets
3:53
or kind of the magics of this car
3:56
is the woofers were mounted directly to
3:58
the metal and it really made a big
4:00
difference in terms of the tactile feel
4:02
detail impact of the bass response so
4:04
that is why the the rings themselves
4:07
um will be painted
4:09
are painted red what i'm going to do is
4:11
basically take a sheet of dynamite lay
4:13
it on the floor put the woofer over the
4:15
top of it cut out around the perimeter
4:18
of the woofer and then apply the dynamat
4:20
so
4:21
basically that baffle will all be
4:23
covered with dynamat
4:25
but where the actual woofer is going to
4:27
go in will be
4:29
uh will not be covered with dynamite for
4:31
that very reason all right um one of the
4:33
other things i did you'll notice
4:35
throughout the various iterations of
4:37
installations in the car um
4:40
it was zapped by its fair share of
4:42
stinger screws so
4:44
anywhere where there were previous holes
4:46
that may have gone either
4:48
through the car or into the car i went
4:50
through i just realized actually i
4:52
missed one i gotta get this one i'll
4:54
take care of that
4:55
um i was working pretty late the other
4:57
night so i must have missed it but you
4:58
can see throughout the car i've got a
5:00
bunch of silicone spots and that again
5:03
is to basically cover up those those old
5:05
screw holes the objective here basically
5:08
think of this is i'm getting the car
5:10
back to kind of a
5:12
as stock i guess as possible in terms of
5:15
bringing it back to like
5:17
ground zero right before i actually
5:19
start the install so that's what's going
5:20
on there um another thing i did um went
5:24
a little bit crazy here and removed the
5:26
entire moon roof cartridge
5:28
um the objective here was to make sure i
5:30
can dynomat every single square inch of
5:33
this
5:34
uh without being interrupted and having
5:36
any kind of an issue and you'll see that
5:38
i've got that carefully sitting on top
5:40
of the car um this will also
5:43
uh what i'm going to do here when i
5:45
dynamed this is put a layered item at on
5:48
put the cartridge back in make sure
5:49
everything works as far as clearance
5:51
goes take the car cartridge back out and
5:54
then put the second layer of dynamite in
5:55
so kind of gives me that flexibility
5:57
because the you know it's it's not that
5:59
hard to get it out by yourself it's kind
6:01
of a bear but it's doable so
6:04
all right let's talk a little bit more
6:06
um about the doors
6:08
i'm going to go ahead and hop out
6:11
and
6:13
i want to show you some some details on
6:15
the doors um there's quite a bit of time
6:18
and care taken here so uh first off one
6:21
of the things that you'll notice is i've
6:23
got this
6:24
sharpie line all the way around the
6:25
perimeter and the objective here was to
6:28
make sure when i started dynomatting i'm
6:30
just going to go
6:31
beast mode and just cover everything
6:33
right so i want to be careful here and
6:35
make sure that i have an ice cream clean
6:38
crisp line that i go up against the car
6:40
is going to be getting an entire respray
6:42
and i want to make sure
6:44
uh that when that happens i don't
6:46
pigeonhole myself and end up in a
6:48
situation where we've got overspray on
6:50
the dynamat or
6:52
something like that so i basically just
6:54
went in an inch and then that gives me
6:56
some room to work with i don't think you
6:58
know sacrificing an inch that's not
7:00
going to be dynamited i don't think
7:01
that's going to make a big difference in
7:02
the end so
7:04
that was the first thing um
7:06
the other thing that i did i know a lot
7:08
of people do whatever you guys call them
7:10
knock off or knock
7:11
knockout plates cover plates whatever i
7:14
did the same thing even though there
7:15
will be no drivers in the doors so
7:17
basically the drivers in this car again
7:20
will be the woofers and the kick panels
7:22
and there'll be a four and a half inch
7:24
in tweeter co-actually mounted at each
7:26
end of the dash that's it there's
7:27
nothing in the doors but despite that
7:30
my objective there was to have the doors
7:32
be as solid as possible and remove any
7:35
kind of road noise that i possibly could
7:37
so if you notice both doors on that side
7:40
the knockoff plate or cover plates
7:42
whatever you want to call them are
7:44
mounted currently so if we look at this
7:46
door i can show you a little bit more
7:48
detail about this uh what i did here is
7:51
some threaded inserts um a little pro
7:54
tip too to help you guys out if
7:56
anybody's looking to do these um
7:58
i would highly encourage you to use the
8:00
aluminum versions i tried using
8:02
stainless steel you know because i'm i
8:04
don't want anything to corrode
8:06
and the stainless steel were a beast i
8:08
ended up breaking a couple of the tools
8:09
i bought some decent tools but they
8:11
still broke so
8:13
again kind of a pro tip would be to
8:14
stick with the aluminum and obviously
8:16
the aluminum will not corrode or rust i
8:17
want this car to be in one piece when i
8:20
am long gone and in the ground so i do
8:22
not want it to corrode um
8:25
the next thing i did from there was i
8:27
used as you can see over there uh there
8:30
is all stainless screws and um washers
8:33
that hold those panels on now those
8:35
panels are also going to get a layer of
8:38
dynamite and the front and the back of
8:40
each panel okay
8:41
um
8:42
additionally with the panels i actually
8:44
have one right here i wanted to show you
8:46
so this is
8:48
this one would go here on the driver's
8:49
side i have what i did is i started with
8:52
abs because it's it's thin easy to work
8:55
with i can bend it some of these have
8:57
some contours to them to meet the
8:58
contours of the door
9:00
um so it's easy to work with in that
9:02
regard but to me it wasn't you know
9:04
super super solid um sorry one second
9:08
drove my notes here wasn't super super
9:10
solid so i wanted to do something to
9:12
reinforce this so i added a piece of 16
9:15
gauge steel to the front
9:17
and the back of each of these panels so
9:20
what i ended up with is the total for so
9:24
there's two cover plates per door
9:26
um a total of eight and the overall
9:30
weight is 16.4 pounds for all eight
9:33
cover plates so they average a little
9:35
over two pounds a piece this i think is
9:37
going to add a lot of dirt you know
9:39
again theft
9:40
or a heft to the doors
9:43
and um
9:45
make them more solid and reduce road
9:47
noise this this metal 16 gauge is the
9:49
equivalent of what is in the car the car
9:51
is 16 gauge steel is what they used in
9:53
this car so i've got two layers so if
9:55
anything it's actually thicker than if
9:58
this thing was just all one piece from
10:00
the factory okay now the other thing
10:02
that's really important i think is
10:04
functionality and serviceability um
10:07
i notice a lot of installs that i see
10:10
where people dynamite the entire door
10:11
and just cover the entire thing but if
10:13
you get you know the window regulator
10:15
goes you get one of these plastic clips
10:17
this car is 30 years old right
10:19
it's this needs to be serviceable so
10:22
these panels as you can see takes maybe
10:25
two minutes per door to be able to
10:27
remove these panels and that will be the
10:28
case after our dynomat again the
10:30
dynamite's going to kind of roll into
10:32
this
10:33
hole
10:34
these panels will each be covered front
10:36
and back and then they'll be able to
10:38
screw on and screw off the screws would
10:40
be accessible in other words they won't
10:41
be covered with dynamat so again i'm a
10:43
big proponent of being serviceable i
10:46
think that's a really big thing
10:48
all right basically from here uh my next
10:51
move with the car
10:53
is going to be two layers of dynamat
10:55
throughout every single square inch of
10:57
the interior is going to get two layers
10:59
of dynamat um one other exception too
11:02
you'll notice i did like you can see it
11:03
over on that b pillar see that sharpie
11:06
line i even did the same thing there
11:08
just to make sure i come up against that
11:10
sharpie line because
11:11
where these uh door moldings fit there's
11:14
no room for dynamat so this lip is gonna
11:17
remain without dynamat so that again is
11:20
another reason why
11:22
in this area you can see i painted this
11:24
right it wasn't painted because this is
11:25
all welded i actually felt bad covering
11:28
the the welds with paint because they
11:30
came out so good again shout out to my
11:32
future son-in-law james abrams did an
11:35
incredible job welding these things
11:37
these panels you could probably lift the
11:39
car by those things it's so solid look
11:42
at the welds up there you can see it's
11:44
just incredible
11:45
all right so anyway um two layers of
11:47
dynamat i am using dynam brand product
11:51
um that was is what was used in a car in
11:53
the past and that's what's gonna go back
11:55
in the car that is i know there's a
11:57
million different products out there and
11:58
some people argue wow it's all the same
12:00
and that stuff's too expensive and all
12:02
of that i'm sticking with what i know
12:04
works that product um even though it you
12:08
know was peeling off when i got into the
12:09
car there was a a lot of it that was
12:11
still stuck in the car and i know it's
12:13
going to work well the new product is
12:14
that beautiful
12:16
material so i know it's going to stick
12:18
well and hold up very well i estimate
12:20
it'll take about 60 hours or so to just
12:23
do the dynomat before i put
12:26
before i do anything else after i do the
12:28
dynomat i'm going to go through and
12:29
re-secure all of the wiring obviously as
12:32
you can see i intentionally have
12:33
everything just kind of loose and out of
12:34
my way so i can quickly work and apply
12:36
the dynamat
12:38
to these clean doors um but then after
12:41
that i will go through and re-secure
12:43
everything just like you saw in the oem
12:45
video wiring video
12:47
after that i will be working on the
12:50
audio wiring um basically just getting
12:53
the wiring that's got to be run
12:54
throughout the car against uh straight
12:57
wires is partnering uh with the build um
13:00
with me on the build and will be
13:02
supplying all of the audio wiring for
13:05
for that so uh one last thing it's i
13:07
think my timing is just right it's still
13:10
it's despite being the end of august
13:11
here it's between 105 and 110 degrees
13:14
right now here in the phoenix area um so
13:18
when applying dynamite i'll still use a
13:19
heat gun because i really like to get it
13:21
good and hot and make it stick well but
13:23
my timing is good at least i don't have
13:24
to worry about it being brutally cold or
13:26
anything like that all right that should
13:28
be it for now i certainly appreciate you
13:30
watching if you do have any questions
13:31
let me know and i'll see you next time
13:34
after the dynamat is complete take care