CarMiZa Trunk Details part 48- Lighting Design, Testing & Planning
This is a different kind of video. Most of the time on this channel, you see the fabrication — cutting, machining, mounting, wiring. But what you don’t usually see is the design phase. And if I’m honest, I probably spend more time designing, testing, comparing, and overthinking than I do actually building. In this video, I walk through the entire lighting design process for the trunk of CarMiZa — testing multiple MR16 fixtures, comparing beam angles, analyzing spectral transmission graphs, and evaluating dichroic lens options side-by-side (including the original lens from the 1994 build). This is the part where I scratch my head, test ideas, reject things, and refine the details before anything gets permanently installed. If you enjoy seeing the thought process behind the build — not just the finished result — let me know in the comments. I may do more of these design-focused videos in the future. Thanks for watching, and enjoy!

At this point, over 2,000 hours on the build and at least that much additional in design time.
Transcript
Click to reveal
Welcome back to another Carmea video. It's been a while since the last one. Let's go ahead and get right into this
0:06
one. In the last video, I was not sure what I was going to work on, and I've decided to work on the trunk lighting.
0:12
Uh, in this video, this is going to be a little bit different uh than my normal videos. There will be no building of any
0:18
kind. This is going to be the results of my testing, research, the challenges I
0:23
ran into uh which still are not done. um and ultimately basically all of my
0:28
selections for all the different variables for the lighting. Let's go ahead and begin. All right, so to begin,
0:34
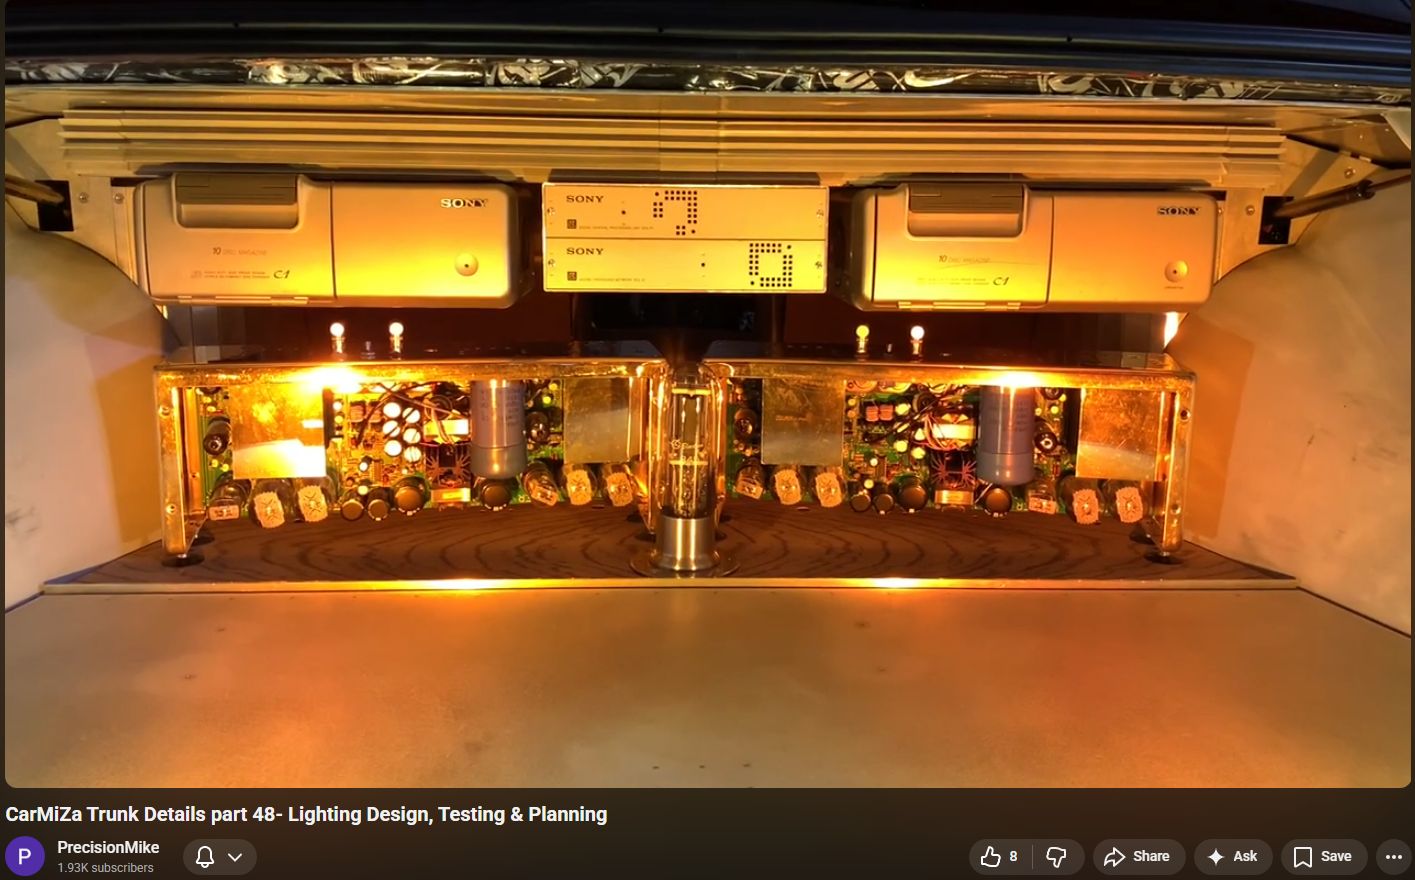
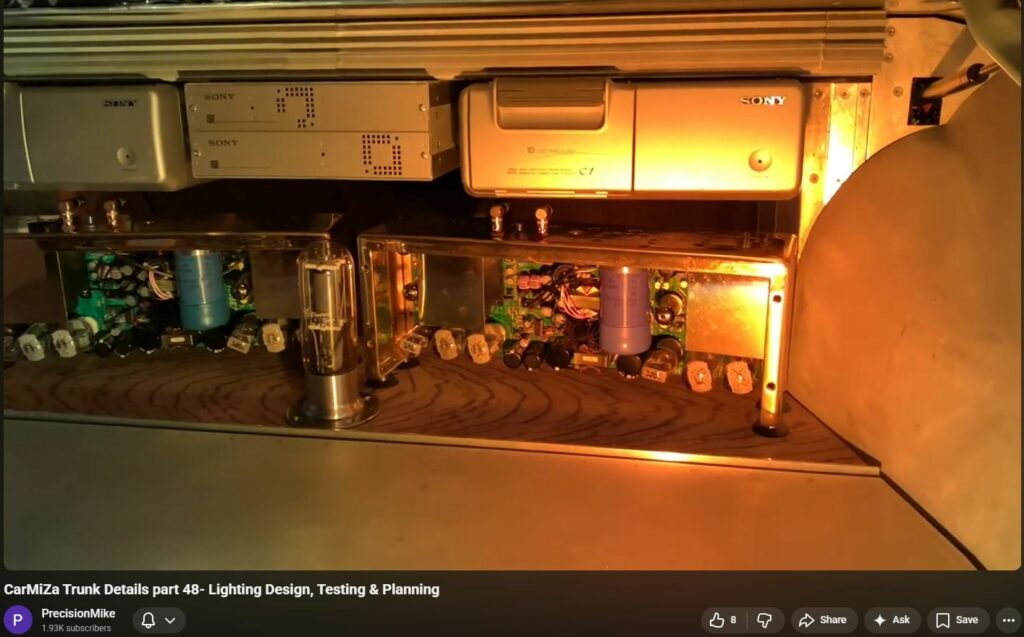
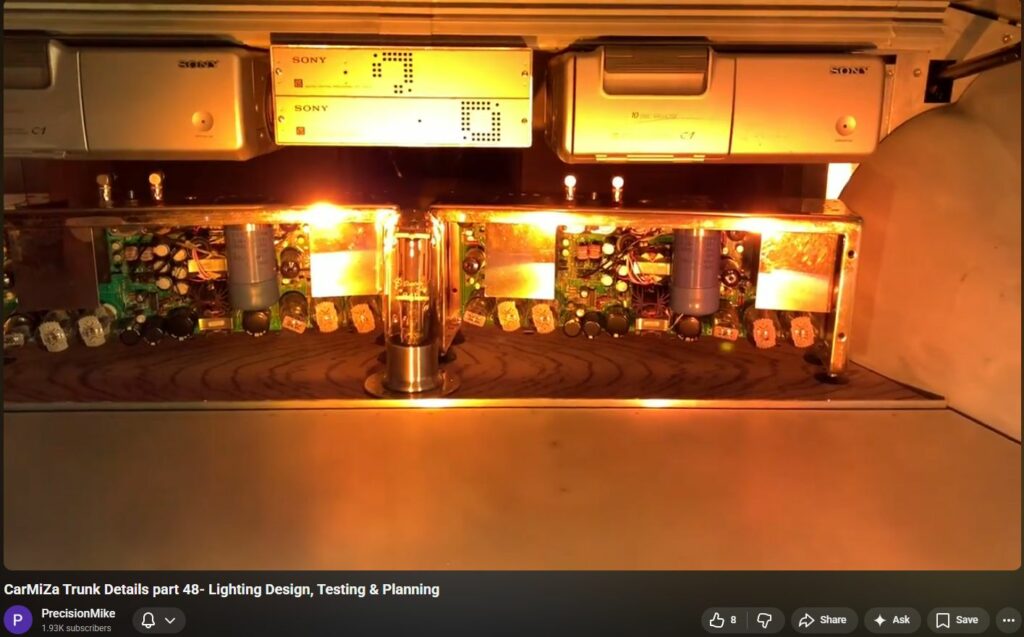
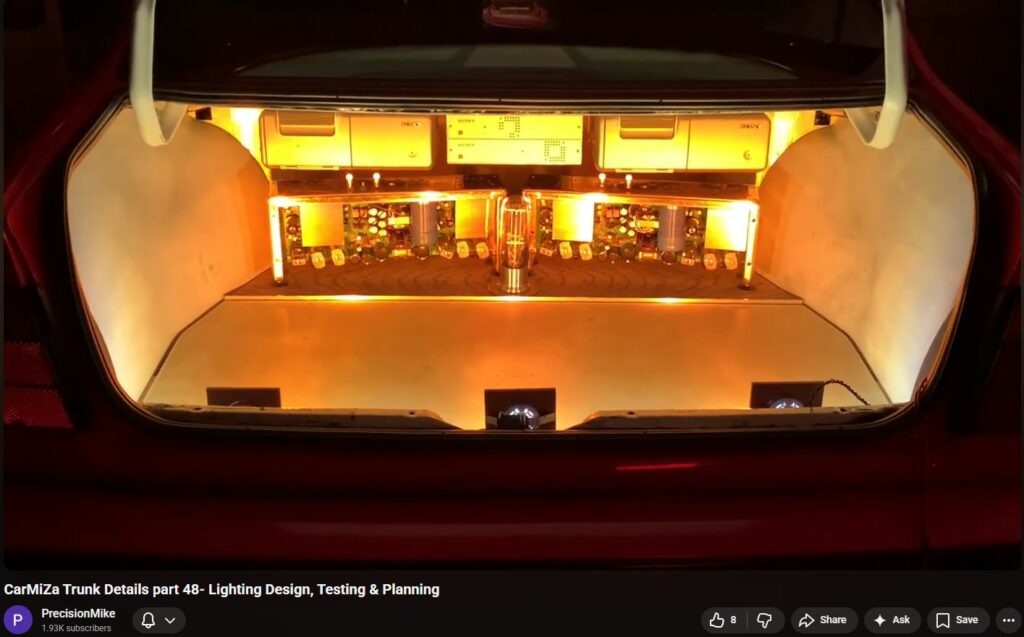
this is going to be a shot of the exact lighting setup that are all had in the car. These are the exact same lights and
0:42
the same lenses. We'll talk about the dicroic lenses in just a bit. Uh may not be showing up perfectly on camera, but
0:49
this produced an unmistakable glow. This looked absolutely incredible and kind of
0:54
like the sound of the system. It's very warm, very natural, not harsh, and it basically the best way I could describe
1:00
it is it looks like natural candle light. It's just incredible. Um Earl was very unique when he built the car in a
1:06
lot of ways and in this way as well as it relates to the lighting. Most car audio systems, mine included back in the
1:13
day or even modern car audio systems normally rely on edge light lighting or
1:18
LED lighting where you see the actual lights, things like that. Earl wanted something unique. He wanted it to be
1:24
classy, elegant, and kind of fit the rest of the build. So, he decided to use
1:29
home lighting. He wasn't afraid to step outside of the box and do something kind of unique. Um, so that's basically again
1:37
exactly how we got to where we are here. Um, I recently asked him about, hey, like where did you get this stuff? How
1:43
did it all work? And basically he described it as he went to a home lighting company, asked for some 12vt
1:50
lights that would work but were a nice kind of a direct lighting like this. They set him up at the lights and then
1:56
right before he left they he said the guy at the counter said, "Hey, we've got these new lenses. They're called diroic
2:03
lenses that you can put over the top of the lights and they give you kind of a a different color. Do you want to try some? And they had like whatever it was
2:10
a five or a six-ack different colors. Earl said, "Sure, fine. Whatever." He grabbed them, brought them home. There
2:15
was a red, blue, yellow, and then this orange-ish amber. And his just like
2:21
again the rest of the car. As soon as he put this light on, this lens on and shine it on the gold amplifiers, he knew
2:27
right away, all right, that's the color. In a little bit, I'll show you what these things look like without the lens,
2:33
and it's just horrible, uh, in my opinion. So, um, like the rest of the
2:39
build, my objective is to stay true to what Earl did, but wherever possible, and I saw somebody on Facebook recently,
2:46
um, say this, do I dare say carefully upgrade. I've got huge shoes to fill. I
2:52
don't want to disrupt Hurl's vision, and I'm trying to just very carefully accentuate it. So, all right, with that,
2:58
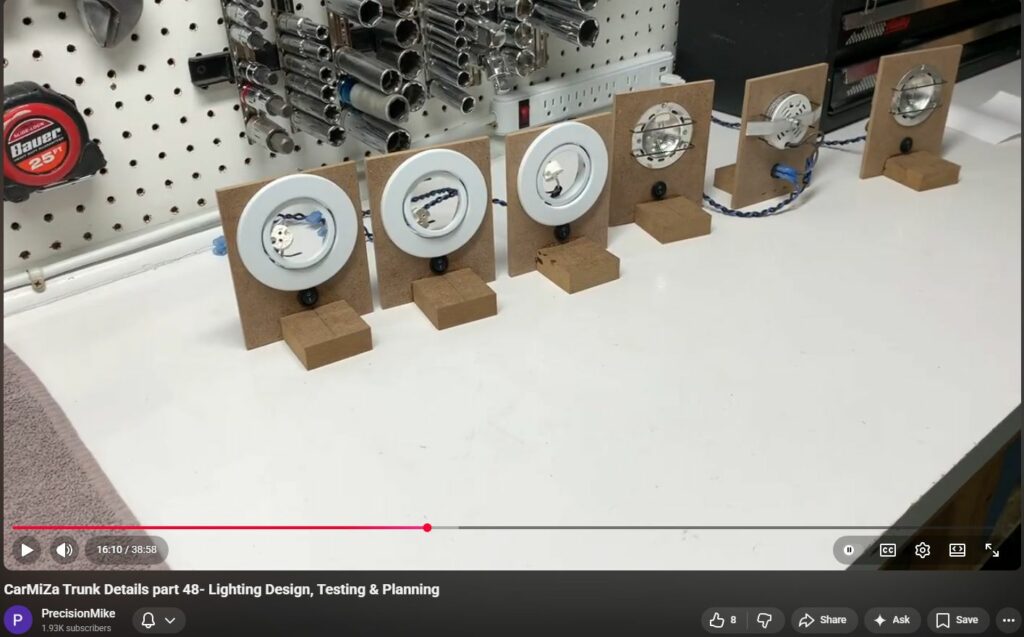
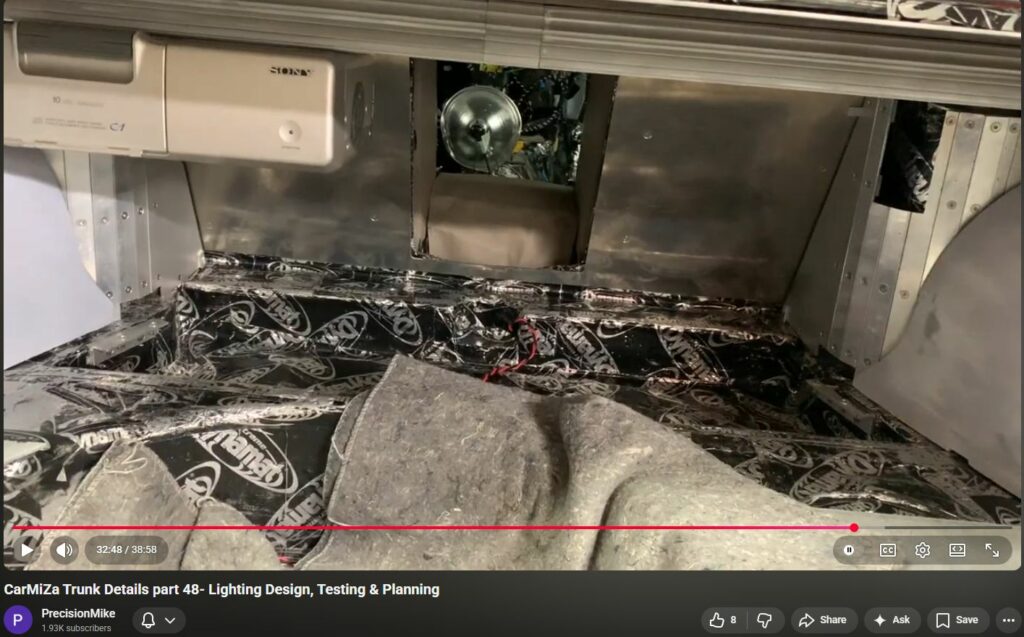
let's go on to the next part. Okay, so this is what the lights look like. If you notice, I have the near
3:04
wall, that panel out. I'll talk more about those mounts I made, those little uh temporary mounts to hold the lights
3:10
in a little bit. Um, but this is the exact location where Earl had the
3:15
lights. It's the exact angle. It's the locations, and again, it is the lenses. So, this is kind of my reference. Um,
3:22
and again it is direct lighting where the lighting itself is shining on the object, which again is quite unique in
3:29
car audio. By the way, throughout this video, if you happen to see this uh in
3:34
the background, this is my C32 AMG. And if you're wondering, I have it jacked up
3:39
uh almost 17 in off the ground because I need to replace the transmission. I love
3:44
this car. I've owned it for on and off for I think 13 years now. Uh, obviously
3:50
I am very much into nostalgia and love the car. So, I've got a new transmission
3:55
or used transmission sitting over there. I'm doing this project simultaneously. While I'm waiting for things, parts to
4:02
come in for Misa, I'll chip away and work at it. If you're interested on the channel, there will be a full video
4:08
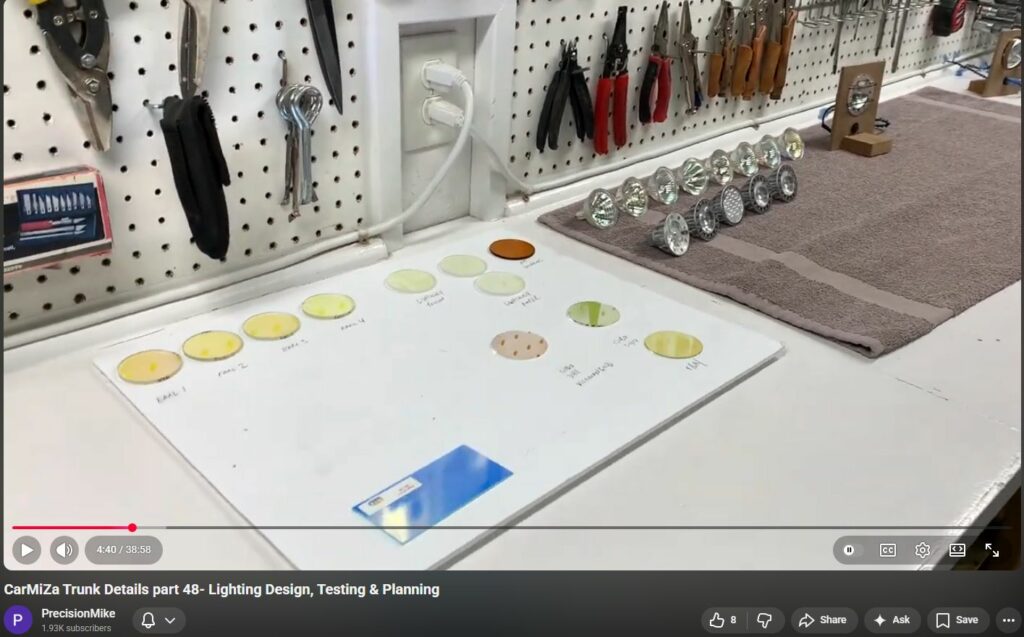
showing the the entire process of the transmission. All right, let me show you what I've got going on here. I thought
4:14
this was going to be again relatively quick and easy. find the lenses, um, get
4:20
some lights that look similar, find some mounts, and then start installing. I am a month in, probably, I don't know, 30
4:28
or 40 hours of time dedicated into buying stuff, ordering parts, researching the testing I've done thus
4:35
far. Um, I'm in a pretty good spot, but the biggest challenge is the dirolic lenses. So, let's start out with the
4:42
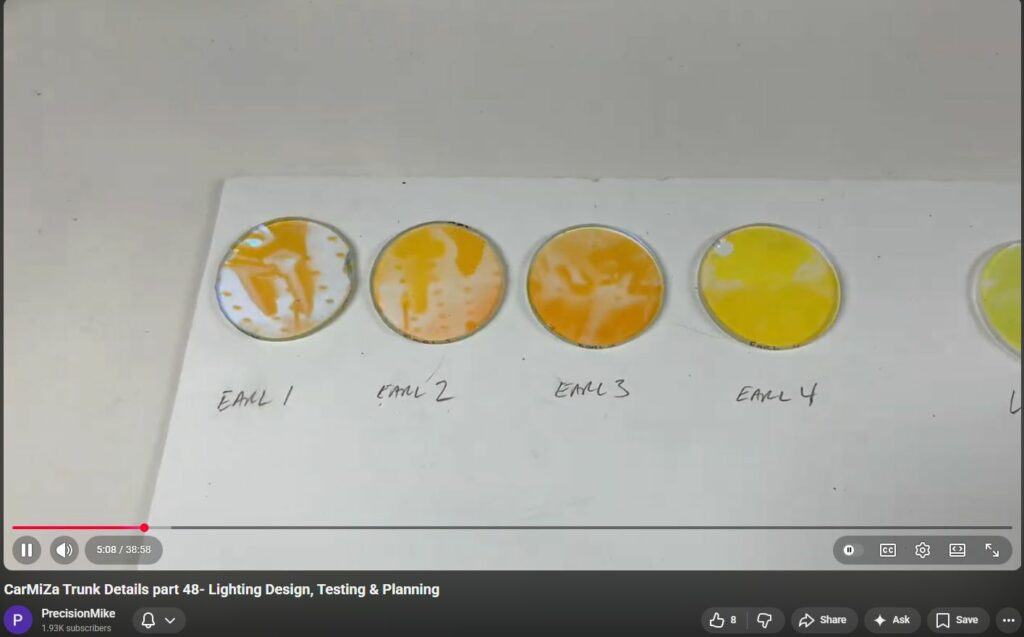
lenses. Here's what I've done. I have these are the four from Earl. One of
4:47
them is got a pretty good size crack in it. Um, which doesn't it's not going to
4:54
make any difference. Um, you'll see why a little bit. There are four lenses from
5:00
the car when Earl had it. Notice the first three are the same color and this
5:05
one's a little bit more yellow. I think this was a yellow one from the set and there was um a lot of times they're
5:11
calling these amber. So, I think three were amber, one was yellow. I then went and tried ordering
5:18
from different companies all these different things and some of these are these are about $60 a piece and none of
5:25
them come close. None of them look right. Um I even ordered this one from a company recently and it's actually
5:31
perfect opposite of what I need. So um luckily this company did not uh charge
5:37
me. So um this is the biggest challenge. I've got to try to find uh more of these
5:43
lenses. I'm going to use this lighting setup throughout the entire install. And I'm going to need between 18 and 22
5:51
lights are going to be in the car total and other areas, not just the trunk. So, finding these lenses is really going to
5:58
be important. Um let me kind of explain the way these work for anyone who's interested. Um you'll notice I even
6:05
labeled these as well uh with a Sharpie. So, dicroic dye means two. to color.
6:11
Crowic means color. So, the way that these work is they allow one specific
6:17
um color of light to pass through. In this case, you can see it's like an orange, right? And in this one, you can
6:23
see it's a blue. And then the opposite color on the color wheel is the primary
6:28
color that it rejects, which is blue in this one. So, if you notice, it's orange there. It's kind of tough to tell. It
6:35
goes like an amber. And then if you get it just right, you will see where it
6:41
rejects. And it's tough to see if it's kind of bright light. There we go. That's better. You can see where it's
6:47
rejecting the blue. So, it's pretty wild. Notice the color change. It really
6:52
shifts. It's pretty wild. I want to be really careful. That one, too, the the one with the crack. I just did that. I
6:59
was carrying it from the car and was really bummed out. Ultimately, I want to
7:04
get to a point where I've got more of these that I know what to do with and the scarcity is not an issue. So, again,
7:10
that is the behavior of the dicroic lens. They are very, very special in
7:16
what really gives you that warm glow. I tried a couple of different lenses that were not dicroic didn't work. Did it
7:22
look like crap. The dicroic is without question the stuff that I need. Um,
7:29
all right. So, with that, let's see. I'm going through my notes here. Um,
7:35
I did go to several different um, glass companies locally, art glass companies,
7:41
theater um, lens companies. I've tried so many different things to try to match
7:47
these and to no avail. I get samples and they look like crap and it doesn't work. So, my big plan for this week, it's
7:54
Sunday night. Tomorrow, um, I am going to call the three largest manufacturers
7:59
of dicroic glass in the United States. I have tracked those down. Um, I use Chat
8:04
GPT. I do a ton of research with Chat. I won't use new technology uh, in terms of
8:10
tools or equipment, but when it comes to resources, I will use the heck out of Chat, and that's what I've been doing.
8:15
So, I've got those three companies um, uh, ready to call tomorrow, and what
8:21
I'll likely do is send them one of my samples. It's three different companies. I may send one of each of these as
8:27
precious as they are to the three companies so that they can try to match them. Uh even if they have to reverse
8:33
engineer them and ma, you know, make a custom test run, uh like a one-off run,
8:39
I would pay for that. That's how important it is that I get these things. Um and a little bit of um information
8:45
about DICROIC if you're interested. The main company I'm working with is called Codings by Sandberg CBS. If you go on
8:53
their website, um, they have a really cool video which kind of shows the process of making this dicroic glass. It
8:59
is incredible. The technology is amazing. It's about a $1 million machine that is used and it's a process that
9:06
takes several hours. So, this isn't like a a film that goes on and you're good to go. It is a big chemical reaction that
9:14
takes place. It's it's really interesting, but again, that's what gives me that perfect um kind of a look.
9:20
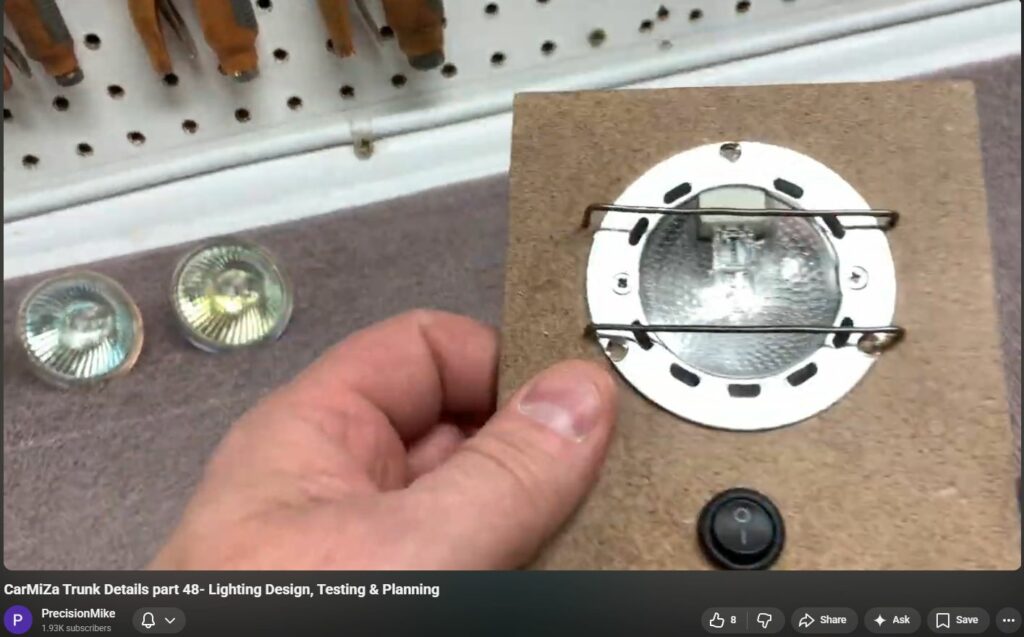
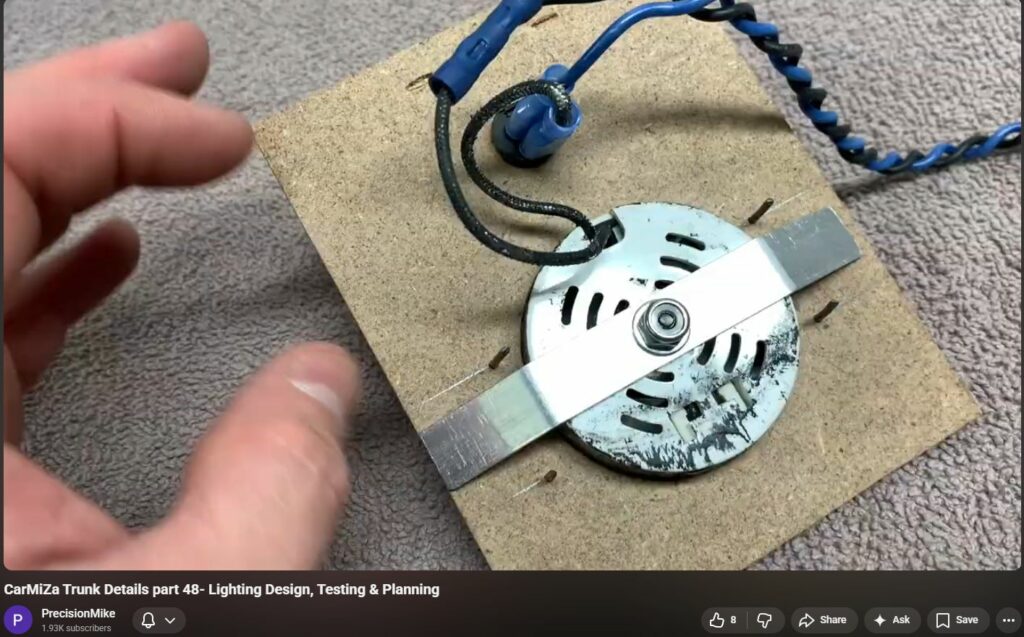
So, next we'll talk about the bulbs. All right. So, let's start with the reference what Earl had in the car. This
9:26
is without there is a like a plastic housing kind of like a puck where these could be mounted like underneath like a
9:32
kitchen cabinet. I think that was kind of the design. You can see it's got a a light bulb in there. It's a hallogen
9:37
bulb and then it's got the reflector on the back side. Um, and then this is what the back of it looks like. There is this
9:44
heat insulator device. This, by the way, I'll talk about these in just a moment. are some temporary mounts that I made.
9:50
We'll talk about those in just a sec to be able to do the testing. So, this again was my starting point, was my
9:56
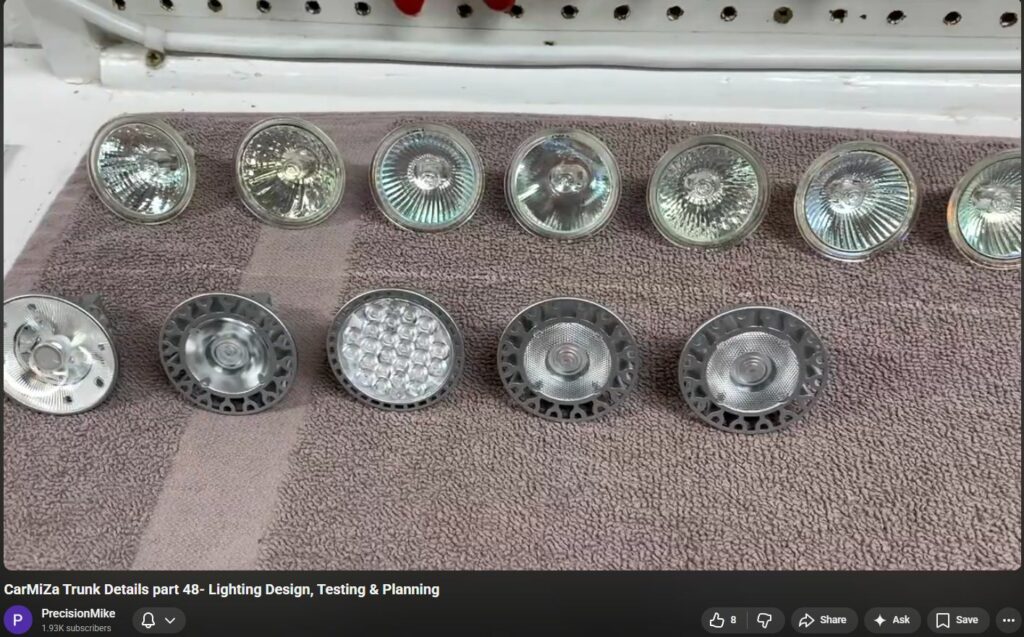
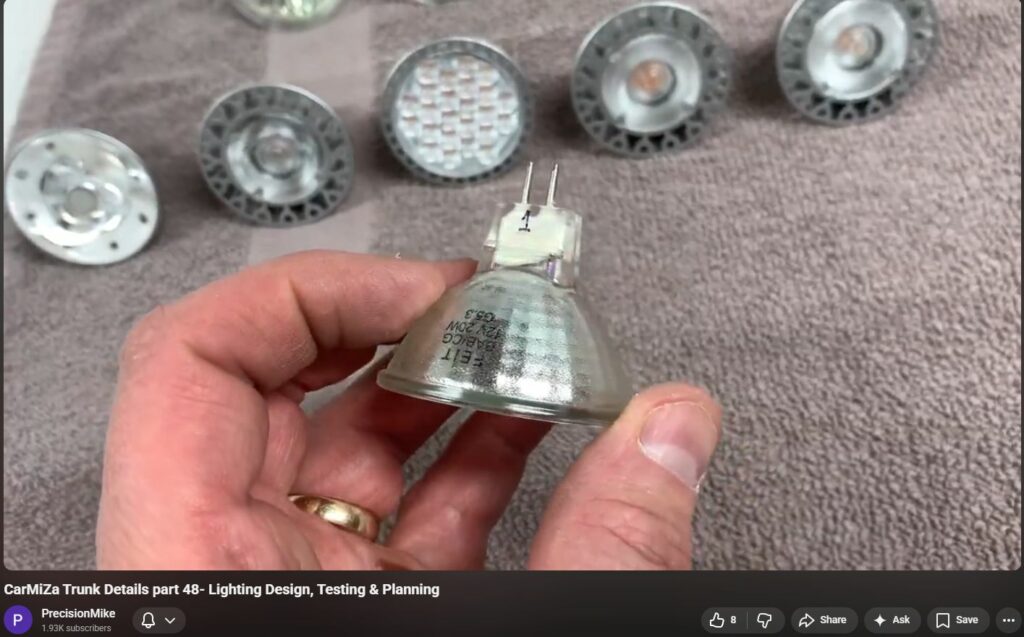
reference. Then I went on a wild goose chase, went down a rabbit hole, and I purchased all of these lights as test
10:04
samples. The ones in the back are all traditional H hallogen. Um, these are an MR16 is basically the and this is a GU
10:12
5.3 socket, which makes it a 12vt. They do have this in a 110 volt as well. I am
10:19
a ninja. If you have questions about these bulbs, I know everything there is to know based on my research. So, this
10:25
is will work off 12 volts. I've tested all of these and they all work off 12vt. If you notice, I've even numbered these
10:32
and then I built a spreadsheet with all of my notes about these. Um, again, I
10:38
know I've done so much research on the color temperature, the beam angles,
10:44
which makes a difference. Uh we'll talk about that when we when I show you some of the testing results. Uh let's see
10:49
what are some of the other variables uh that I've looked into. Um obviously
10:56
the wattage, the color temperature, the beam angle, the CRI, which is the color rendering index. Basically, how true are
11:03
they when it comes to producing color? These are all H hallogen in the back. All different. There's different
11:09
wattage, different beam angle, all different manufacturers. Some are some of these things were like $1.50 a piece.
11:16
Some are $35 each. So, I wanted to check the quality differences between these.
11:22
These are all LED. Now for LED, I did a bunch of research
11:27
here of course and there is a type of LED called COB which is um gosh I
11:35
apologize circad bulb or circad base something like that where basically
11:41
those are kind of junky and they're pretty cheap. These are not. These are
11:46
basically in almost all cases except for this one. They are a single LED emitter
11:52
and then they have a a kind of a a reflector similar to what you see here and it all goes back to this being kind
11:58
of the first generation, right? Um these are really good quality. I went
12:05
through and did a lot of research on different manufacturers. This these are all made by the same company. These are
12:10
aluminum. They're really really high quality. These are some of these run about they're about $50 a piece for the
12:16
bulbs. So way more expensive, but obviously LED is going to be the newest
12:22
technology. Not always the best, especially when it comes to audio. Um, but also the lowest temperature, the
12:28
lowest current draw, and the longest life by a magnitude of 10x. Right? These will last about 25 hours. These will
12:34
last about 25,000 hours. Uh, or 2500 hours. 25,000 hours. Um,
12:41
all right. So, with these, I did the same deal, right? I numbered them. These are all different beam angles, wattages,
12:48
and really had some fun playing around with these and going through and being able to test them. So, um, all right, I
12:55
think that's it on the bulbs. Let me double check. I apologize. I have more notes, guys, for this video than I've
13:02
ever prepped for any other video ever. So, uh, let's see.
13:10
All right. Yeah, I've tested every one of these and I'm just going to show you the highlights. I'm going to one of the last things I'll do or next things I'll
13:16
do here is to basically set up the tripod, have the um the camera running
13:21
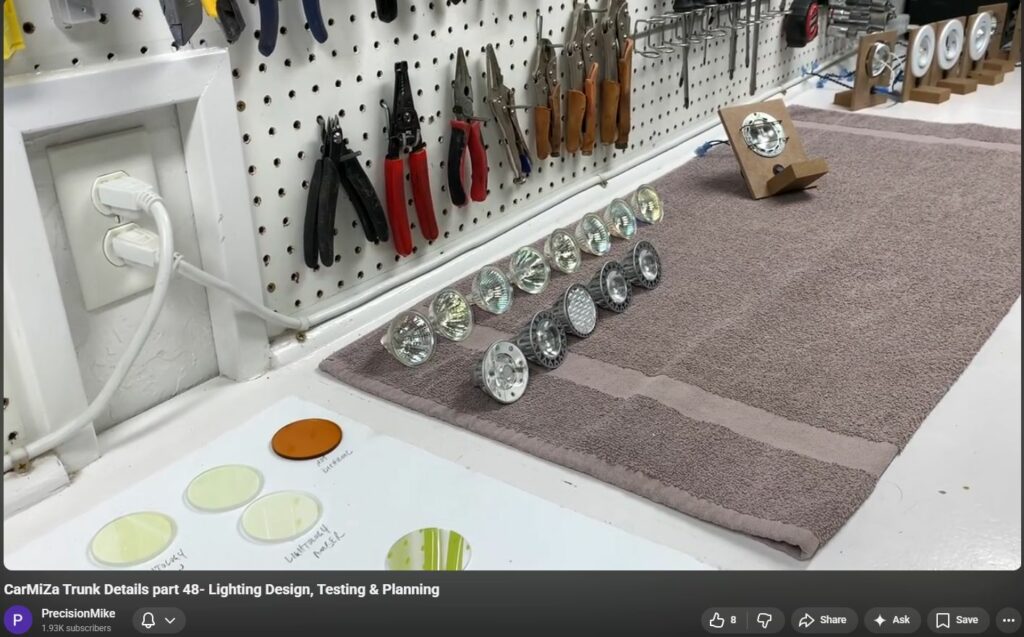
and then I'm going to switch between lights so that you can quickly see the differences. And it's pretty cool. I think you'll you'll enjoy it. All right,
13:28
so next let's talk about these little um temporary mounts that I built. The whole
13:34
objective here was to be able to test the uh the different lights, the different lenses,
13:40
um but replicate them in different positions, be able to quickly move things, and I came up with this. I put
13:45
these together. They're just MDF CA glued and some staples. I bought some
13:51
cheap switches. This allows me to turn each one on individually. Um, for these,
13:57
um, I didn't really have a way to mount the glass, so I took some wire, drilled a hole, and I just press fit this in,
14:04
and that kind of holds the wire in place. And then, if you notice, each of these has a 12-in pigtail.
14:10
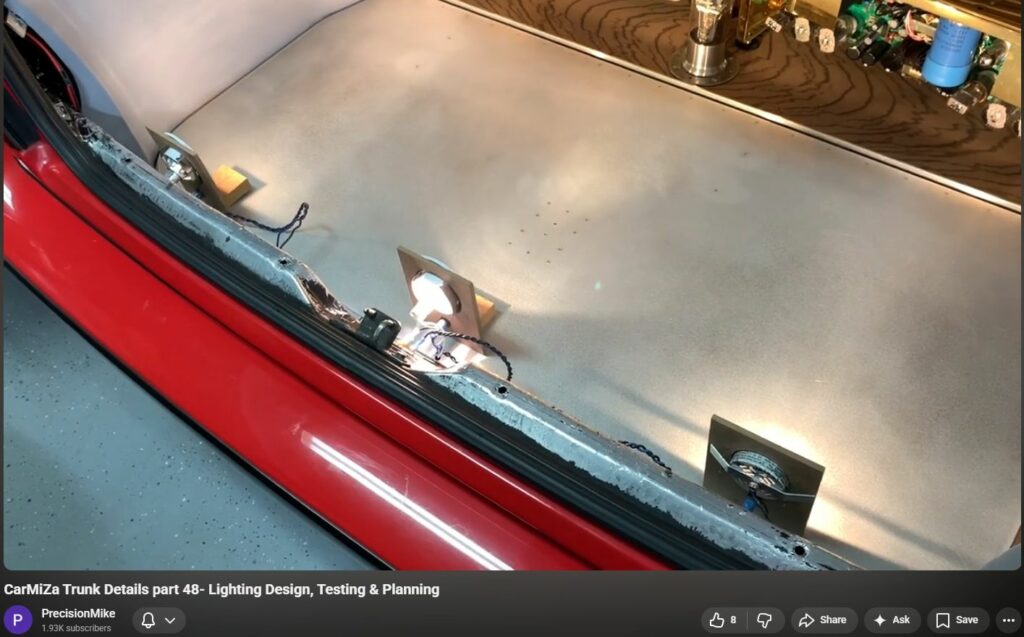
And then in the car, super crude, but this is kind of therapeutic, I've got my
14:15
main power wire coming off a battery. It's actually a battery out of the C32. I've got a charger on it. It's, of
14:21
course, fused. Uh it's a decent size uh gauge. I forget what I'm at, like 12 or
14:27
14 gauge. And then I ran a bunch of Tataps here, which allows me to plug
14:32
lights in in different locations. There's even one back here. Um I'll talk
14:37
about that in just a moment as well. So, um again, nothing crazy, nothing soldered here. The whole point is just
14:44
quick and easy to be able to take the mounts and the lights in and out.
14:49
If we look at the mounts for the um MR16. So a LED MR16 and a H hallogen
14:57
MR16 go in the same kind of base and utilize the same kind of socket. So I got lucky there. I bought these so these
15:05
mounts. I don't know if these will be the final ones I will use or not. I if I don't I'll use something kind of close.
15:11
Um I will likely goldplate them. More on that later so that they match the Milberts and other things in the car. If
15:18
you notice, these are actually really cool because they allow me to pivot the light. This makes a really big
15:24
difference. And you would not believe how much of a difference even that much of an angle makes versus, you know,
15:30
having it just like that. Um, not totally a huge fan of the way that these
15:36
work. They're not intended for, you know, a very high-end um, showc car
15:41
build. These are meant to go up in your ceiling. And they've got this little kind of a friction tabs that are on
15:46
here. And then this is what holds the lights in. And the lens fits in there just fine. So if I do use these later,
15:53
I'll either get something of better quality if I can find it. If not, I'll probably try to carefully upgrade
15:58
without going crazy and spending a month building, you know, brackets to be able to hold the lights. So all right, that
16:05
is an overview of the lights, the lenses, and the mounts. Now, let's go on
16:10
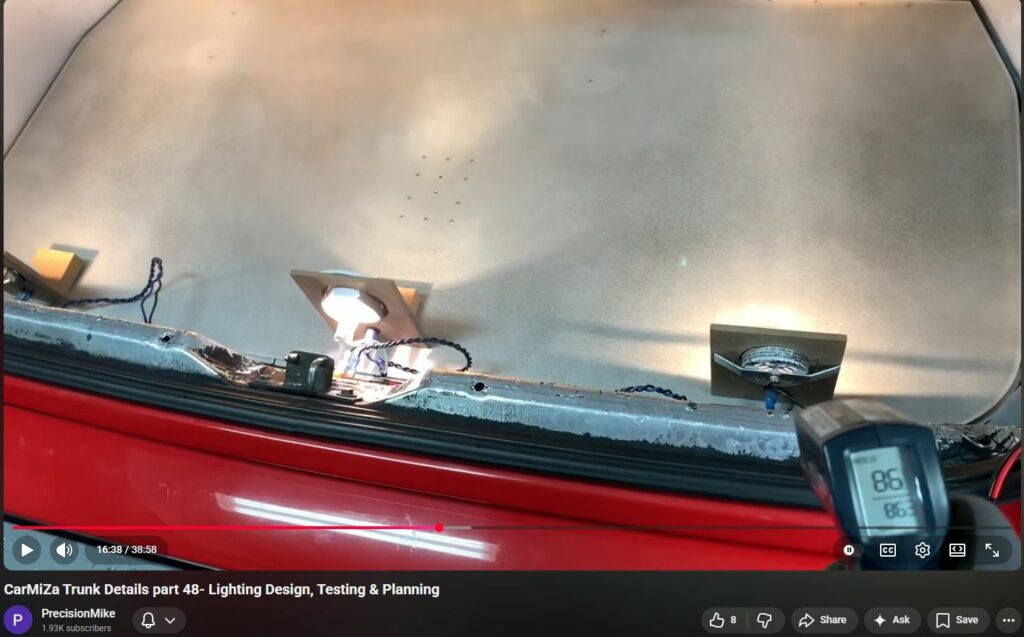
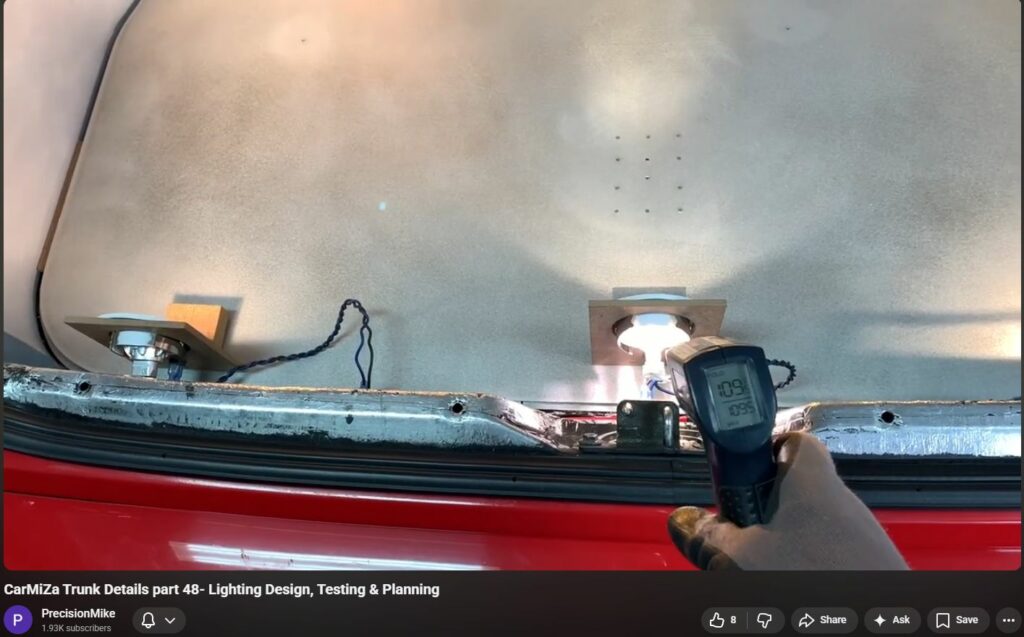
to showing you some comparisons in the car. Okay, one of the first things that I did was test the temperatures of the
16:17
lights. So, here we have uh Earls, we have a H hallogen, and we have an LED. I
16:24
did this for the front and back of every one of the lights. So, if we look at Earls, the back side. Now, this has
16:31
basically this cup, which is I don't think it's plastic. I don't know what it's made of. 86 degrees doesn't look
16:38
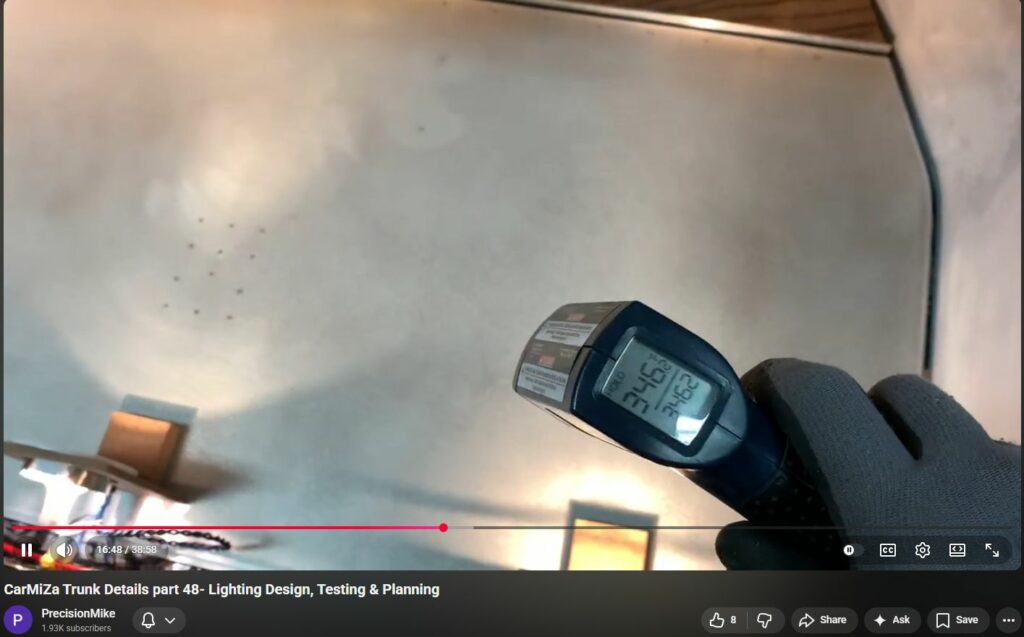
bad, but if we look at the front trying to
16:46
346° I was getting some readings sometimes of over 400° on those lights.
16:52
So, really hot. Um, and again, we're talking carpet all in here. It's
16:58
flammable. Um, okay. the H hallogen 109
17:07
on the back on the front.
17:12
I don't think I got that 128. I was seeing about 150 typically.
17:20
Um I'm trying to film while I'm hitting this. There we go. 154. That's That was pretty
17:27
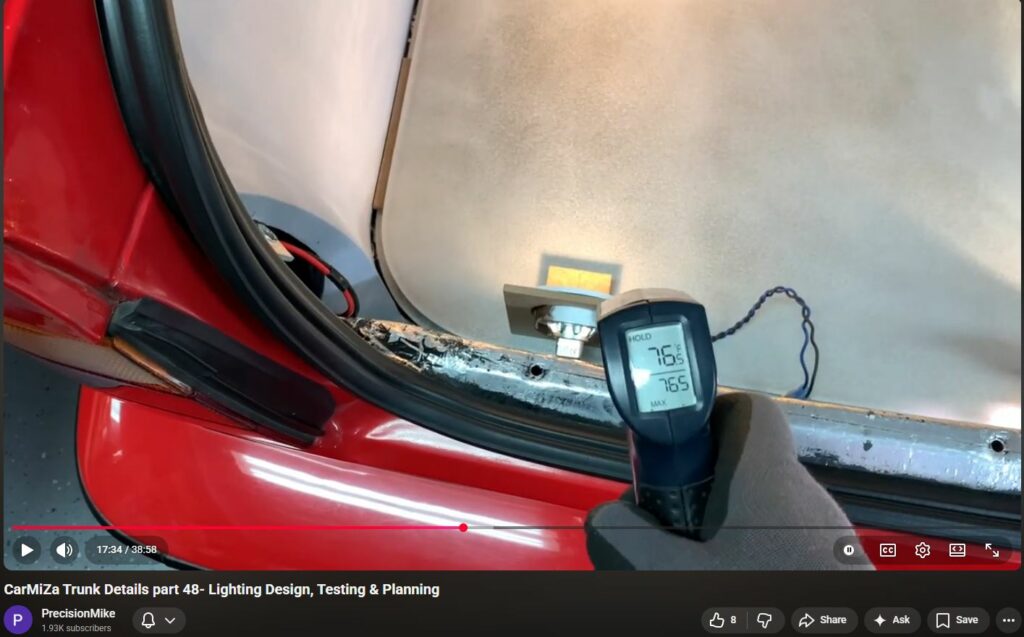
pretty common. 150 to 160. The LED
17:32
back side 76,
17:37
front side 76. I'll try it again. There is some
17:43
heat coming off of these. It's probably 109. It's about 100 or about 100. It's
17:49
about uh 80° right now in the garage. Um so these bottom line is I'll I'll tell
17:56
you basically what my results were. These were getting no more than 100 110.
18:02
These were running 150 to 190 depending on the wattage in the bulb. And Earls were the backside wasn't bad, but the
18:09
front side was like 250 260. So pretty pretty rough there.
18:17
All right. So in summary, from a temperature perspective, Earls were hands down the hottest, but those are my
18:24
reference and and look the best. And I wasn't going to compromise and say,
18:30
well, you know, maybe the LED or H hallogen don't look as good, but at least they're cooler and less risk of a
18:36
fire or something like that. Uh, sneak peek, I will tell you ahead of time. The LED was the clear winner in every
18:42
aspect. We'll get to that. I'll show you the testing. So, I don't have any heat concerns.
18:49
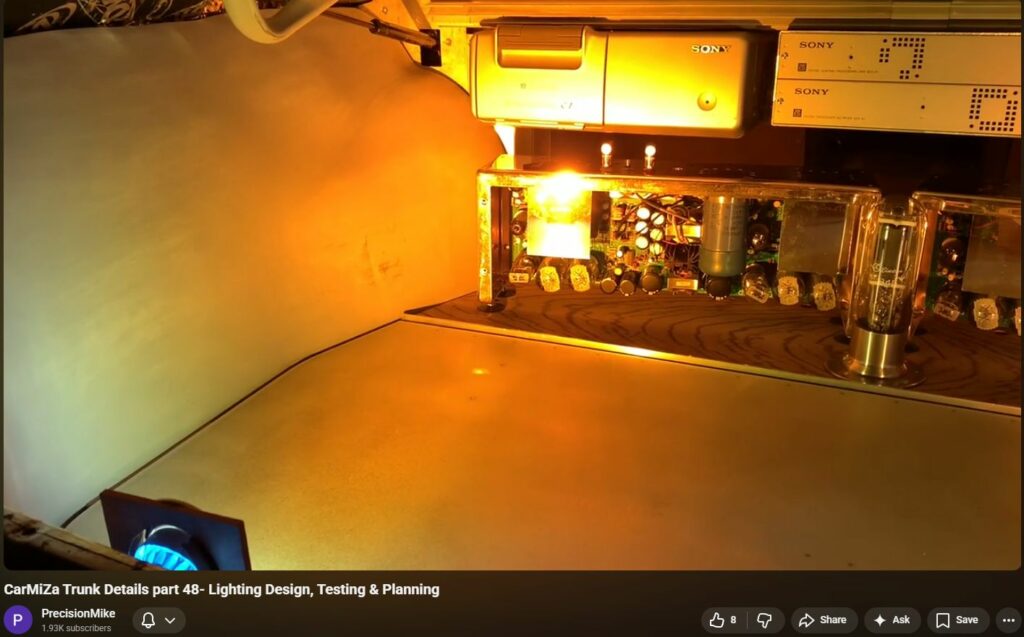
All right. All right, I'm going to try to give you a comparison, but I can tell this is definitely not showing up on camera nearly as well as it does in
18:56
person. I'm just using an iPhone to record, so it's not the best. So, what I've got here is one of Earls, the H
19:03
hallogen, and the LED. So, right now, what we'll do is compare Earls
19:09
to the H hallogen. And it's tough to say, but the light as it hits the
19:16
components looks the same. Um, but the shadowing is also the same. This is
19:21
something I'm I'm I really paid a lot of attention to. The shadow that gets cast. So, um, the shadow is way worse on the H
19:30
hallogen. And you can see this is a 36°ree um, beam. And it really does not I don't
19:38
like the shadows. It gives you these weird looks. So then if we look at the LED, this is also a 36 degree beam.
19:49
Let me make sure this is straight on. There are no shadows at all. Zero. And
19:55
the light quality again, it's definitely not coming through here, guys. Is actually better than Earls. It's
20:02
slightly brighter, but not too too bright. I did try this is a 7 and 1/2 watt H hallogen or um LED. I did try 9
20:10
watt. That was too bright. So, it's actually a little bit brighter, which I
20:16
think looks better. And it's it's more of a rich tone. It's It's definitely not showing up here. Um, but it looks
20:23
better. And notice again, there's no shadows at all, even up against this edge. So, once they're inside the near
20:29
wall, the whole thing's going to glow. That's kind of the whole idea. And again, you can see shadows there um with
20:36
the H hallogen. Not as um There we go. Uh, but you can totally see
20:41
those, right? It looks like a flashlight. Um, and the Earl light looks
20:47
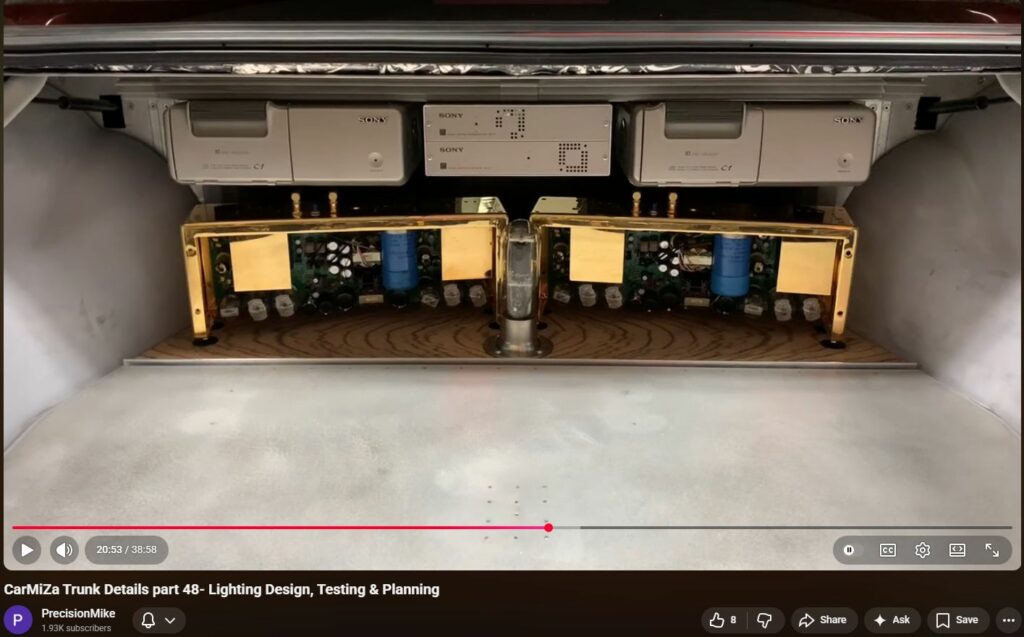
good, but again, it's not quite as bright. So, let me do another quick comparison for you. By the way, that's
20:52
what it looks like with no lights. All right, let's try to do this and see if I can get some consistency here. So,
20:59
here are two lights. These are the original Earl lights in the same exact placement. And notice the coloring.
21:06
Everything looks good. There is a little bit of shadowing coming off the lights. Uh, but not bad. It looks It looks
21:12
really good. This again is kind of my reference. So, I'm going to take this and then I'm going to go to the
21:18
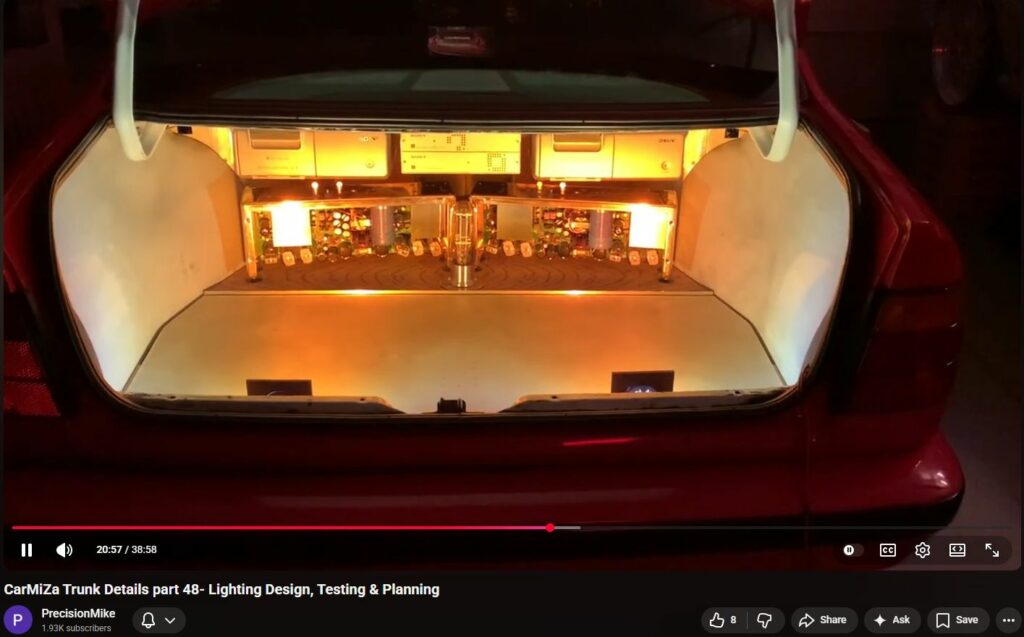
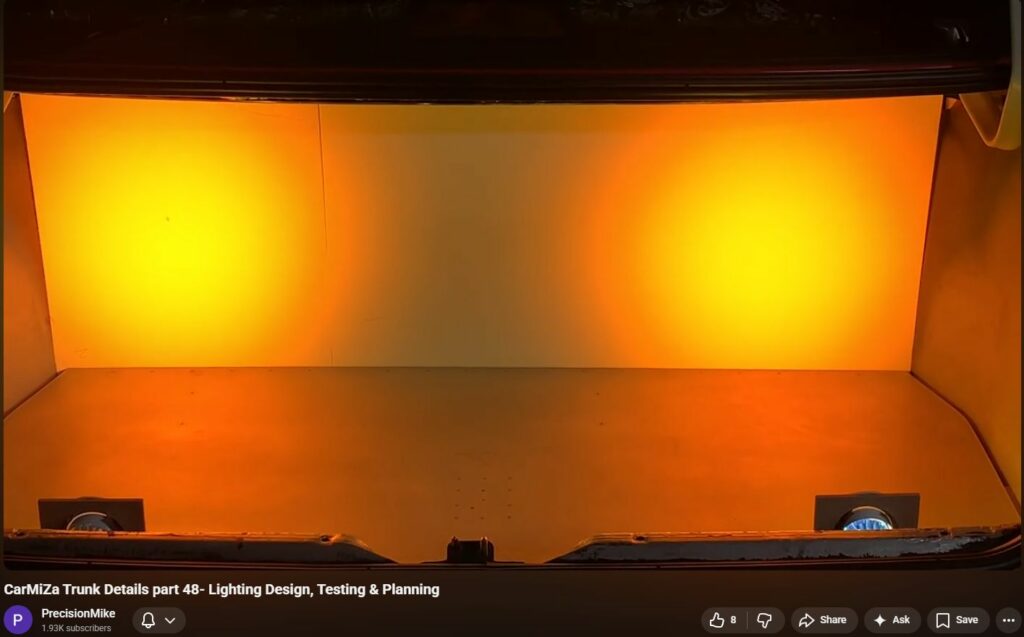
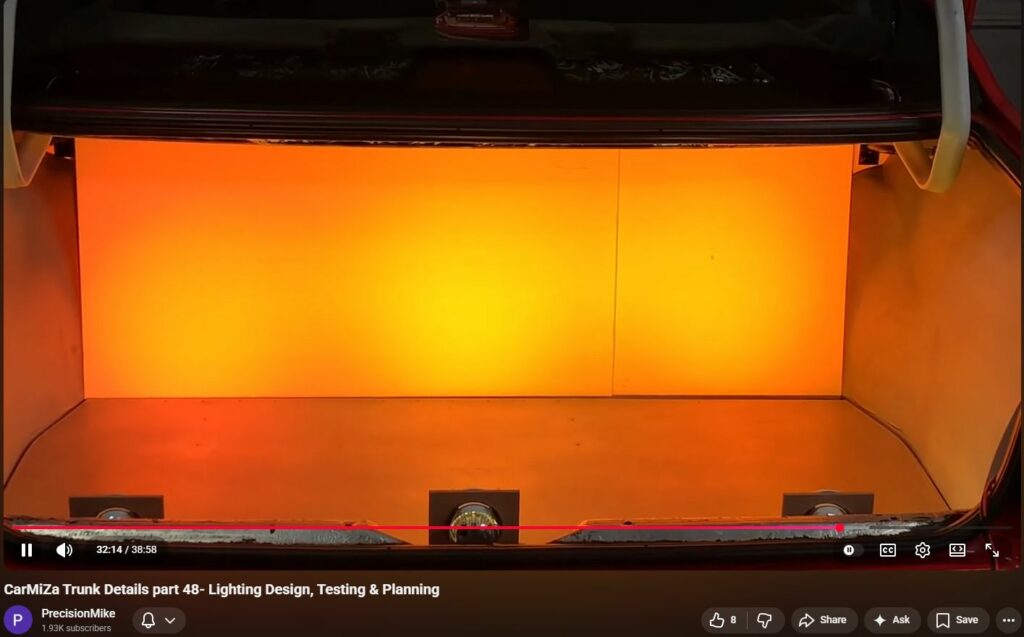
following. Okay. After a whole bunch of time of playing around, I came up with this. So, I added a third light in the
21:24
center and then I took the other two lights that were there and I pushed them out about 3 in uh to the outside. That
21:32
ended up giving me a more consistent light. Um, a really nice glow. I think
21:37
it kind of filled it in and made it a little bit brighter. So that I determined. Well, I at this point I was
21:43
like, "All right, I'm I'm digging the three lights." Um, and I think I'm on to
21:49
something. So then I went from this to the following to this. And this is the
21:54
three LEDs with the obviously with the lenses. And this to me, guys, you
22:01
obviously I I don't think you can appreciate it on film here. It just pops. It looks awesome. It is super
22:08
even. It just looks like the things are the components are just jumping out of the trunk. It looks incredible. So,
22:15
super happy with this and we'll continue on. One other quick thing I wanted to
22:20
mention. Um, for those of you who've been following the build, you probably recall I had these little pockets up here. These have been up here forever.
22:27
And the intention there was potentially to put a light up there as well. So, I didn't worry about kind of finishing off
22:33
the corner. I just tried to take a look to see if it would show up and of course it doesn't really show up on camera. I
22:39
tested extensively putting a light up there and it really just kind of washed
22:44
out the look. I think the fact that these are all in the same plane is really part of what gives it this nice
22:51
consistent glow and as soon as I put a light up in either corner, it just then
22:57
it just it loses the effect that it has and it really just kind of went to crap.
23:03
So, those are a no. Um, and for this area, it's just going to be these three lights uh on the near wall. Okay, major
23:11
update. It's about a week later, a little more over a week, and I've been talking with several companies. Um,
23:20
Codings by Sandberg did not work out at all. And I got a hold of two different companies, one called Rosco and one
23:26
called Gobo Source, who's a distributor and has a sister company in Italy. I
23:32
have gone through some ex extensive uh research with these companies and
23:37
here is what I've got. Some really exciting news. As I zoom in, you guys would notice this will change the look a
23:43
little bit. The lens on the right side is one of Earls. The lens on the left
23:49
side is a new lens that I was able to source. Um the left side lens is from
23:54
the Italian company. They're an Italian manufacturer. And you can see notice like the halo around the outside of the
24:00
light the you know the the showing up is more of a yellow but trust me it's more of like a golden orange. This is a super
24:09
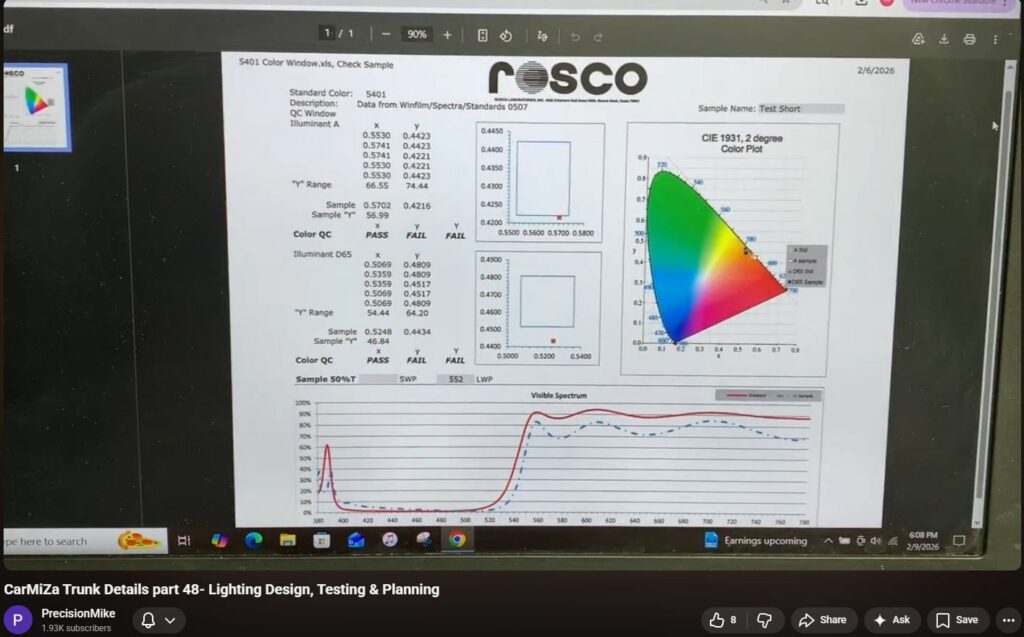
super close match. Now what I've also done is the following. So I'm working
24:14
with another company called Rosco. They are a big largest manufacturer in the world of dicroic lenses and it took me a
24:20
long time to get that figured out. I got a hold of Rosco. They don't normally deal directly with the public, but they
24:27
were nice enough to help out. I shipped one of Earl's lenses to them. They did an entire kind of a DNA analysis, if you
24:34
if you will, of Earl's lenses, and this is it. It's pretty cool, too, guys. You can see the the light spectrum is sort
24:42
of like a frequency response. They refer to this as the slope, the Q, the cut off
24:47
point, very much like we do in audio uh in the lighting community. So, this is
24:53
Earl's light that was measured or Earl's lens that was measured. The one I just showed you, the Italian one. Um, I have
25:00
the lens, but I'm waiting to get their kind of a DNA analysis on that. I should have that tomorrow. And the company
25:07
Rosco that did the analysis of Earl's light Earl's lens said, "Hey, great
25:12
news. We have a match for that. That lens will be here tomorrow." So, huge
25:18
update. The bottom line is I can get lenses. All right, so I'll show this again as I'm talking. So bottom line, um
25:25
Earl's lenses, as we know, I have three of them. I need probably 18 to 20 for the entire build throughout the car. I
25:32
have two suppliers that I can get these from. When I get the other sample
25:38
tomorrow, I'm going to do some extensive testing with all three. And who knows, maybe, you know, Earls is kind of my
25:44
reference, but maybe I like one of the other ones better. I cannot tell a difference. If anything, this new one,
25:50
again, it's not showing up on video. When I pull that, this is a cardboard backer that I have just to be able to
25:56
see, you know, the the true color. Um, me and my daughter agreed that the new
26:02
one actually looks a touch better. It's actually a little bit warmer. But that was a major hurdle for this build, being
26:09
able to try to find these lenses, duplicate those. I have spent the last two years randomly ordering, getting
26:16
things that don't even come close, and it's been really frustrating. So, huge victory and we'll continue on from
26:22
there. All right, so here's the next thing. And I realize I'm kind of hopping all over the place here with subject
26:27
matter. What I determined is these are the cups that I'm going to use for the
26:32
near wall. I am not going to use these springs. So, I'm going to come up with some kind of an L bracket or something
26:38
that I'll fabricate and I'll utilize this piece with the pivot mount cup.
26:44
This again has got a machine screw. I can torque that down a little bit and that becomes tighter. So, they're
26:49
decent. They're made of aluminum. I don't know how I'm going to finish them off yet. They're either going to be painted tan so that they're kind of
26:55
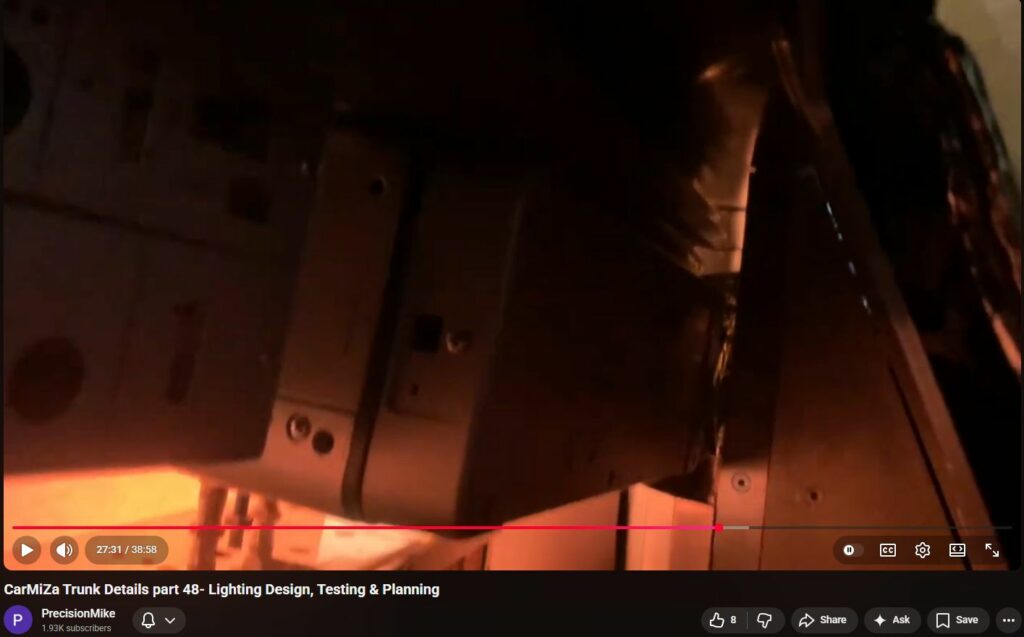
inconspicuous probably the way I'll go or I may gold plate those. But, uh I think I'll leave the gold for the real,
27:02
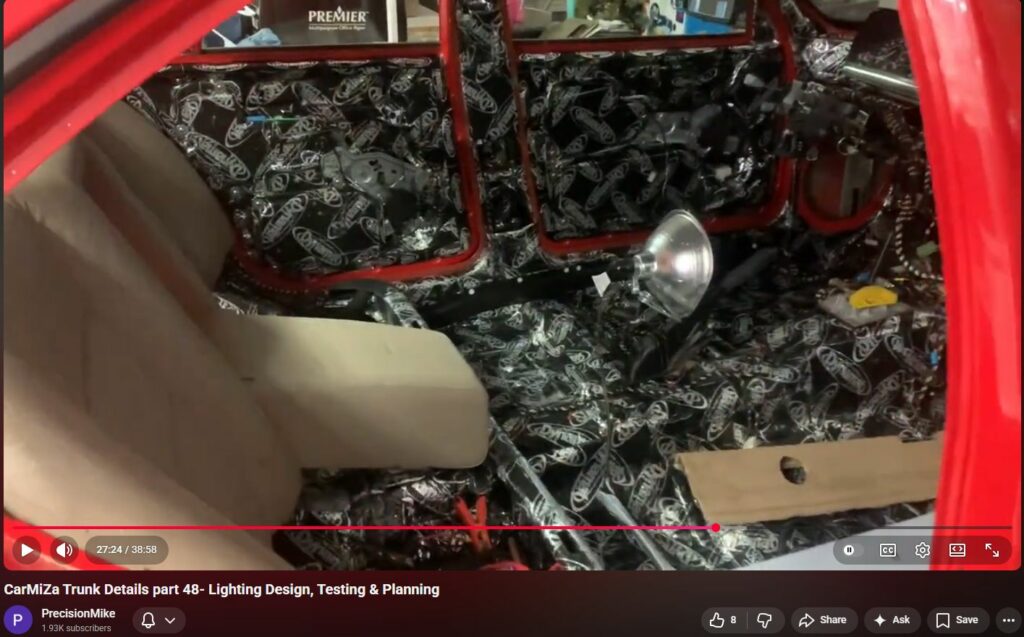
you know, show pieces like the Milamps. Um, the problem I ran into is the
27:07
following. And I'm going to pull the some of the stuff out of the back of the car so that I can see and you guys can
27:13
see. But the bottom line is if I try to put this cup like this up through the
27:18
rear deck in this area. Let's see if I can get I don't know how much this is going to
27:24
show on video until they really pull things apart. But back in this area up
27:30
there, I'll I'll get better footage of this for you guys. Behind the Zapco
27:35
amps, there is the the uh aluminum plate that I built, right? That's in the rear
27:41
deck. You can see it here. The problem is these cups are too wide to fit in
27:47
that area. They hit the Zapco. I could trim those down. I could come up with something, you know, to do different.
27:53
And here's what I came up with instead. All right. So, instead of trying to use this, and the other thing also I didn't
27:59
show you, let me show you this real quick. There is a hump in the the rear deck. This is just a natural beam. It's
28:06
it's hollow, but it's basically like a V channel that goes all the way across. The rear deck upholstery piece sits on
28:14
top of that. Even if I could fit those cups, I was thinking I could trim those down. If I flush mounted the cups,
28:20
there's my aluminum plate that goes all the way across the back of the underneath the rear deck. I would have
28:25
to cut this out in, you know, in an area where the bulb comes through, which I'm okay with, but the bulb is too tall. The
28:32
bulb would go beyond this. So, basically, I need to drop the whole um
28:37
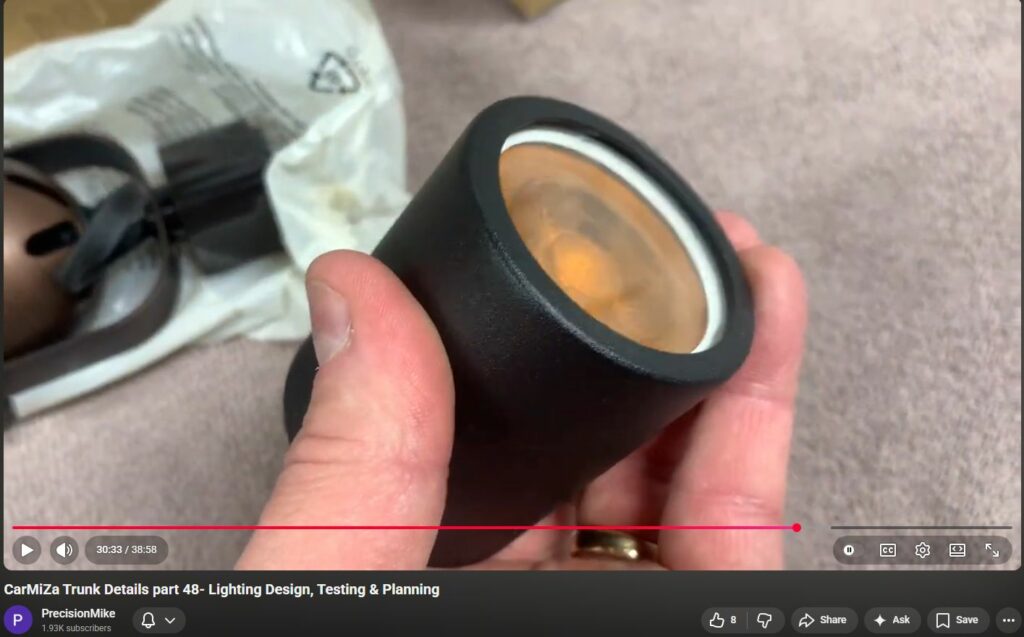
mounting for the bulb down lower. So, here's what I did. I bought some pendant
28:44
lights and some track light samples to be able to see if I can kind of use the
28:50
the housings. Um, this does fit. I've got to check. It's
28:56
going to be tight near the changers. I'm don't know about that yet. So, I got to pull the Milburss out and make sure everything's going to fit. But, here's
29:02
kind of what I'm thinking. This is meant for an MR16 bulb, the same kind of bulb
29:08
that I'm using. But, uh, give me one sec. Okay, so here is this is the the
29:15
bulb that came with these light housings. It's tough to see in here, but there's kind of some slop. And if I put
29:22
the dicroic lens in, actually, I can do here is a the same diameter. This is not
29:28
dicroic. It's just a a dud sample I use for fit up.
29:33
This kind of moves around and as I'm hitting bumps on the car, you're going to hear this and it's it's not going to be good. So, I'm like, all right, how
29:40
can I center this up and keep it solid? So, what I figured out so far, and
29:45
again, this might all change, is the following. I took the center piece from
29:51
one of these, which is this. And if I take this,
29:58
it fits perfectly inside of there. Now, this does have a layer of glass, which I'll probably remove. This piece will go
30:05
right up against this edge perfectly. And then I can take trying to
30:11
do this in film. There we go. Drop in my dicroic.
30:20
Drop in my bulb. And it's it's very solid. Right. Once I get a the um the
30:27
harness on there and everything, we'll be good to go. So, that is kind of what I'm thinking. You can see where that
30:33
glass is not they don't even have the glass sitting properly. That's kind of what I'm thinking. But again, I've got
30:38
to see how this is all going to work. I may end up cutting these down. And again, I have to make sure that I've got
30:45
room with the changers in there. This whole thing is a super tight fit. So, my next thing is going to be to pull the at
30:52
least on one side, I think, one of the milberts out. I'll probably pull the pole floor out, the spare tire, all that
30:57
stuff, and then literally get in there and kind of see how much room I've got to work with. All right, another quick
31:03
update. It is the next night and I have the new uh second sample um from Rosco
31:11
um in the car. So, basically, it's it's really tough to tell on video, guys. It probably looks all the same. This center
31:18
one here, uh this one is Earl's original. This is the one from Italy.
31:24
And I just had my daughter look at it. We're both standing here looking at it. This one looks a little tiny bit more
31:30
gold compared to Earl's. Um, and this is our favorite. This one looks more
31:35
orange. I even gave a picture to chat GPT and it says this is kind of leaning more towards like a pumpkin color and it
31:42
kind of would look like you're um obviously have a color in there or almost like a salmon. There's like a
31:48
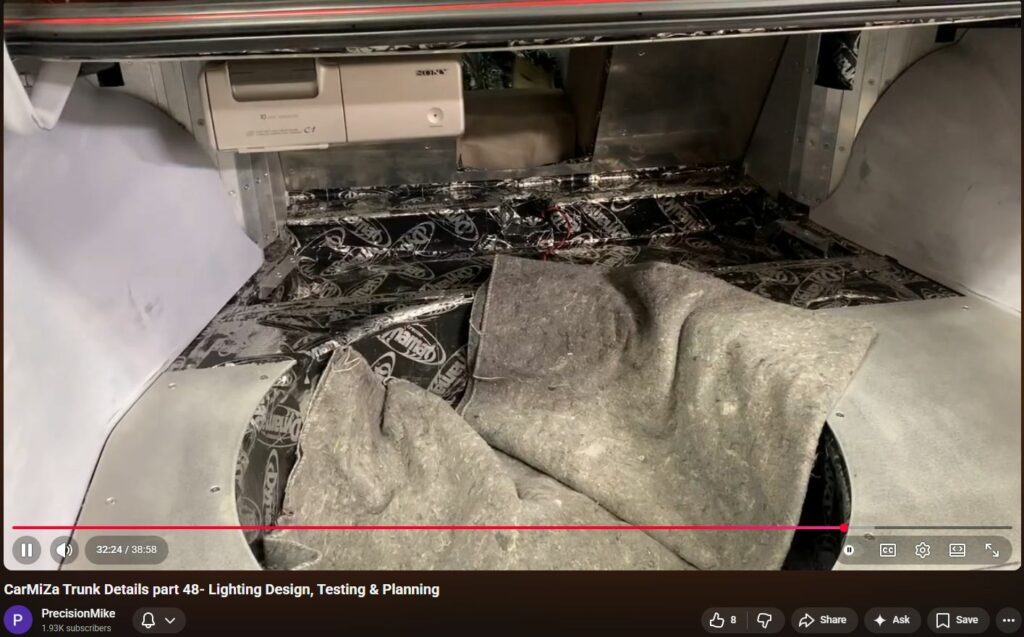
pinkish tone to it as well. Very very different. Um, again, I don't think it's getting picked up properly on um on
31:56
camera. So, I'm going to put the milits in and do all of that. I have all of this apart right now as you can see
32:02
because I'm working on the lighting uh for the rear deck. We'll get to that here in just a little bit, but I am
32:08
right now convinced that that's going to be the option I'm going to go with. And again, the bottom line is it's readily
32:13
available. They're not terribly cheap and they come from Middle East, so there's a little bit of lead time, but at least I can get them in quantity. So,
32:20
all right, we'll continue on. All right, it is the next night and I have decided
32:26
I'm going with the Italian lenses. Um did some more testing tonight. Uh did it
32:31
against the Milberts and everything. I had everything back in the car and those definitely look they are like 99% the
32:38
same as Earls and if anything they might be a touch better. So I am good with those. So decision made. I'll place the
32:44
order tomorrow. So at this point I've got a bunch of things pulled out as you can see and I'm working on the lighting
32:49
for the rear deck. Um I want to show you. So earlier in the video I showed you
32:56
like whatever I have like six different lights, right? I got like these um track
33:01
lights. I had kitchen pendant lights. I got all kinds of stuff. Um I like to
33:07
look at every possibility. This is even something I came up with. This is a bracket from one of these. The white cup
33:14
from one of these, right? The ones that are going to be in the near wall. and
33:20
the lens actually or the um excuse me, the bulb obviously fits in there and when I put those screws in, those screws
33:26
would hold the light in place. So, I'm like, "Wow, that's kind of cool. What if I just did something like that?" I don't
33:32
like it. It's very kind of unfinished and I don't think it's going to look right. So, you won't see any of these
33:37
lights obviously. Um but I just again, the whole purpose of this video is for
33:43
you guys to see the amount of time and thought I put into these types of things. hours um to ultimately come up
33:50
with what I do. Let me show you one other thing here, too. All right. So, um here is what I figured out I'm going to
33:55
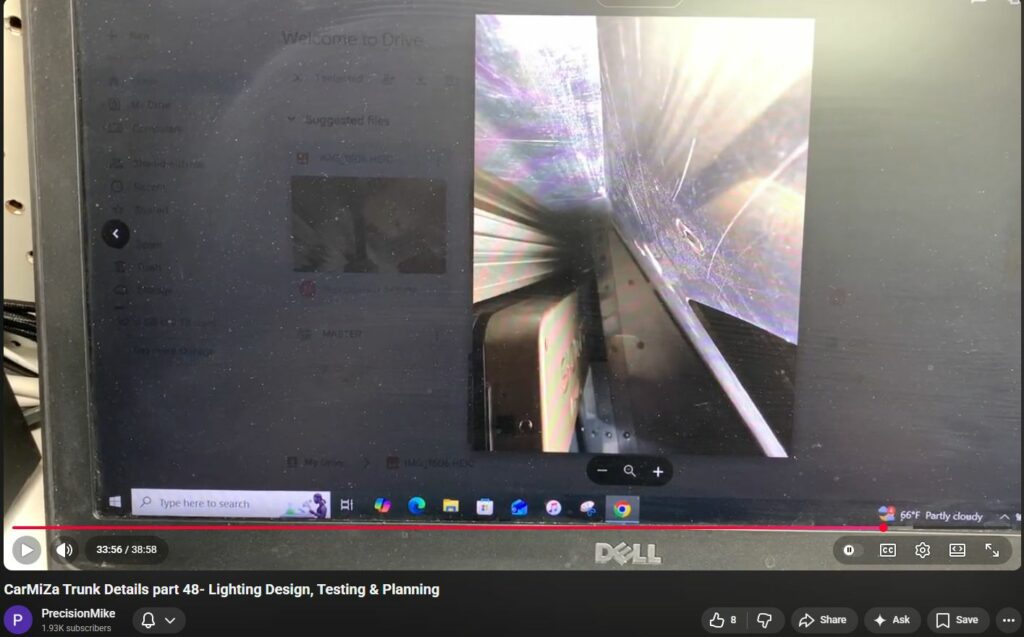
be doing for the lighting um in the hanging from the rear deck. The two lights that go behind the changers will
34:02
be the same on one on either side. This is a shot I It's a lot easier to do this
34:07
than try to bring the camera in there and show you. Um this is what it looks like back in that area. Here's another
34:13
shot as well. So, as you can see, here's the back side of the changer, and this is where I'm going to be hanging the
34:19
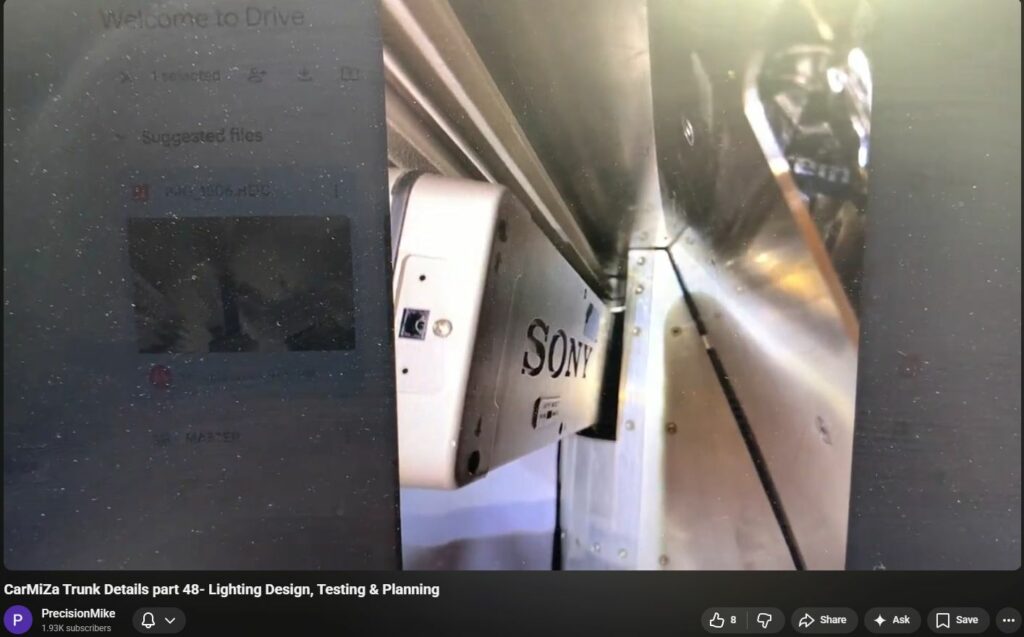
light from, but there's very little room. This is what it's going to look like. So, I'm using um I'm using the
34:26
actual track light. I'm just I took off the uh bracket that clicks onto the track and I'm just using their bracket.
34:33
What I'll do is I want to push this up a little bit further, but I want to make it where this stays at or um below the
34:42
changer because as soon as I go up on it like that, I get a weird shadow and it kills the light coming off down here. So
34:48
to do that, I'll shorten this bracket. I may even grind this side right here
34:53
because it's about to hit it's going to hit the what I call the ski wall right here. So that'll allow me to push that
34:59
up, tuck it in there. I'll even use the hardware that came with this. Um, which
35:05
is basically kind of like they have in a lamp. It's a hollow bolt that goes through and then the wire will go right
35:10
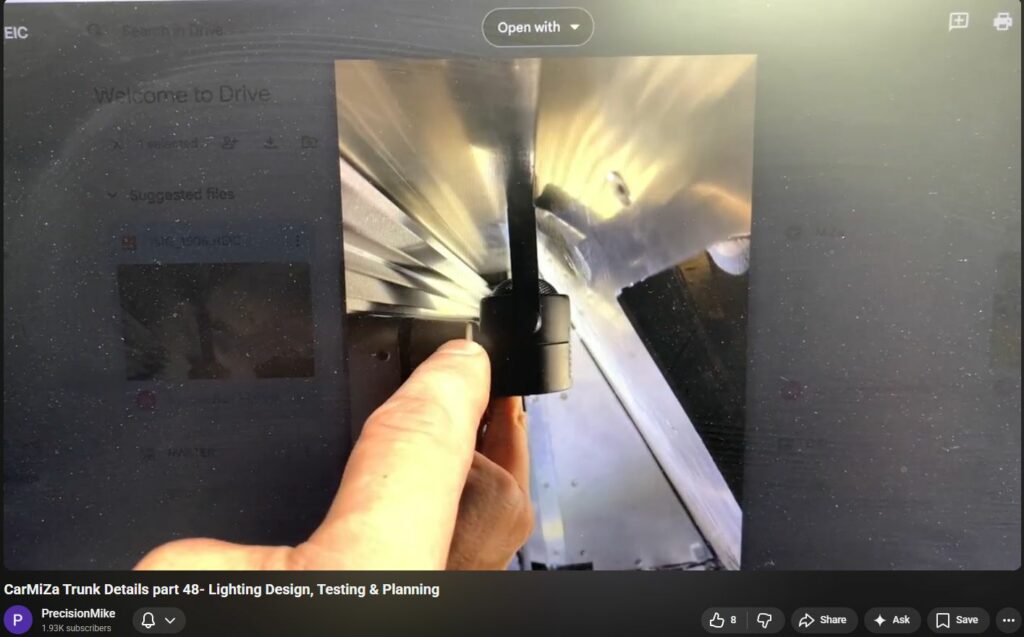
up through the rear deck and I'll deal with that. So, that is my solution there. Here is a little bit better shot
35:18
of what this would look like. So, imagine the changer's in the car. Here's one of these lights. It's going to go
35:23
basically right up against it like this. I'll put a piece of neoprene back here just to make sure it doesn't, you know,
35:29
vibrate or anything like that and we'll be good to go. And again, you won't see this at all. So, I am very happy with
35:36
that. I think it's going to be a good solution. Next, let me show you what I'm what I'll do for the center light. All right. So, once again, here is a
35:42
photograph for you on my computer. This is the same light with the bracket pushed up as far as I can get it um in
35:50
the center. Okay. But the problem is, as you can see, if I were to mount it there, you would totally be able to see
35:55
this through that ski hole armrest, which is not acceptable to me. So, what I'll do is I'm going to take another
36:02
light like this. This is the same bracket just pulled apart. I will cut a hole with a hole saw through my aluminum
36:09
plate through the rear deck. Slide this up into it where this is kind of where
36:14
my aluminum plate is. Use their screw, their threads here, and build a couple of little L brackets. And that'll hold
36:21
this well up inside of there. So, there will be no issue. Um, and I think that's going to look great. It'll cast really
36:27
nice lighting down there, and there's no way you will see the actual um housing, which is exactly what I want. All right.
36:34
So, at this point, I'm going to wrap up this video. I think um you get an idea,
36:39
a sense for the element of design that I do on the car. I don't count these hours. Again, I'm uh I'm over 2,000
36:47
hours on the build and I'm probably at least another 2,000 hours of that type
36:53
of design, playing around with stuff, getting an idea before I pick up tools and do the work. But hopefully you found
36:59
this video um enjoyable, inspiring to to be able to see that kind of stuff. There
37:05
are some other things I still need to do from a design perspective. Uh which would include things like the uh rope
37:12
light, for lack of a better term, around the spare tire. I'm looking into some really, really high-end industrial
37:17
lighting to be able to use for that. I'll source that on my own, and I'll show you how I'm going to install that
37:22
when we get to that point. And one last thing for anybody who stuck around this far in the video, I'll give you a little
37:29
bit of a teaser about what I'm also going to be doing with the lighting. So obviously I've been focusing it on the
37:34
the bulbs I'm going to use, where they're located, how many I have, the dicroic lenses, all of just a ton of
37:40
time and attention into all of those things. I feel I've got a really good handle on that at this point. One of the
37:46
big things that I want to do is um build a logic circuit where when I've got the
37:53
trunk open, I'll have the lighting on for the near wall shining on the mills and all that. When I press the button
37:58
for the motorization, these lights will dim out and then when the motorization
38:03
as it's opening, the lights in the spare tire well will be off and then it will slowly dim on while it is motorizing
38:10
open. Um, I think that's going to be really dramatic and add kind of a
38:15
theatrical element to it. Um, I'm going to be doing something cool also. I won't get into that just yet. Uh, with the
38:21
armrest in the rear uh seat area and with the lighting there as well. So, not
38:26
just the lighting, there's going to be some kind of logic circuit that I'll uh be building and rigging up as well.
38:32
That'll be after I've got all the lighting complete and in the car. So, in the next video, I will be picking up
38:38
tools. We'll get right into it. I'll probably start that tomorrow. Um I'll start filming tomorrow and I'll start
38:44
going through and getting things uh built in the car once again. So, thank you very much for watching. Again, I
38:50
hope you uh enjoyed this particular segment and if you have not already, please like and subscribe. Talk to you
38:56
soon. Take care.