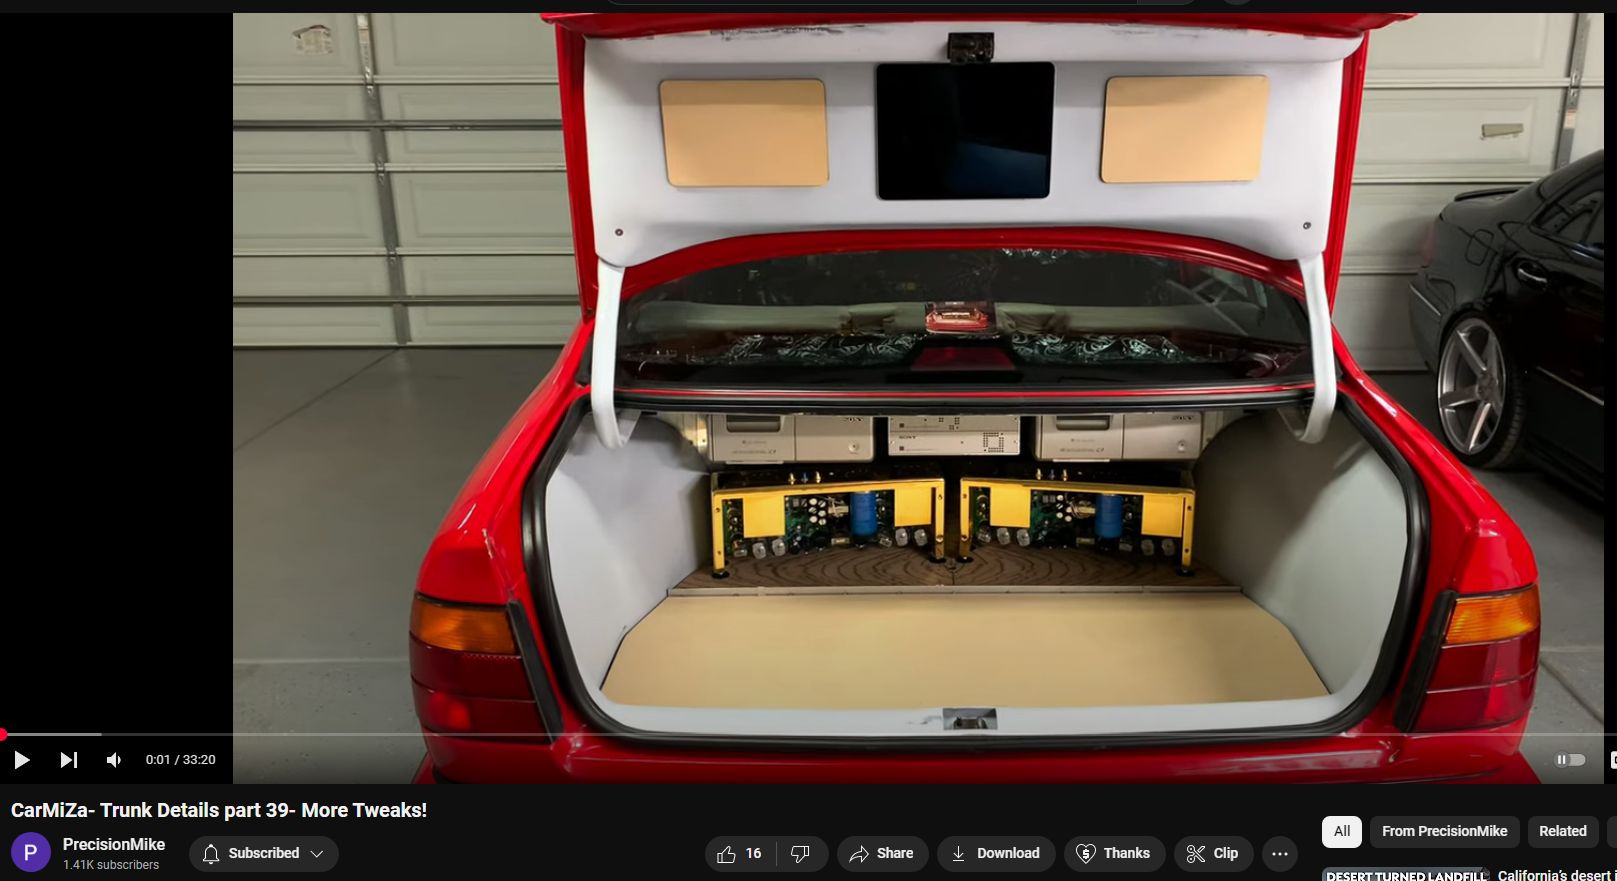
CarMiZa part 39 Trunk Details More Tweaks
In this video, I chase down and solve several small items. For me, I need to get everything as “precision” as possible before going to the next step. Thanks for watching, and enjoy!
Transcript
0:01
hey folks welcome back to the channel welcome back to another Cara video in this video I'm going to be doing some
0:08
what I'll call Corrections little tiny details on the trunk up to this point
0:13
again in in an effort to keep things really Precision there's aspects of the build that I'm not quite happy with that
0:19
I'm going to kind of uh correct if you will so uh I recently took about 10 days
0:24
off of Misa did some other stuff on some other cars including went to some car shows with the e50 5 uh got a Best in
0:31
Show which is pretty cool um but it's it's time to get back on the mus it and really go hot and heavy uh so again it's
0:39
going to be details things like this Gap I'm not happy with this I'm going to
0:44
likely close this little Gap up all the way around in the trunk lid uh there's some other things with some gaps along
0:50
the side panels where they meet the zebra wood uh so those will be addressed and and get everything basically as
0:57
tight as possible with regard to the trunk uh before moving to the next part
1:02
which will be in an upcoming video where I'm going to be doing this floor the final version of that floor out of
1:08
aluminum uh so again this video uh nothing Earth shattering it's not going
1:13
to look completely different it's just taking care of these details also uh if you've been following along on the
1:18
channel and you haven't checked out the last video I posted which was uh when's it going to be done I go through quite a
1:25
few details in terms of some numbers and goals and things like that uh I was also
1:30
interesting too to note I was thinking about taking a short break from the trunk and going and working on the
1:36
fender area I'm about I'm just over a th hours in the trunk and you know been
1:43
staring at it for over two years on the trunk and I said uh maybe I'll go in and
1:48
work on the fenders and finish out this area um with the woofers and motorize
1:54
the fenders and all of that but then I realized I want to stay on the trunk and get it done so again in this video I'm
2:00
going to bring you through and document all these little tweaks that I'm going to be making so let's go ahead and kick
2:05
things off okay my first step was to remove the trunk light I didn't have to do this but it's going to be easier and
2:11
it'll come out better I know in a very recent video I was saying it's going to be the last time until I'm ready to do
2:17
upholstery uh but again I want to do these Corrections um the good news is
2:23
with my plugs and everything the way I did the install even taking the panel off it was under 10 minutes to remove
2:29
the panel from the trunk lid and pull the trunk lid up so very serviceable piece of cake uh so now I'm going to
2:35
kind of dig in and identify the things that I want to clean up all right so here's the first thing I'm going to
2:40
tackle I noticed that when I put the trunk lid cover on the iPad panel um and
2:46
I torque the bolts down I don't it feels like something is hitting and it is if
2:51
you recall if you've been following the series um I did a little bit of surgery to the back side of the panel where I
2:57
built it out and that hole right there is where the plug for the wiring harness goes to plugs
3:04
into the tail light and it's a really tight fit I didn't cut enough I missed like half of it uh had I not pulled this
3:10
out pulled it apart I wouldn't have seen that so now what I'll do is I'll mark that uh I will carefully take a Dremel
3:16
continue round two with the surgery and I will get that piece out that's going to ensure that there's no undue stress
3:23
on the wiring harness uh for the tail lights and make sure everything fits properly it's the same on the other side
3:29
too
3:35
[Music] it's
3:41
[Music]
4:03
[Music]
4:15
very
4:23
carefully all right that's that section uh pulled out this was basically just uh
4:29
some some of the fiberglass and fleece that I put over there so I'll clean this up I'll do the same thing in the other side and that's going to free up the
4:35
space I need okay much better now I've got clearance for the plug I'll do the same thing on the other side and we'll
4:41
get this panel back in and see how it fits much better fit uh when I crank these um bolts down I feel it bottoming
4:49
out on the insert against the MDF backer that I've got in this which is what it
4:54
should do and previously I think it was hitting the harness a little bit and and putting stress and that this again this
5:01
Gap I'm going to work on but the first thing was to make sure that everything sits properly with these screws which is
5:07
now been addressed and fixed that again it took me 1 hour from you know planning
5:12
it pulling the lid doing all of that and I'm like whatever I think a couple
5:18
hundred hours into building this lid doing the trunk arms and all that so for one extra hour to bring it that last
5:24
little 1% that is the type of details I'm talking about so uh the next thing I'm
5:29
going to do I also feel like I've got a little bit of stress on something else here it might be hitting somewhere one
5:35
of these plugs I'm not quite sure or this harness coming up the middle so now again I'm going to you know run this
5:42
down figure out what the issue is and solve okay I found another issue when I tighten these bolts down I can tighten
5:47
these down and the whole thing draws tight but I'm hitting
5:53
by a bunch right in there that harness especially that clip sorry for the light
6:00
there is hitting so again I've got it marked I'll uh carefully remove some of
6:05
the material from the backside there's plenty of meat to work with and that will ensure that this lays flat that's
6:11
also adversely affecting this Gap making the Gap bigger all right at this point I've got the passenger side good I think
6:19
but in order to double check it I am using my latest favorite tool which is a
6:27
Bor scope this allows me to show a camera in there to ensure that the plug
6:32
has all the clearance it needs which uh it's kind of tough to do with one hand but I'm running a zip tie between the
6:37
plug and the panel uh and there's plenty of room to go so pretty cool if you are
6:43
looking for a boroscope I'll put the link in this for this one in the description I think it was 25 bucks on
6:49
Amazon if you don't have one of these they're the coolest thing ever uh it's actually fun to kind of use it so I
6:55
would definitely encourage picking one of these up okay the bar scope was cool um don't get me wrong but I'm not able
7:02
to see every part of the plug so here's what I'm doing I took a piece of uh just a uh microfiber put it on top of the
7:11
plug now I'll take the panel put the panel in place push down
7:19
on the panel to make sure I've got all the pressure I'm going to have when I go to screw it down and actually here let me uh pull it out of that area push down
7:28
on it and I can pull that right out that way I know it's not getting hung up on that
7:34
plug okay the panel is now sitting properly it's sitting flush it was up in
7:40
some places 3/16 of an inch which ironically is why I didn't like the perimeter so if you recall earlier in
7:46
this video one of the first things I said is oh I want to I want to build this up I want to kind of make it maybe
7:53
tight against this Edge and now that the panel is sitting properly like it was before I did the wiring and um put the
8:00
tail lights in and all that I think I'm actually liking it and I think I'll have enough room to be able to roll the
8:06
carpet to the back side um and then Mount the panel and then this is
8:11
approximately 3/16 of an inch and the carpet is a/4 of an inch on compressed so lot'll go right up you know
8:17
upholstered it'll be nice it'll give me a nice Edge I'll be able to roll it under here there are still some tweaks I
8:23
want to make so for example the shape of this right here this line is not exactly
8:30
the same as this so that's something I'll do tomorrow night also I want to push this piece in right here in the
8:36
center um if you notice it's really probably tough to see but if I take my
8:42
finger and look at the where this lines up it kind of bows out in the center
8:48
that's a really easy fix I'll heat this up with the heat gun take a cool rag and put it in place and it'll kind of Reform
8:54
the shape a little bit just a little bit is all I need and that'll take care of that but again these are like those
9:00
little tweaks that I think really make the big differences so that'll be it for tonight I put in a solid night for those
9:06
of you watched the last video about my hours it's uh I don't know 20 after 10 right now and I put a solid 3 hours in
9:12
so I'll come back tomorrow night and continue working on it talk to you guys soon all right it is the next night uh
9:18
I've done a few things off camera uh that I'll show you when I put the panel on but before I do I wanted to show you
9:24
these are the areas that again I had to open up for making room for the harnesses I also did Mill this down
9:30
about um an e/ of an inch to get the panel to sit just a little bit flatter
9:36
um there's that Notch I made for that wiring bracket and again this one for the the bracket you can see where I
9:43
opened this up as well and I've got the little plugs I put in um right here uh
9:51
where the bumpers used to be and then this is the area that I cut out uh which was hitting the tailet harness so now
9:56
what I'll do I'll take my uh black spray paint just cuz I'm kind of a nut about this stuff I'll hit these areas with the
10:03
black spray paint and then I'll put the panel back on the trunk lid and show you how that fits now it's really good all
10:10
right so I got good news and I got bad news uh when I shot that video it was several days ago like five or six days
10:16
ago um had a bunch of stuff come up crazy busy with work and a bunch of
10:21
stuff around the house and family and all that so several days off way behind where I want to be especially again if
10:28
you've watched my videos where uh the recent one where I talked about kind of my Pace but that's okay that's fine
10:34
we're going to get back to it uh also I did um just after I filmed that last
10:40
little segment I went around here and I hit this with some um black the flat
10:46
black just to kind of give this a finished Edge I did one other thing too let me flip this over and I'll show you
10:51
all right so the other thing I did is I did not like um there was some kind of some bare spots that I had standing down
10:57
on this piece so I hit it with some rattle can primer hastily I think I rushed and I
11:04
know I rushed and uh I'm not happy with it so again my whole philosophy here now
11:09
especially kind of looking at the whole timeline thing it's got to be a precision and I got to do my best to
11:14
keep on track right I'm not going to sacrifice either in order to be able to get this car done so here is where I'm
11:20
at I did the rattle can um came in behind it had some high spots and I've
11:28
taken care of those I've also kind of done some more shaping in this section I wasn't happy with this I believe I am
11:34
now and you can see I've kind of gotten down into where I'm into the fuzzies a little bit on the fleece so what I'll do
11:41
I believe next I'm going to double check my to-do list I'm going to paint this with some resin um and I also want to clean up the
11:48
underside of this Edge is not per I can feel it it's not perfectly smooth um so I'll probably do a little
11:55
bit of kitty hair in there I also do want to show you what you know how this fits on the pan on the trunk lid you can
12:01
see also I got some overspray in here with that buildup primer again nothing you're going to see but it's not
12:07
Precision I've got some overspray on my magnets I'll go through get this all cleaned up respray this black re-shoot
12:15
this with the proper primer the 2K primer uh I've got plenty of time today so I will get this caught back up so
12:22
here we go all right so here's the panel mounted um there's really not much you're going to be able to see
12:27
differently here that's kind of the degree the tweaks they were very very minor you can see this probably this
12:33
Edge lines up much nicer now uh I reshaped this area a little bit and this
12:41
area I got those good I've got a nice clean consistent Gap back here so that
12:47
when the carpet rolls under it'll be good so my perimeter is all good so
12:52
shape fitment is good now what again what I'm going to do is work on um
12:58
fiberglass resin this corner that corner and I'm going to do a little bit of kitty hair under here cuz I'm not
13:04
perfectly happy with that okay I've got a couple of ounces of
13:11
resin just mixing it up ready to go um so again the bad news is I kind of fell
13:17
off track on my schedule kind of cost myself a little bit more work in having to redo some of
13:24
this but it's not a big deal I I want it right um the good news is is I did go
13:31
through and I've come up with kind of a solution to the next step
13:37
of the build which is going to be there's kind of four parts to it there is and that's the last things I need to
13:43
build in the trunk it's what I'm calling the pole floor actual
13:50
um floor over the stare tire and then there is
13:55
the spare tire area itself and there is the car area so that when
14:02
you lift the floor out what does it look like and then there's what I'm calling the luggage wall which I'll explain that
14:09
later it's when I bring this thing on tour and travel around the US I want to
14:15
be able to put Luggage in the trunk without having any kind of risk of damaging like the milbert's so that will
14:23
be a wall being made there I have most of that figured out uh and a little
14:28
sneak peek I do believe I am going to motorize the floor so and I don't think it's going to
14:34
be terribly difficult to build what I want to build so all right we'll let this cure up that's just the two corners
14:40
I needed to do and then I'll do the kitty hair underneath as well okay uh I am letting the raisin C up I decided to
14:47
do also this back Leading Edge all the way around just to kind of candy Co coat
14:52
the whole thing uh next I'm going to clean up the rattle cane mess that I made in here with the rattle canane
14:58
primer uh I'll use a reducer it's a urethane reducer uh which does a really
15:03
nice job of cleaning up uh overspray like spray paint uh I'll clean this all
15:08
out I'll pull the magnets out get everything properly cleaned and I'm going to put a new coat of black in here in just a bit all right Cruis I'm right
15:14
along uh magnets are all out cleaned washers are cleaned I cleaned this area just to get any of the kind of Dusty
15:21
overspray and again and just a bit we'll go back through and just hit this with some more flat black the resin is
15:29
still a little bit sticky I'm going to hit it with a heat gun um just to help cure it along it's about 65° out so not
15:37
like hot out so um we'll do that and then flip it over and then hit this edge with some kitty all right I've also got
15:43
this out in the sun to get a bit more heat on it I was always under the impression that UV helped to cure um
15:51
polyester resin but uh Zep carig 6708 uh one of a commenter on one of my
15:58
recent videos uh advised me that that is not the case he owned a surfboard shop for 15 years and apparently polyester
16:05
resin and the mekp that goes along with it has nothing to do with UV it's just a
16:11
chemical reaction so uh but obviously if you put it out in the sun you get a bit more heat on it so uh the more you know
16:18
I guess right so thanks for the tip and uh hopefully this tacks up and gets nice and cured and we'll be able to go ahead
16:24
and get a little bit of sandpaper on it okay I never like this bottom Edge so I went very heavy way more than I need um
16:33
as you can see I've got it mounted and I just mudded that up with Kitty hair I'll let it cure I'll remove it and I'll get
16:40
everything sanded I need to sand about an eighth of an inch Gap underneath there but this way I know I've got
16:45
everything filled in um I kind of back mudded it first before I put the panel on and then I came across the front
16:52
again there's probably 70% of that is waste but that's fine I'll get it to be the way I want so from there I'll go
16:58
ahead and get it sanded all right so here's what it looks like pulling this off then luck it
17:08
should D did the other end there we go now go ahead and pull it off all right
17:13
and that's what it looks like that's what I I wanted I wanted to get a better defined Edge there now I'll just go
17:19
around clean the extra part up sand it down nice and smooth and we should be
17:25
good well that was easy um got it all sanded ended up uh stripping
17:31
off that uh rattle can paint because I don't trust it I got my Gap really nice
17:37
very very consistent here and again you can see that edge looks good all the
17:43
other edges are good I went around the thing with the fine Toth comb so now we're ready to go back in and do a
17:49
little repainting um I was just thinking too I was like man you guys have seen me
17:55
do this multiple times on this panel and I know a lot of you are like hey we want
18:00
to see the details and all that kind of stuff I'm I'm almost thinking like is this video even worth putting up but uh
18:08
I guess I'll put it up but uh yeah lot of work and uh when you want to be Precision things happen so all right
18:15
continuing on all right I cleaned the panel with soapy water masked it off to be able to shoot those inside black
18:21
sections inside sections repainted all right much better magnets
18:26
back in place everything looking the way it should all right next thing is to uh
18:32
take a piece of cardboard uh kind of poster board cut it as a mask for these
18:38
three holes so I'll go ahead and do that now all right and once again all ready for a primer
18:43
[Music]
19:10
all right primer complete definitely not perfect good thing it's not a car um it's going to be covered in carpet but
19:17
um came out good so I'm going to let this cure up probably overnight and then
19:23
I'll scuff it with some 60 grit pull the masking off and then trunk lid BAS
19:28
basically will be almost done there's a couple of other little tiny tweaks but um I think at this point I'm going to
19:34
move on to the Milbert floor area and do those tweaks all right it's the next night and it's time to do a little
19:40
sanding [Music]
20:01
all right panel is back to where it started um I'm very happy with it came out great um now I'll get it mounted on
20:09
the trunk lid all right trunk lid is back on everything is tweaked I went through and even though I cut all of
20:16
this with you know router and all that I double checked all of my gaps you can see I'm getting really really critical
20:24
and again this is just it's going to be carpet up against this so I've got a lot of leeway but everything is very very
20:33
precise as good as I can get it um especially again I'll I'll uh use the
20:39
excuse of the tools to some degree everything is solid there so um trunk
20:44
lid I would say at this point is 100% oh one thing I full transparency I went to
20:51
pull the iPad off and if you guys remember I've got four steel washers epoxy at the back of the iPad one of
20:58
them broke loose the epoxy I used some Harbor Freight epoxy and I had it happen
21:03
on another one too and I switched over to JB Weld for that one to replace and
21:08
it worked fine so for this one also I'll switch to JV weld so at this point um
21:13
continuing on in this video there are some additional tweaks that I want to make in this section so again I'll dig
21:19
into here and I'll show you what I'm doing all right so this is the new epoxy I used a two-part uh JB Weld um and you
21:26
can see this is the one I just put on I've got it in the correct position this
21:31
is one that also came loose on me and I put the new uh used that new JB well
21:36
that worked well and then these two still have the old Harbor Freight we'll see how they fare if they come off I
21:41
will replace that adhesive as well all right cruising right along it is the next night and I am working on the
21:48
alignment of the side panels and all of my gaps so uh this side is really really
21:53
close probably within a 30 second this side's off by a mile so what I'm doing
21:59
is I put a piece of tape down kind of tough to see but I ran a pencil along the edge of the Milbert floor the
22:06
Milbert floor is basically fixed the way it goes in um it really doesn't have a
22:12
lot of play in terms of the way it's mounted it can expand and contract um which I've got slot grooves built into
22:19
this uh front rail but effectively right now when it goes in it's it's predictable repeatable and it goes in
22:24
the exact same spot so now I'll pull this out and I'll I have the lines to be
22:29
able to get my side panels to fit properly all right kind of got you a funky angle here so you can see my line
22:36
on the tape you can see the panel and if I put the screw in
22:44
place there is one screw that holds the side panels in those are called Carl
22:49
screws my buddy Carl was wondering how those are going to go in so if I pop that in you can see
22:57
I don't know if you can see it again in the with the uh being able to see with the camera but I've got a bigger Gap
23:03
here than I do down here when I take this screw out and I see kind of what's
23:09
going on there if I take the panel now and
23:16
Rocket I can find kind of the center axis there it's hitting on something and that's preventing it from going properly
23:23
into the um side of the car that's not as bad on this side much worse on the
23:28
other side so I'll play around it probably have to do a little surgery behind the panel um and we'll get this
23:34
fixed all right I have rethought the plan of attack here with all these little tweaks and I decided to change up
23:41
my uh angle of attack if you will the first thing I needed to do was deal with
23:46
this what I call again the near wall um after I built the this panel if you
23:53
recall I had to do some surgery on this thing and I think that's kind of what all started all the of this cascading
23:59
into the things not fitting the way I want and again I'm off by a 16th maybe
24:05
an eighth at worst on these all these panels so um typically a 16th or less so
24:12
one of the things I recently or I just was running into is I had a little teeny
24:18
tiny bit of a gap in here where you could see Dynamat in there um this again
24:25
is going to get covered I'll cut this this I'm going to cut this I'll cut it
24:30
with a blade at an angle like this on the carpet so I'll have kind of fluff coming out here so the carpet is going
24:37
to kind of fill in this Gap if you will so definitely not an issue but again
24:42
that's how OCD I'm being but if you notice you cannot see any Dynamat there
24:48
I fixed the Gap um I had to sand some of this the bottom side of this panel to do
24:54
that and then let me show you the other little kind of a hack that I did all right you can't even really notice it but what I did is took black paint and
25:02
painted about 3/16 of an inch of a of a lip here you can see see that just to
25:09
hide the shininess of the Dynamat I've seen builds where um and it was none of
25:15
you I'm sure but I've seen builds where you can see little things like that right those again are the that's the
25:21
last 1% if I saw this build you know with everything with the zebra wood and
25:26
the gold amps and all that and I could see Dynamat it would kill it for me that's how CR critical I'm being here so
25:34
um this I consider to be a bit of a hack but uh but not a hack job um I just again painted in there and
25:42
that makes sure that you don't see anything and once again once it's carpeted you'll definitely not see any
25:48
of that so all right continuing on all right one other quick model show you on the near wall I went to a a longer screw
25:55
this is substantially longer than the old ones um this is a giant Hollow cavity so there's like 3 in of dead
26:01
space behind here um and I did that because the bolt was not going all the
26:08
way through the insert it was kind of you know going in whatever halfway through or whatever and when I tightened
26:14
it down I had this one stripped out on me this one was a little suspect so I replaced both of those inserts went to
26:22
the longer Bol and that should prevent any kind of stripping issues ever in the future in doing so because this this is
26:28
a longer bolt and because of the angle of this wall relative this wall here relative to the angle of the panel I
26:35
need it to kind of egg shape the or oval the holes a little bit again those holes
26:41
are just the acccess holes to get the screws in those would be covered up with a flap of carpet once I carpet the whole
26:46
thing all right quick check in on the puzzle tweaks uh in case you're wondering I did paint the back of this flat black again um just because I did a
26:53
bunch of sanding this side panel this is where things again we're starting to get a little wonky um when I put this
27:01
together I'm telling you it was all perfect the gaps were perfect and I
27:07
think I when I did this modifications of the near wall I think the zebra wood
27:12
could be doing a little bit of expanding and Contracting still that's got to be expected um and again things are just
27:19
getting slightly um disheveled I guess a bit so here's what I got on this piece I've got
27:25
it really good here um um I've got a little tiny bit of a gap here that's I'll close that up later um with some
27:33
kitty hair um that's you maybe an eighth at the very top I also still have to redo fill in this whole pocket area
27:40
after I do lighting I've got a little tiny bit of a lip down here I can sand
27:45
this and it'll be good and then you can notice the Gap there it's exactly an
27:50
eighth of an inch here which is what my target Gap is but it's about a 16th there so what I think I'm going to do
27:56
I'll get the other side tweaked kind of in the same setup I think I have the same problem in the other side I don't
28:01
know how it happened but I will lightly sand that edge of the side panel so that
28:08
my Gap is consistent mic one gaps zero victory is mine so I finally got
28:16
everything tweaked all my gaps are back to where they should be so that if you notice I've got a nice consistent eighth
28:23
of an inch that's a piece of aluminum E8 in stock right there um I did have to sand down which I'm going to I'll hit
28:30
that with a little bit of primer um just that area right there by maybe an eighth of an inch but now I've got my quarter
28:37
inch spacers in here I did not have to do any sanding or modification here this is right back to where it should be I do
28:43
have a little tiny bit of a pocket there there's again this whole thing is going
28:48
to be filled in when I finish my leting so I'll probably just address that at that point but really nice here got
28:55
again quarin spacer I did a qu in here because I'm thinking that the carpet's
29:00
going to roll underneath this panel but more on that later in the next video and again you can I don't know how well you
29:06
can see it but this is spoton I could take a flat Edge across this and it's perfect this is again where I'm going to
29:12
cut the carpet allowing these panels to come out independently and then going along there and back in there you can
29:20
see a really nice proper gap so all the gaps are good so at this point what I'll do is I had just sand this one down a
29:27
little bit as well I'll pull the side panels out this is a kind of a squared off edge right here
29:32
it's more worried about getting the Gap and I'll hand sand this Edge and then I'll hit this with a little primer
29:38
probably just brush it on just CU I'm a Nut about having things kind of be consistent looking um and I think
29:45
that'll do it I'll reassemble everything and one of the biggest things with this now that I have the gaps correct is
29:52
getting it consistent in predictable repeatable results I still have a lot to do and I want to make sure that when I
29:58
put things you know take things in and out they drop right into exactly the right place I'm confident that'll be the
30:04
case I think this you know rebuild and the couple of surgeries I had to do on
30:09
there really screwed things up so feeling much better um now I'll just get these final painted areas done put it
30:17
back together and make sure everything is good all right so on both side panels This is the area that I sanded this is
30:23
before primer and this is after primer you can see it's a little shiny there there I'll let it cure up and then I'll
30:29
scuff it with a little bit of sandpaper and that'll be good to go all right so side panels are back in everything is
30:36
fitting properly so gaps once again predictable repeatable that's kind of one of my sayings uh I'm right back to
30:43
getting the exact same gaps what I ultimately found out was the brackets that I've got on here um those I can
30:51
adjust and I had them out of adjustment and that really just compounded all the issues and once I got those back into
30:58
the correct alignment now everything is good here and that's really where everything starts to fall into place the
31:04
only thing I do notice that I don't like which I'll address right now there's a little tiny bit of a gap right here uh
31:11
so I'll just tape off the car put in some kitty hair back mud this give it a quick sand and that'll be good okay so
31:19
removed the trunk gasket I've got the tape in place and the panel is in place
31:25
now again I'll just take Kitty hair add add it in there do the same thing over here let a cure up pull it out and we'll
31:31
have a nice perfect mold okay kitty hair applied and I'll let that uh it's just curing up I'll pull the panel out get it
31:38
sanded put it back in and make sure the Gap looks good all right that is a wrap I've got all the tweaks done that I
31:44
wanted if you notice the iPad is out I am charging it um today is Thursday tomorrow night Friday um there are some
31:52
people coming over for a get together uh as the uh MasterTech is happening this
31:58
week and some car audio friends are going to be coming over and checking out the car and catching up including Earl
32:05
so uh I'm going to cut out of work a little early tomorrow and I'll install the uh just temporarily obviously the
32:11
milbert's um the distribution blocks all of that um the power inverter the
32:17
capacitors all that and get all that stuff in there for those guys to see so um in the uh in an upcoming video I
32:23
don't know if it'll be the next video cuz I'll likely get some footage of that Expo group and put that up as well but
32:30
the next thing I'm going to be working on is going to be I've got four things remaining so what I call the pull floor
32:37
this will need to be made out of aluminum the trunk area um kind of the
32:43
size of the trunk underneath this and then the spatar area and then again I'm going to build just a real basic quick
32:50
and easy wall that I'll be able to mount should I want to put Luggage in the trunk so those are the last four pieces
32:57
to build uh before we move on the next thing we'll next after that we'll get into
33:02
Cooling and also lighting and the final upholstery prep and then it's on to
33:08
actual Upholstery and carpet so that should be it for now thanks again for watching folks I'd really appreciate it
33:13
if you have any questions let me know and if you have not already please like And subscribe and I'll see you in the next video thanks again bye-bye