CarMiZa part 34 Trunk Details Steel Fuel Line as a Wire Loom
I am excited for you to check this one out! This is yet another example of some old-school car audio creativity. I used steel fuel line to run the wires from the car to the trunk lid. Why not run the wires through the arms themselves? I would have to cut holes which would have weakened them, it would not look as cool, and fuel lines because I can! Please like and sub, and most importantly, enjoy the video!
Transcript
0:01
welcome back to the channel and a car Misa I am excited for this video folks I'm hoping I can get this part of the
0:07
project done in one complete video let's see how it goes what I'm working on is
0:12
going to be the wiring that goes up into the trunk lid so there's factory wiring this is the factory cover uh just made
0:19
of plastic here where the wiring goes this is about 3/8 of an inch diameter um
0:25
the wiring fits through there and goes up into the trunk lid for things like the license plate and such tail lights
0:31
all that I also need to run some wiring in here for an iPad charger and some
0:36
lighting up here and who knows maybe some other surprises later so looking at it I said all right I maybe I can
0:43
replicate that over here for those people who do 3D printing I don't even know if you can do like a reverse of
0:49
this and I said even so it's plastic it to me it looks really cheap so here is
0:54
my old school car audio type of creativity idea notice again where this 3 inch bump out is we're not going to
1:02
use this but instead I'm going to use
1:08
this 3/8 in fuel line which I will bend I got a bending tool to basically run
1:16
parallel to this we'll weld this onto the trunk arm on both sides I'll body
1:21
fill this whole area but leave a little bump out so when I'm done
1:28
it's going to look just like this only it's going to be completely kind of seamless in here if you will later when
1:34
the car gets painted that whole thing will get resprayed so in the end it's going to look just like that with like a
1:40
little 3/8 in bump out there all painted red and the wiring will go up in there
1:45
so really going to hide the whole thing and keep it really really clean to start
1:50
out if again if you've been following along you'll know that I redid All of the wiring in the car basically I bought
1:58
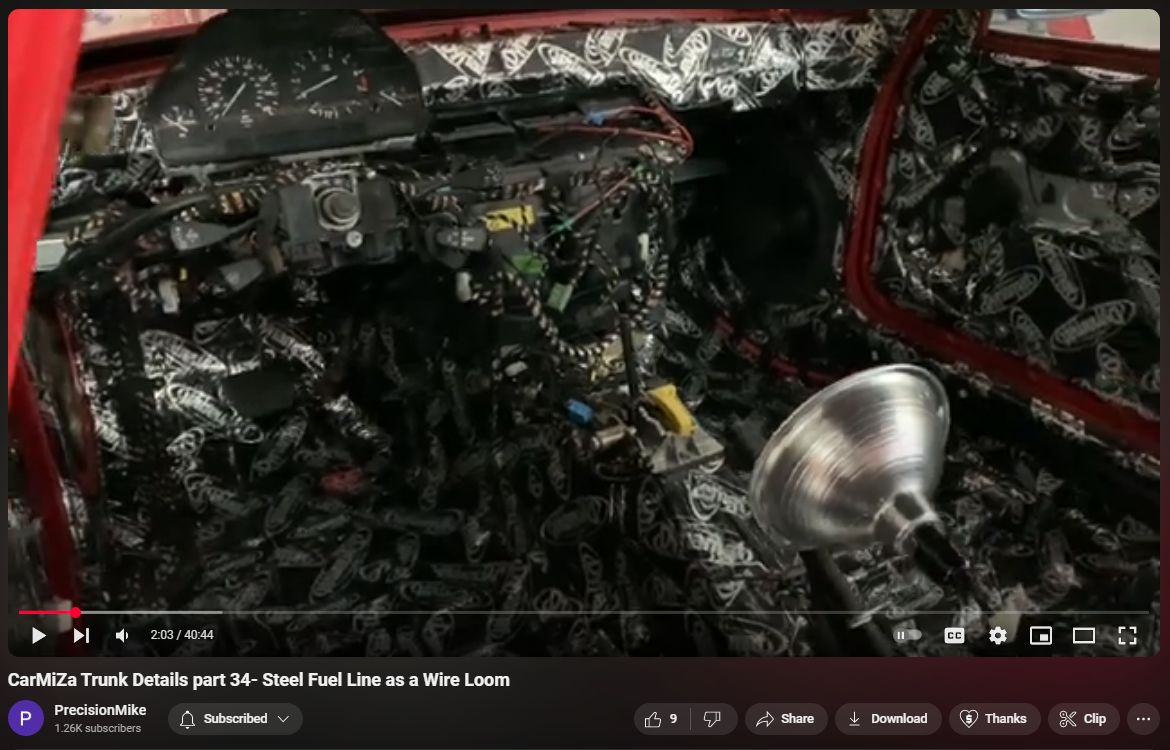
a parts car sectioned out a bunch of stuff stuff to see in there now but everything is very very clean in terms
2:03
of the wiring except for the part that goes into the trunk this is going to be
2:10
still kind of the way the rest of the car was so the first step is going to be to clean this mess up restore all this
2:17
wiring uh get everything to where it needs to be and then from there we'll work on building the tubes I'm going to
2:24
call it to go up into the trunk lid so let's get started if you're new to following this build I'll show you
2:30
something pretty cool um all the flat panels back here are made of aluminum uh 8 in aluminum all machined hardware and
2:38
these are the um the heat sinks for the zapco Z 600s I took a spare amplifier
2:46
sliced it and made links that are for the end and the center to hide the
2:51
wiring and then machined an aluminum cover cap for the ends also if you
2:56
notice the amplifier is upside down it's Hollow right now and I've got two Sony
3:02
10is Changers one on either side this bracket that will hold the changer serves is the bottom of the amplifier
3:08
everything again is all machined aluminum um done in my driveway with a router and all that and you can see you
3:15
even put like a 45° chamfer on that uh just really to make a nice complete finish I also have these crazy
3:21
Contraptions I built which are the shock Tower covers I wanted something extremely solid uh that would be
3:27
symmetrical and kind of curved to cover the shock Tower area and that's what you
3:33
see there um to do this wiring I needed to kind of expose everything you can see
3:38
there's a hole that's the factory hole where the wiring ran through so again step one here is going to be to kind of
3:45
assess and figure out I've labeled it so I know where things go but basically rerun it figure out the way it runs and
3:52
then get this all cleaned up all right so what I do to start with this wiring is I electrical tape it every 2 4 in or
4:00
so give or take um from the factory it's like that but the tape is pretty much disintegrated at this point um I
4:06
identify where things kind of split off which is the case here this is the stuff that goes up into the trunk lid and then
4:13
this is the stuff that stays in the trunk goes along this uh again what I call the near wall goes to the tail
4:18
lights all that but again just kind of removing all the factory cloth tape this
4:24
stuff uh identifying where it got what I call molest did where was that stuff
4:32
like this there's you know aftermarket connections all this will be redone
4:37
soldered and eventually once I get everything cleaned up I will use 9mm Tessa tape cloth tape which is the same
4:44
stuff the factory used only this is shot so again just kind of getting everything tidied up cleaned up figure out where
4:51
everything goes that's the first order of operations all right laying this out is not going too bad at all so far so
4:57
what again what I'm doing is removing all the factory tape I've got my tape um just kind of holding it and where it's
5:03
going to split off I've got that taped up I've identified and plugged in where
5:09
things need to plug in uh also um there is this part that goes underneath the
5:15
car BMW runs these marker lights you can see them down there they go into the side of the rear bumpers right there and
5:24
then we've got the electronic solenoid control for the that's for the gas door
5:29
locks the gas door there's an actuator there and then this tail right here so next what I'll do is test all of this
5:35
I'll turn the key on um test everything just to make sure all my lights and everything work back here and then I'll
5:42
go to this other section which is the part that goes up into the trunk lid which again that's going to be the part
5:48
that we're going to run through our tubes okay making progress but here's what we've got always going to run into
5:54
this kind of stuff so this is the line the whole group that goes up into the trunk lid um one thing I've got to be
6:01
careful of I'm doing 38 in od fuel line which according to my uh calculation I
6:07
measured all this is going to be a tight fit so I'm going to make sure it's going
6:13
to fit obviously before I weld stuff onto the trunk bars and all that I'm also going to make it where I have a
6:20
connection up underneath here so that I can remove the trunk bar um up here
6:27
there's basically a connection you guys have seen me take the trunk you know lid off on on and off several times I want
6:33
to plug down inside of here and I also want to plug up here so the wiring
6:38
that's going to run through here is basically just going to stay in there and there'll be a connector here and another connector down there um which
6:46
brings me to the next thing um I'm peeling the tape off peeling the tape and there's a big bump and I run into
6:51
this so somebody went a little crazy here cut the wires probably to get the
6:58
trunk lid off is my guess and then spliced everything back in and did some other tie-ins here it looks like so what
7:05
I'm hoping is I can cut this here if my length is good attach my connector here
7:12
that'll represent the car side connector this you know for the next 10 or 12 in
7:18
runs through the tube I'm going to create then I do another connector which goes up on the trunk lid there's
7:24
also some other stuff I've got to clean up someone tied in here
7:30
um that's a power red in this car is Power and Brown is ground so somebody tied in here um at least it's soldered
7:37
it was taped up and everything but I will cut this off I have a entire box of
7:42
parts I probably have another one of these plugs I'll cut this off down here
7:47
and solder in a new plug so that it gets rid of all this stuff so uh fun stuff um
7:53
this isn't too bad if again if you're not aware I did this process for the entire car the literally the entire car
8:00
and then made an inventory of every electronic part and tested every one of them I built a big spreadsheet and 100%
8:07
everything worked so I'm not afraid of this it's not bad but it's an incredible mess because you're dealing with old
8:14
sticky residue tape this stuff is all sticky so once I get all this run and
8:20
kind of roughed out I will have to clean everything and then again uh ret tape it all so I'll show you that process all
8:26
right quick update here I'm running wires into the trunk it's um pretty basic up here there's the
8:32
tail lights which I popped in there's the um license plate lights there's a a
8:39
harness for this latch and then I've got two extra harnesses um BMW does an
8:44
awesome job of not duplicating um like the same plug in the same area they're all unique Mercedes you need to learn
8:52
that um and I've got two extra plugs that I cannot figure out what they go to
8:58
so got a little bit of reading here uh thank you Michael Milbert I've got an entire wiring schematic for the car and
9:04
I also have a Shot manual between the two of these I'll be able to go through review the schematic and identify what
9:10
these are if they're something that my car doesn't have or something I'm not going to need then I can remove these
9:17
wires which will um further ensure that the wiring is going to fit through the
9:22
tube I think I'll be okay even if not um so again you can basically see I've got
9:28
stuff plugged in where plugs in I've got a rough idea where my wiring is going to go here I've laid it out here and then
9:35
this is where that kind of a I'll call it a mess down here is and I think I'm
9:41
going to be all right with where that's going to be cuz I'm going to go again all the way up into here and I'll have a
9:47
socket probably on the top side of the rear deck so um pretty solid progress I
9:52
would say um this is kind of the the not fun part um especially again because
9:57
it's just a total mess but uh makeing progress I'm going to wrap it up for tonight and then uh tomorrow night I'll
10:03
continue wiring I'll figure out what's going on with these guys I'll have again some additional work to do soldering and
10:10
redoing a bunch of this stuff so um little by little it's coming along all
10:15
right this is not a slam dunk it's going to be a little tricky uh here's where I'm at I've took the area where um all
10:22
of these wires were cut basically uh and spliced back together I cut them off
10:27
remove the trunk lid and what I'm I'm going to do now is kind of work backwards so I'm going to I'll fix this all the stuff up and I'm going to put
10:35
these wires where they should go how I want to run them and get an idea as to
10:41
what that length looks like um what I'm going to end up doing is I'll have a
10:46
connection uh that comes out of the tube at the car and another one up here at the trunk lid because again as you can
10:52
see it can remove the trunk lid with the arms included and I can also there's a
10:58
couple of 10 ms I can REM move the arms I want the flexibility to just leave the wiring in the tube and be able to
11:04
connect it at the car side or at the lid side so uh that's what I'm working on I'm also it's going to be sketchy I want
11:11
to make sure that all these words are going to fit in that tube if not I've got a an option but uh hopefully they do
11:17
let's see how it goes all right I cut a very small piece of the tubing and as
11:23
you can see it's tight I may have to put some WD40 in there as I push the wires
11:28
through but but it fits it's going to be close especially once it's all bent and everything it's
11:34
going to be a good time but uh I know I can get them all in there so that is cool continuing on show you a quick
11:40
funny here uh last night I was going nuts trying to figure out what these two harnesses go to again I pulled out the
11:46
wiring schematic and was going nuts um turns out there is a actuator kind of
11:51
like a door lock actuator um I've already mounted it it goes they're making sure nobody can get to this thing
11:57
it goes way back behind this panel and this is what it does and you can see
12:02
the mechanism there it controls the lock and unlock um I just wanted to point out also again if you've been following me
12:09
you've seen me do this before but if I've got stuff like this where I've dynamed over it I'll take a punch and I
12:15
will just carefully remove the Dynamat that way I'm not tearing it everything is nice
12:20
and I still have enough room where I can adjust this should I need to but it is set for now so all right continuing on
12:27
okay quick update um it's going well um I have to play around with where I'm going to Route stuff in the uh in this
12:34
panel you can see I've removed some Dynamat for the clips I'm kind of playing around with it but that I can deal with later that's kind of pretty
12:40
easy um the most important thing is where do I need
12:46
to extend if at all these wires which I don't want to have to do uh and I think
12:51
I'm going to be okay so here's what I got this blue tape represents where this comes to kind of where it would come
12:57
into the uh panel if I was to cut this over here put a
13:03
connector there and then be like all right cool that takes care of that and then I'll just run this part through the
13:09
tube right the problem is it's not long enough and that's again I cut where the
13:14
the other people had cut in the past not a big deal here's what I'm going to do I'm going to leave this I'll cut back
13:22
what I don't need because I'll have extra and pretend that's my connector from here to go round this
13:30
down and have plenty of slack to go in the car I need about 30 in so here's what I
13:36
did I have again I have a parts or I had a parts car and I harvested all the wiring out of it so I probably have this
13:43
wiring but again I'd rather not make connections if I don't have to kind of follow me here so what I've done is this
13:51
is the trunk lid wiring all right and previously this was tied together with the main harness that went into the
13:57
trunk and it kind of wrapped around the shock power it went up there so it was kind of a long run so what I've done is
14:03
I undid my tape back down to this fuse box here so you can see this is all
14:08
again the I'll call it that the trunk wiring and now what I'm going to do is
14:14
take my trunk lid wiring run it over here run it up with all this Factory this all get redone and now when I do
14:22
that and I just have it zip tie just to hold it I've marked this as well so you
14:27
can see that blue tape basically represents I'll cut this metal back a little bit uh if needed even and I'll be
14:34
able to do my socket right here so I can unplug it push the wire through and be able to pull the trunk lid from there um
14:42
which leaves me trust me on this from that blue tape to this end 30 in so I'm going to cut
14:51
the wiring here this will be the piece that goes in the tube I'll put a socket on either end we'll do a socket on this
14:58
side of this wire so again like right here for the car side and another one on
15:05
this side for the trunk liet side so again I'll be able to take the trunk liet off either with the hinges on or
15:12
the arms on or not so uh all right keep cruising along here and there you go
15:17
there's my trunk I cut it that's going to be plenty long enough and I've got you know solid 6 in on either end to be
15:23
able to do my connector and go from there all right I am back it is Sunday
15:28
and I've got uh pretty much the whole day to work on this um all right here's what I did next I just took a piece of
15:35
string ran it along this area here again just to confirm and I got my 30 in that
15:41
I uh that I suspect I'll need it's probably a bit more that I need so what I'm going to do next is cut this I
15:48
bought a tool just basically a pipe cutting tool I'll cut this to 30 in and then I need to remove this coating which
15:55
I think is going to be easier to do before I bend it okay if you've never a pipe cutter this is the way it works
16:00
it's basically a wheel inside there and you just turn it give it another
16:09
little bit of a turn this is a real small CHP one that I bought when I bought a flare kit um we're going to be
16:15
flaring the ends of this as well which will help I figured with the wiring that
16:20
way when I pull the wiring through I don't risk chafing the wiring the
16:26
insulation of the wiring especially because it's going to be tight um bending this as well uh I think is going
16:34
to be probably the hardest part of this whole project and that's what I'm doing next after we get this cut and this
16:41
coating off it will be bending it especially because the the trunk arm as
16:46
you can see here I C this notice it's it's kind of Twisted the the shape of
16:53
the arm so it's not perfectly straight it's not like I just need to do those bends and I'm good it's a complex curve
16:59
so that should make things fun I don't have have any idea what I'm in there's
17:05
my cut with this I have a feeling we're going to be using some map gas as well this stuff is cheap um it's readily
17:11
available at AutoZone so if I need to run and get more I can easily do that so all right on to the next step in typical
17:18
Precision like fashion I've got my to-do list again anytime I do a project like this I spend as much time if not more
17:24
planning and out than I actually do executing to hopefully ensure that it goes well all right as far as the
17:29
coating goes that is the before and that is the after uh 10 minutes alone with
17:35
some uh sandpaper I did a 60 grit and then down to 100 grit again the
17:40
objective of removing the coating is to make sure that when this gets welded uh
17:45
we get a good strong weld uh the next part is going to be to go on and start
17:51
bending and I'm going to use this is kind of an offcut uh from this shorter piece of pipe I have two different
17:57
lengths of this tubeing that's what they had in stock at AutoZone I'll use this to practice bending I've never done this
18:03
before I don't know what to expect and I'm going to give it a shot so let's try it all right so to bend the pipe uh or
18:10
tubing whatever you guys call this um fuel line whatever fuel line uh I got
18:15
this Tool uh off Amazon and this basically will the pipe goes in you go
18:22
like that you lean it against this Edge and you can put the required bend on it
18:28
so again I've never tried this inside of here there's three different tracks for various diameters of pipe I'm going to
18:34
try just a small Bend here at the very end see what it does I don't
18:39
know how much leverage this is going to
18:45
take if I'm going to need
18:54
heat pretty good Force required that's for sure
19:03
and there's my Bend um it's all
19:09
right but I notice it's kind of closing down the end just a slight bit the
19:15
wiring going through here there's 14 wires of different sizes and it is going to be tight so I think this is going to
19:23
be a little tricky let me try a little map gas heating this up and see if it's a little bit more tame when we bend it
19:30
okay I'm also thinking the vice is going to help but again I might be limited after I start doing my bends on the real
19:35
piece for those of you who've done this before you're probably laughing at me thanks a lot I appreciate it just kidding all right let's see what happens
19:42
here we'll apply some heat I don't know quite how much but we'll play around with it and see what
19:52
happens all right let see what that does we don't want to Cave it in
20:01
I'll go further back in my piece definitely easier to bend it but I
20:08
want to see what it looks like man I'll tell you this is
20:15
not the handles on this uh tool are not as long as they should be in my opinion
20:22
you can't get much Leverage
20:34
let's get this [Music] out I don't know I mean it's it doesn't
20:41
look bad it's all right if it's not perfectly round because as long as there's enough
20:48
space in there for the wiring to fit but I'm not not 1,000% impressed or even
20:54
100% so all right I'm going to play around a little bit here off camera see what I I can come up with and I'll check
21:00
in shortly all right slow and steady uh what time is Auto Zone open
21:06
till I don't know if I'm going to get this on the first try guys it's definitely tricky especially because of
21:11
the compound curves on the trunk arm so if you notice it's I would say this
21:17
looking at it from this perspective it's it's pretty much where it needs to be but then here you can see I've got a
21:23
little bit of I got to I have to add a curve here to try to get this to curve down this is going to be really tricky I
21:30
got to do it on both sides but I think again you get the concept there um once
21:35
this is done it gets welded and you know the whole thing gets painted and all that so I'll continue on making my bends
21:42
let's see how it goes all right definitely a work in progress but here's what I've got uh obviously the trunk
21:47
lid's out and what I can do is carefully slip this in and just kind of get an
21:55
idea of placement I can see we're going to have to do a little bit of VAR moded surgery on the panel but that's okay I'm
22:01
G to I'm still tweaking that end but again we're slowly coming all right quick check in um not terrible um kind
22:11
of what I envisioned I guess but this is kind of hard guys it's I'm going into completely unchartered Waters here so uh
22:18
one quick thing this was like right up against here and I needed to straighten it out like this so as you can see here
22:25
I added another zip tie and very carefully took a screwdriver put it inside there the the biggest fear I have
22:32
here well one of them is collapsing this right cuz if I Collapse this at all wiring is not going to fit for sure um
22:39
and then I just gently pulled on this while pushing down on this so I was able to bend it it's thin wall steel so um it
22:46
is you know to some degree obviously flexible this gets a little weird here but again I'm going to Bodywork this
22:52
whole thing in and it's going to be you know once it's in the car so for example
22:58
this this is the driver side it's going to be that's kind of down in the bottom you really won't notice that I don't
23:04
think and again I'll mold it all together um here
23:10
is be careful here how we're looking here so pretty
23:15
cool I think that's right where the factory wiring went in um I'll decide on
23:21
whether or not I want to fill this all in I want people to know that you know when I'm showing the car I'll say hey
23:27
yeah I use 38 in fuel l to run my wiring and I think maybe if I leave it like this it would be cool cuz you can
23:32
totally see where that is but I otherwise this will all be finished off but they'll be separate here that might
23:37
be cool we'll see um the other thing that's a little bit
23:42
weird um and it be okay actually as you'll notice this bottom part is kind
23:49
of low I got to be really careful with this enters into the car obviously I need to cut this and then I'm going to
23:55
flare it this ended up being I cut it way longer than I needed to figure that piece that I showed you it's just going
24:01
to be a cut off scrap um but now I need to figure out I think
24:06
what I'll do is cut this you know maybe about here flare it and then that's
24:12
where my wiring will go you know I'll have my connector and goes into the car but I don't know I I think I'm
24:20
apprehensive to try to do anything more with it because I don't want to screw it up
24:26
which is I feel like it's playing roulette here right I spin a wheel and am I good or do I wreck it so again it's
24:34
pretty cheap so if I do I can go get more oh I also heated it up and bended it this way so as you can
24:41
see I mean we're really close to being tight here we might be able to very carefully clamp it but again we want to
24:48
be really careful when I go to weld it so this I'm not worried about that I'll fill in that Gap but overall I think
24:55
it's pretty slick I mean when you compare it to
25:01
sorry comparing it to this it's the same philosophy and it is going to look so
25:08
much cooler so all right I'm going to keep chugging along here kind of figure out what my next move is and uh I'll
25:14
keep you posted all right I got my piece cut to length um pretty happy with it
25:20
and the next thing I'm going to do is flare the end I did this on a the cut off piece and you can see what the
25:28
effect effect was there the objective here again is when I go to feed the wiring uh I don't have a sharp edge that
25:33
I'm going to be you know getting really uh stressing the insulation on so the way that this tool works as far as I can
25:39
tell I got this from Amazon it's just a we'll call it a Fisher Price version uh
25:46
pretty basic but it'll serve the purpose let me get this tightened up and
25:52
already so basically this part is going to hold the fuel line and then this part
25:58
you can see there is got this concave thing it's going to cause a flare at the
26:05
end very
26:11
carefully all right I think that should do it and I just need a little bit just again so that I don't have a sharp
26:21
edge might want a little bit let me get this wrapped up and I'll show you all right there we go that end is good kind
26:28
of tough to see maybe a little bit on camera but you can see when I go to feed the wires in it'll be a little bit
26:34
easier I need everything I can get because this is going to be think that's after bending these and then I got to
26:40
still match this and do another one of these replicate it for the other side um getting the wiring through is going to
26:46
be a tricky tricky task but we'll get through it all right carrying on okay
26:51
here's a side profile and again this Bend is a little weird but I'm fine with it and then this if you notice it kind
26:58
of hangs a little bit lower which I'll need to because I need to again from here goes my wires into the car so I
27:05
think that side is good to go I do have when I put the uh iPad panel on this is
27:12
hitting just a little bit of where I built it up I can trim that away it'll be fine and there's plenty of room for me to run the wiring in here so I think
27:20
this part is good um my next move is going to be to replicate one of these
27:25
build another one for the other side and hopefully end up with the same kind of bends and shape so it's symmetrical and
27:31
then we're going to um probably wire wheel this paint away and prep it for
27:37
welding all right so again the next thing I'm going to do is hopefully replicate this as near as I can for the
27:43
other side um one other quick thing too I track all my hours on my builds this took 2 and 1 half hours for me to get to
27:50
this point kind of figuring it out laying it out vending it doing everything I needed to um which I don't
27:56
consider to be that bad and I was able to get it complete on my first shot so I do have plenty of extra tubing so if I
28:02
screw up this other side I can start over so all right let me go ahead and knock this one out quick check in uh so
28:09
bend up the second one don't like it the bends are not as symmetrical as I can get them uh if I claim to be Precision
28:16
mic let's be Precision so I'm back from AutoZone with a new piece and I'm going
28:22
to redo that side okay second attempt on the passenger side worked out quite well
28:28
um we're really really close 90 plus% right now so uh it's about 3:00 I'm
28:33
going to go grab some lunch inside and come back out and continue my goal is to get these 100% prepped and dropped off
28:41
for welding today to my son-in-law James uh so a little bit more tweaking to do
28:46
uh I've got to grind down the paint where he's going to be welding and then uh do the final attachment which
28:51
obviously I won't use plastic uh zip ties for so coming along it's kind of uh
28:57
meeting my Vision I would say um some things I still want to figure out but overall quite happy and it like I say it
29:04
definitely is what I imagined so all right I'll be back here shortly What's the phrase flame suit
29:11
on this Dent was not there I put it there intentionally using a bolt I put a
29:17
bolt there it's a big giant Hollow cavity uh if you're concerned about me damaging the car don't forget we've got
29:22
13in woofers in the kick panels so I wanted to be able to have kind of a dimpled area for the tube to come in
29:30
this has nothing to do with well I should have made the tube taller because again I want it to slip underneath the
29:35
panel that I made for the iPad so basically I put a bolt there very carefully tap the metal and formed that
29:43
this was a factory crease that was there so when it's in the tube is in basically
29:49
you can see the wiring will come through here and this also will allow for I've
29:54
got this arm right now uh I need to allow clearance right for adjustment so
29:59
right now the arm is as far that way as possible and you can see it's I just
30:04
have enough clearance and it kind of looks like it was from the factory I think so all right uh let me show you
30:10
one other thing on the panel all right on the panel this was the piece that I left as is where the factory wiring came
30:17
up through you can see kind of where my finger is there was like a little trench I took a Dremel and just kind of
30:22
accentuated that and the my wiring can run along here or by the time it gets over to here the you can fit your finger
30:28
in here it's there's plenty of room and then I mimicked this on the other side
30:33
just using again a Dremel to open this up and now I can run my wires the same
30:38
way and the I'll show you I'll put the panel on and show you how that meets up with the tube all right the trunk lid
30:46
entry is what I'm I I come up with names for all my stuff and that way in my spreadsheets I can reference things so
30:53
trunk lid entry for the tube is done uh it is is really came out nice I think um
31:01
I think what I'm going to do and again my hope and thought is to get everything done during this particular video but if
31:08
not in the comments I'd be curious um what I'm going to do I want your opinion
31:13
I'm going to basically this will get welded and then imagine I just take filler and I go like that with my finger
31:19
I want this to be visible still so that I can explain to people yeah I use fuel line to run my wires check it out and
31:26
I'm thinking that I'll leave like this as a gap here so that you can clearly see that this is 38 inch fuel line I'll
31:33
I'll kind of seam seal it and bond it here but it'll break off there um again
31:38
curious what you guys think um I could hide it and then you know it would be like trying to explain it to somebody
31:45
and they may not pick up what I'm putting down but I think it looks pretty cool um I'm really happy with my bins uh
31:52
I just checked both sides everything is good there the last tweak I need to make is entry into the car I'm I want to see
32:00
how is this going to look um in the car is this going to be too close do I need to bend this more straight this stuff is
32:07
carefully pliable so um I may need to do a little bit of tweaking and I may may
32:12
do some adjustment to that but I'll pull the hinges off or the arms off I'll Mount them in the car without the lid
32:19
and kind of play around and see how things look all right I just tried this arm this is the driver's side arm in the
32:25
car sorry it didn't take you long for that part but basically I you know put the pin in place moved it and I wanted
32:32
to see what's this actually going to look like how is this going to look um
32:38
most importantly is it safe do I have room for slack and the harness and all of that um generally speaking I do but
32:44
here's what I determin I want to cut about a quart of an inch off this so I'm going to cut this I'll Raper this it's
32:50
pretty easy to do and I've also determine I want to close up that Gap I want to get this tight up against here
32:55
so I'll very carefully do that and then I'll mimic the same thing on the other side um this one if you notice too
33:01
notice the Gap here relative to this it was off if you had an Eagle Eye you caught that already um again I'm full
33:08
disclosure but I had a feeling I was going to need to trim this so I'll use this as my reference and then trim this
33:13
one back do the same thing and see how it looks I will have to um one other thing and I'm going to leave this for
33:20
got a long list of stuff for upholstery prep um that area right there this Edge
33:27
I want to I want to take back another quarter of an inch uh but to do that I've got to pull all this out and it's
33:33
kind of a big project I figure I'll wait until I'm getting ready to do the
33:38
upholstry for that which isn't that far off believe it or not so all right continuing on all right and this cut is
33:44
needed and the flare is complete all right so now that's what the end looks like I did a very slight Bend just
33:51
brought it up against the arm and now I'm going to install it and see how it all looks kind of dry running all right
33:57
so this is why I didn't bring you with last time it's a little tight um but looking at it I can see where the wiring
34:04
is going to go and if you notice up in this area is hollow see
34:12
that big bump right there so just below that is all Hollow and that's where I'm
34:19
going to put the slack and the plug so I'm good with that I think it looks good
34:25
now I got to do the other side all right I ended up taking off off another 3/16 and now it's exactly where I want it so
34:31
now I'll replicate the same thing on the other side all right mockup complete looks really cool um if I don't say if I
34:39
do say so myself um all right again mimicking the concept let's go take a
34:45
closer look here of what the factory plastic cover does only this is going to be way cooler I think um and you can see
34:54
goes up into the rear package shelf there very nicely um everything moves
34:59
good um I will again I'm going to need to tweak the I call it the hanging shelf there that piece of aluminum that I
35:06
built I'll widen that out by quarter to allow for this um but that's later that's kind of pre- upholstery stuff but
35:12
um again I think it looks pretty cool and I like this notion of separating it
35:18
here to be able to distinguish and again show that it's something different and I made it so um I'll do one more test fit
35:25
on the actual trunk lid just to make sure everything is good with the placement then I'll pull it all apart
35:31
I'll pull both you know all four pieces apart sand the um arms themselves and
35:38
preparation for welding and then I'll attach the tubes to the arms I've got a
35:44
couple different options I'm going to try there and get it all mocked up for James who will be doing the welding yeah
35:50
in case you're wondering I'm going through an absurd number of zip types buy them at Harbor Freight they're real cheap I think this is like five bucks
35:56
four or five bucks for a 100 so good deal all right once again trunk lid fitment I didn't expect it to change
36:02
nothing really moved I've got my marks where are they so you can see right here where I aligned everything up and I'm
36:09
back to the original placement so tubes go in there just as they should all right time to sand this down in
36:16
preparation for welding all right this is what it looks like after I sanded it um just need to make sure that when
36:23
James does the welding we're steel to Steel uh and that's plent so I'll show
36:28
you the process very simple just using a 5 in random orbital with a 40 grit uh
36:35
pad and knocking off this High spot we'll see how this goes it's dark out and I got my head lamp on
36:40
um I went ahead and marked this with a sharpie in terms of where I need to sand
36:46
while the uh piece was on so here we go
36:52
[Music]
37:04
[Music] I won't do the whole thing but you get the idea all right that's a wrap for tonight
37:11
I am ready for welting um notice I've got I took off the regular wire ties I
37:17
took some uh heavy gauge wire here spun it got everything nice and tight I've also put some reference marks for James
37:25
and I'll review the whole thing with them he did the welding of the kick panels he's the only other person that
37:32
worked on this car um probably will be other than Earl when we get to tuning so
37:37
um hopefully tomorrow I can run over to his place after work drop these off and
37:43
then he'll probably bring him to his work and then get him welded up after that we're going to do the body work on
37:49
him and continue on from there all right folks so it is the next day uh the parts
37:55
were dropped off to James and without me thinking about it he's like
38:00
wow this is going to be really hard uh if you consider the tubing he needs to be able to weld through that and you
38:06
know connect it to the trunk arms without blowing through it which is going to be really hard because it's a very thin wall steel so he said I'll do
38:14
my best and and hopefully everything comes out so fingers crossed uh obviously hopefully that comes out good
38:21
um with that I'm going to wrap up this video I'm trying to keep my videos a little bit shorter some of the recent
38:26
videos were over an hour long uh so I want to be careful there I apologize I know I was hoping to get this whole part
38:33
of the project done in this video and that's not the case so likely I'm not going to commit to anything but in the
38:38
next video we'll get the parts back from James fingers crossed the welding goes good we'll get it all body filled
38:45
primered um I'm not going to paint it yet that'll happen when I paint the car and um kind of take care of all the rest
38:51
of the wiring and I've got a few miscellaneous loose ends I want to tie up in the trunk area too uh to get that
38:56
done so uh if you have not already please like And subscribe I've also noticed that there's recently I'm having
39:03
a big influx of people that are watching the Cara content if you're not aware there's like 50 plus videos on my
39:10
channel just for this car I've got some other videos for the other AMG cars that I've got but the majority of the content
39:16
is on Cara in the earliest stuff has by far the least amount of views so if you're interested in checking out kind
39:23
of the early days I literally have the day I pull the car up to my house when I first bought it and that was over four
39:29
years ago unfortunately and here I am still working on it but uh labor of love I guess but um uh again I apologize that
39:36
this video was not complete I we didn't get the job done but I'm I'm hopeful that in the next video we'll get it done
39:43
so thanks once again for watching oh one last thing um I also uh
39:48
recently um I posted it tonight I'm not sure how quickly I'll get this video up but um I recently acquired some Sony X
39:56
uh some C9 CDX C90 single dis CD players that I'm going to be putting one of
40:01
those in the front of the car just so that I have the ability to play a single disc if I'm sitting in the garage and I
40:06
want to pop in a bunch of different CDs listen tuning whatever the case may be
40:12
um so I bought a few of those and none of them worked and I kind of pieced them together and I got one up and working
40:18
and I'm uh I believe I can get a second one up and working as well so if you're interested in checking that out that's
40:23
another video I posted it's only about 21 minutes long but it's got some cool content um as far as the c90s go so
40:30
thanks once again there'll be another video coming very soon and for anybody watching uh for the AMG content I've got
40:36
some stuff I'm working on there as well but uh that's going to be it for now thanks once again I appreciate it and
40:41
we'll talk to you soon take care