CarMiZa 29 Trunk Details iPad in the Trunk Lid 1
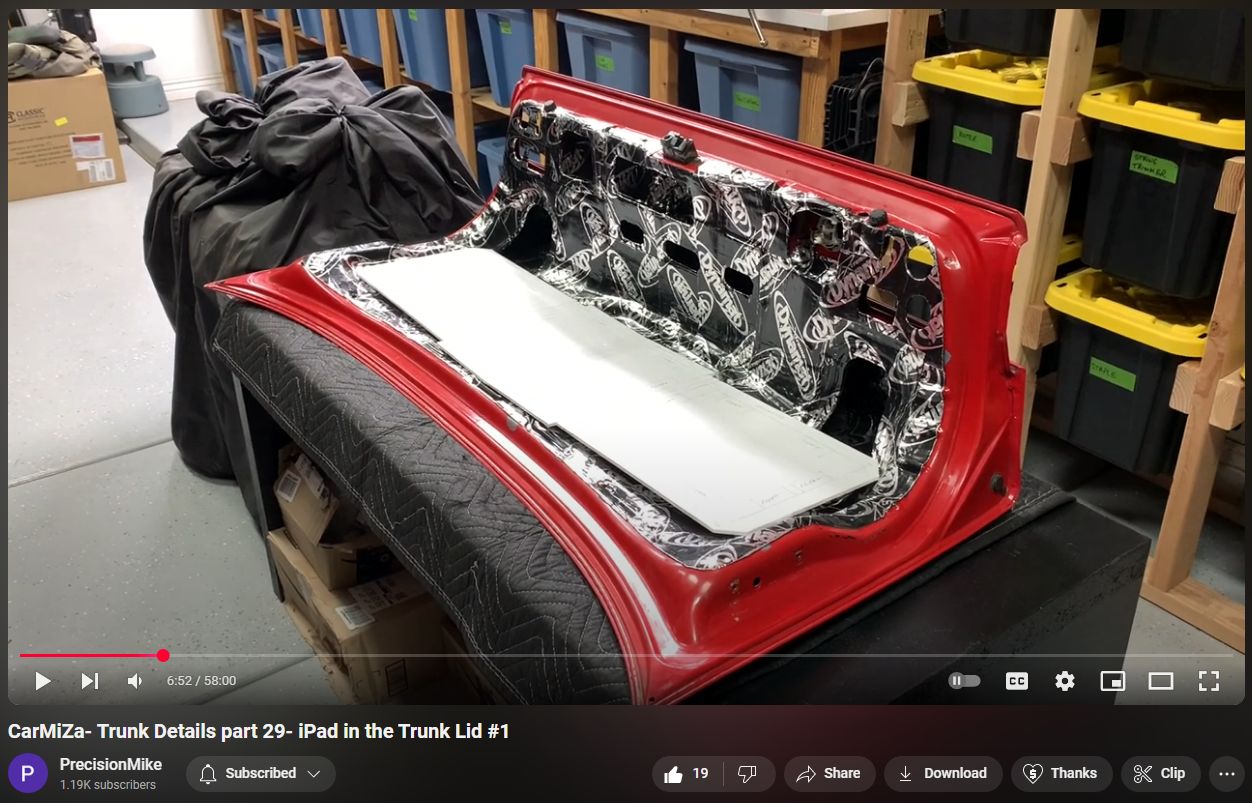
In this video, I start working on the custom panel for the trunk lid, which will feature (2) display panels and a 12.9″ iPad Pro to play build videos of CarMiza. Enjoy!
This car (original build in 1990s) was one of the first cars to use Dynamat.
325 sq ft interior surface area, so far, eligible to receive dynamat.
In the blog post titled “CarMiZa 29: Trunk Details iPad in the Trunk Lid 1,” published on December 15, 2024, Michael begins the process of customizing the trunk lid of the BMW 3.0 to incorporate two display panels and a 12.9-inch iPad Pro. He starts by removing the trunk lid and its support bars to facilitate easier access for modifications. After cleaning the metal surfaces with isopropyl alcohol, he applies an epoxy primer to seal any exposed bare metal, preventing potential rust. Michael then outlines the area to be covered with Dynamat, ensuring to leave space along the edges for future panel construction. He plans to apply two layers of Dynamat to enhance sound deadening while being mindful of the additional weight, considering potential upgrades to the trunk’s support shocks if necessary. The post includes a video detailing these initial steps in the trunk lid customization process.
Transcript
Search in video
0:02
hello and welcome to Cara trunk details part 29 uh the build
0:08
continues um in this video we're going to work on the trunk lid cover um to
0:14
begin I'm going to use the O piece I believe as my starting point and we're going to build it out from there so
0:19
let's go ahead and get started all right my first step was to remove the trunk lid which I've done several times at
0:24
this point I've also removed the trunk bars you can see that are normally attached to the trunk this is going to
0:30
allow me to work um a little bit more freely and the first thing I'm going to do is prepare for Dynamat and put a
0:37
couple layers of Dynamat on the trunk liet so the first thing I'll do is give it a really good clean with isopr
0:42
alcohol and a clean rack all right all the metal is clean I also went through with an air compressor
0:49
and kind of blew everything out just to make sure in these little nooks and crannies that I got everything out um if
0:54
you're not aware the car is going to be repainted so what I'm going to do with the Dynamat is not go right up to the
1:01
edge where my cover will be built I'll go in a little bit and that'll leave me
1:06
an area to be able to uh paint up to so uh the next thing I'm going to do is go
1:11
through an epoxy seal um some holes there were some holes that were drilled in the trunk lid which are exposing bare
1:18
metal um obviously making it susceptible to rust it's been uh over 30 years at
1:25
this point or about 30 years so so far no rust but I don't want to take any Chan so even the factory these are
1:32
actually Factory screw holes that hold that carpeted piece on uh there's bar
1:37
metal there so I'm going to be using this product here uh mixing it 4 to one uh just hitting it with a little brush
1:44
here uh just again to go around and make sure there's no bar metal so I'll go ahead and take care of that next epoxy
1:50
primer complete it's just drying up now it stuff dries really quick it's a 4al one um mixture it's epoxy so it it
1:57
hardens up quick even though it's not super super hot finally for once it's about 55° here in Arizona um the other
2:04
thing I've done is I took some reference photos um because when I Dynam it over
2:09
everything I want to know where these holes are I might be utilizing some of these in the future uh with this uh
2:16
panel that I'm building so uh from here I will go to the next step all right my
2:21
next step was probably a little Overkill but that's the way I roll took me less than 10 minutes I ran a uh perimeter of
2:28
masking tape all the way around right where this cover is again I'm going to be building this piece up um so now when
2:34
I remove it I know where uh to Dynamat up to so I'll go ahead and remove it now
2:40
all right here's the tape perimeter with the panel removed now at this point I can go ahead and start dynama and again
2:46
I'll leave space um along this tape Edge uh one thing I do need to consider is
2:51
weight on this panel it's got the factory shocks or you know the OEM grade
2:56
of shocks that hold the trunk lid open but I'm going to be adding more weight to it so something to consider if you're going to be doing something similar to
3:02
this I know that you can upgrade the shocks to something stronger um I'm
3:08
going to try not to go crazy with the weight um but I'm going to do two layers of Dynamat so um plus the iPad and you
3:16
know I'm going to be fiberglassing the panel and all that so all right time to pull out the Dynamat all right this is
3:21
the product I'm using Dynamat extrem uh I know there's other brands out there that are uh really good um products and
3:29
there's a variety of different options available uh Dynamat was nice enough to help me out with this build uh you may
3:35
have heard Earl explain that this car the uh car that I'm rebuilding was one
3:40
of the first cars to ever use Dynamat he actually was sent uh prototype material to test in the car back in the early 90s
3:48
so pretty cool um there is about 325 square feet in the car so far um
3:57
there's more going in in other places like the fenders when I do those uh with the 13s and all that so there's a ton of
4:04
Dynamat in there and I'm also going to be doing some additional sound ding materials so um with this stuff if
4:10
you're not familiar with it watch check out some of my other videos I go through basically how to apply it cut it roll it
4:16
a bunch of tips and tricks there so uh okay I'm going to go ahead and get a bunch of this damat on the trunk lid
4:22
quick check in uh about halfway done and so far it's coming out really nice I
4:27
didn't do two layers on every sing single inch of it um primarily the flattest
4:34
areas um also took care to open these holes back up for serviceability of tail
4:39
lights um this area needs to be open to be able to service the rod that goes over there things like that so U
4:46
maintaining those Factory holes and from here I'll continue and get the other side done it's taking me I don't know an
4:53
hour and a half to do this portion and I like to take my time so um I'm sure there's people out there that are faster
4:59
so all right I'll continue getting the other side complete Dynamat complete uh
5:05
took me a little over 3 hours I think something like that 3 or 4 hours uh again really taking my time I'll give
5:11
you a closeup on some of the detail here and I know there's some people that are very critical about um other people's
5:19
dynamin installation so it don't tear me up too bad um I ended up doing two
5:25
layers again on some of the flatter areas like this um the other thing to consider too is that there's no base in
5:32
the back of this car everything is up front all the drivers are you know the the 13s are in the kicks and the mids
5:39
and tweeters are going to be in the dash so there's really not going to be a lot of resonance going on back here but I
5:45
want to be safe I might also do some expandable spray foam inside the beams in here down the road I'll deal with
5:51
that later um but I ended up doing four sheets of Dynamat I've got a a big bulk
5:58
kit I don't even know if it's called a P kit it's just a giant box of Dynamat sheets each sheet is Four Square fet I
6:05
use four sheets on this uh total so um 16 square ft and the Dynamat is about a
6:13
half pound per sheet so I added about 8 lb so far so uh do you know anywhere
6:18
where I can get some upgraded struts for the trunk lid because I think I'll need
6:23
them but that's okay I'd rather do it right so all right so with Dynamat
6:28
complete I'm going to wrap up for tonight and then I'll come back um in a day or two I've got uh wife's got a big
6:35
backsplash project for the kitchen uh but um after that I will get into back
6:41
into uh working on the trunk lid and we'll go to the next step all right that was not a day or two um what you're not
6:48
aware of when people do these YouTube videos is that you can fake it and splice stuff together and all of that
6:53
I've been away from the car for like 30 days it's been killing me um I did
6:59
complete the backsplash that is done if you want to check out I do have like a home improvement Channel called Mikey
7:04
land all one word and I documented that whole backsplash that thing took forever it was a bear plus we did all of our
7:11
holiday decorations we had a bunch of people in for Thanksgiving um so now
7:17
it's time to go hot and heavy back on Misa so um couple of other quick things I want to show you to get you caught up
7:24
um I recently had Brian Klein and it's b r y a an c i INE from Brian Klein
7:30
Interiors come over um basically I hired him to do like a consult and I reviewed
7:37
exactly how I plan on upholstering all these pieces um he brought over samples
7:43
of the carpet um the material that I'm looking to use I he was able to find some quote unquote unbacked stuff it's
7:50
not like ozite where it's super flexible but it's really nice carpet it is highgrade it is actually BMW carpet uh
7:58
which I think is going to make it look amazing and not be horrible to uh to
8:05
install it doesn't have as heavy duty of backing as some other carpets um another thing that I've done um shout out to
8:12
Steve head uh estaban on Facebook um
8:18
this may look like a couple of piles of junk but to me this is like finding a treasure off the Titanic uh and very
8:24
again you guys might know by now I am very nostalgic and sentimental and all of that
8:30
these are the original mids that were in this car these are if you remember Earl
8:35
had the you know the 4 and 1/2 in BMWs that motorized out of the dash these are the actual mids they're
8:42
in really rough shape I kind of wiped them off and cleaned them up uh I wouldn't use them um they're not again
8:49
they're not really in great shape but they're definitely a piece of kind of history as far as I'm concerned this one
8:55
even has some of the original tro ring uh that Henry had built so really cool
9:00
I've got some other stuff again I've got the the metal rings uh and I've got up here I think I've shown you this before
9:07
I've got the original piece of zebra wood so that stuff to me is kind of special so all right so with that let me
9:14
go ahead and show you what I'm working on with the trunk lid all right I have been out here last couple of nights
9:19
picking away and I wanted to get some progress at least some design progress before I showed you what I've got going
9:25
on uh so the first thing is I have a new iPad iPad Pro 12.9 in um that came in that's going to
9:33
be going in this Center area this piece right here is just a mockup I spent a
9:38
lot of time doing this kind of design stuff probably a lot more time than some people think maybe necessary or whatever
9:45
but I'd rather do it like this this kind of works for me so look at look at this is basically just a foam mockup so the
9:52
iPad's going to go here in the center and then on either side on one side I'm going to do um kind of a like a diagram
9:59
a system diagram probably something even retro I have from the original car when
10:07
I got all the magazines and stuff from Earl which are I consider to be on loan I have some amazing things that this
10:14
used this stuff used to be or various versions of it different system diagrams
10:19
that he used I might I'll probably have something done similar to this with kind of similar fonts and graphics and look
10:27
pretty retro so uh so that'll be on one side of the iPad uh like in this section
10:35
and then this other side is going to be kind of some quick facts about the car a lot of times people ask oh how long did
10:41
it take how much weight did you add things like that and then I'm also going to have a QR code to get to my YouTube
10:46
channel this whole thing will be carpeted fiberglass the whole n yards this is basically just a mockup to get
10:53
me started so let me show you what I've done there's two things I needed to consider from a design perspective the
11:00
layout of everything where everything is going to go and also considering the height of the different layers so here's
11:06
what I did for that if you notice I've got we'll use this one as an example I've got a perimeter so um again freak
11:15
so I CAU little chunks of wood just to kind of lay this out and see what it's going to look like this will be a
11:20
perimeter this is going to be made of/ in MDF which you guys may know I absolutely despise MDF but um I don't
11:28
like it because if it get wet it turns into just mushy cardboard I figure if the trunk lid gets wet I've got bigger
11:35
problems to worry about so I will resin the entire thing so um if it does get
11:40
moist or wet it's not going to um expand and contract as it does so this is going
11:46
to be a perimeter that I'll go you can see my pieces what I'm going to do again is use this to mock up each of my pieces
11:52
the next step is I'll I'll cut out all of this stuff dry run it here and then transfer this to um the actual half in
12:00
MDF but let me show you what I got going on here this is pretty cool um this is the perimeter this is going to represent
12:07
washers and magnets I've got various magnets we'll get to those later that's what's going to hold these things in including the iPad but imagine like this
12:15
goes here these are going to be the same height um then I've got something called
12:20
a fleece cleat which is basically these little uh they're are 1 in by 2 in in
12:26
most cases that are going to go around here and then I've got uh and then actually
12:33
this goes in like this this will be the magnets and washes just representing the thickness right I've got the perimeter
12:40
and these are going to be my fleece cleat these little 1X two blocks all of
12:45
those are the same height then I'm going to have um this piece right here is
12:52
going to be a piece of qu in MDF that'll act as the perimeter so it's kind of a
12:57
ring if you will and and that's what this is going to look like I'm calling that the fleece inlay that'll sit on top
13:04
of these cleats but only be installed after I wrap this whole thing in fleece you'll see that later I've got this all
13:10
figured out where this is going to basically go inside it's it's going to serve as the final proper perimeter for
13:17
all of these holes and then I determine after kind of testing and playing around
13:23
with things that this is the way um the rest of it will go this represents the
13:28
thickness of the unit either the iPad or these inlays that I'm doing I can use
13:35
washers to to adjust the height of this so I got that figured out and then this
13:40
is going to be the carpet the carpet will sit flush with the piece um I
13:47
tested this I have some samples of carpet and I cut it with a nice clean straight edge and if I butt the carpet
13:54
right up against the iPad it is a perfect clean look but if I roll the
13:59
carpet into the hole it gets nasty and you can kind of see the white backing you know that it does have it looks
14:05
pretty crappy um the fleece again is going to basically go over like this the
14:11
fleece inlay goes inside and kind of tucks the the the uh fleece in place um
14:19
that's basically an idea I know what I'm very confident on how I'm going to lay
14:24
this whole thing out um I don't want to go too much further into the design I want to show you more more kind of you
14:30
know movement and getting things going so all right so with that I'm going to keep working on this I'll get some start
14:37
getting some wood cut uh and get this thing laid out all right I lied one one
14:42
other quick design thing I'm going to use the factory carpet piece that was in here it's kind of a molded piece of
14:49
carpet as my perimeter I'm going to put that in fiberglass resin the whole thing stiffen that up and then when I build
14:56
this whole thing out of wood this represents basically the pieces that are going in there I'll wrap the whole thing
15:01
in fleece resin it and get all of it set up so that again is kind of the design concept of this once again it was um
15:09
totally overdoing it over engineering it uh spending a whole bunch of time planning it but again this is my last
15:16
build so that's the way it's going to go and hopefully you enjoy it so all right time to get the saw going and get some
15:21
wood cut okay it's a couple of days later uh I ended up going to a really nice uh car show today FCP Euro out here
15:27
on the West Coast did a uh they're doing like a semiannual show and they did a big show it was awesome so went to that
15:34
today it's Sunday now it's the evening so before I start cutting um came up
15:40
with a couple of other things that I'm going to be working on first thing is I want to try to cut away again think of
15:46
this as just my mockup for the/ in MDF piece that I'm going to be using what I
15:51
want to do is cut away as much of it as possible uh to try to save weight anywhere I can in the trunk lid not
15:57
because I'm conscious of weight in the car just because um I don't want the trunk lid weighing 50 lbs and you're you
16:04
know the gas struts don't hold it up so this again is where you know this is
16:09
where um the display diagram and the YouTube channel thing is going to go and then the iPad in the middle I need to
16:16
figure out how much of this I can cut away but to do that I need to figure out the magnet placement for each of these
16:22
pieces I'm going to be using uh some high-end neodymium magnets I bought three different sizes I just uh
16:29
temporarily attached to Flathead screw and just took my metal toolbox here got
16:35
an idea of kind of the strength of each of these um for the iPad this by the way
16:42
is what I'm using it's a 12.9 in um Apple um iPad Pro uh it's a little bit
16:50
older version uh bought it refurbished but got a really good deal on it um all
16:57
right so with this there's areas of this that are magnetic some that are
17:04
not as you can see here so I can I can feel it kind of pulling around I did also research to ensure that um the
17:11
magnet's not going to screw up the iPad uh I understand there's several different mounts that utilize magnets so
17:17
I did find that there are four points and you can see I can kind of move it around and it it wants to go to that
17:23
spot so that's where it's going to be the strongest so now what I'll do is lay this out measure this out get my center
17:31
and then transfer that onto this piece at which point I can then determine where I can kind of hog out and cut this
17:37
away so I'll go ahead and do that all right got everything laid out uh in terms of the magnet placement for the iPad uh one other quick thing um I ran
17:46
into kind of a design snafu it's going to happen with stuff like this the way
17:51
that I'm going to do this is the iPad will be sitting in there and hang on one sec let me grab carpet okay so here's
17:57
what I've decided I'm going to do the way that this whole thing's going to work is um instead of building like a
18:03
triming around the iPad or the iPad sits you know like down inside and there's a
18:08
drop in and stuff like that I just want it as clean as possible so the iPad is actually going to be suspended off of
18:15
the piece of wood by a quar of an inch the carpet I'm using um this is not it but it's the same type is a quar of an
18:21
inch the carpet is just going to butt up against the iPad like this the silver here I'm going to deal with that later
18:28
I'll address that um but the problem I'm going to have this is going to give me an awesome really nice clean Edge I
18:35
think um when you roll this carpet I could roll it but then you start to see
18:41
the inside of it I just don't like that look so I'll keep it flat but there's
18:48
the charger for it there's no way I can get a cable in there and maintain that so I looking into some wireless chargers
18:56
these iPads don't really do wireless chargers but allegedly there's some out there so I'm going to buy a couple
19:01
different ones and try it and see if that'll work the other thing I considered is I've got the
19:07
buttons which I won't need to get to I'm using a Bluetooth speaker um more on that later and then I've got you know
19:13
these are my volume buttons and then that's the uh onoff kind of power button if you will um I won't need to be able
19:21
to get to that the iPad's going to be able to come out I'm going to take it out and I'll use it in my house I bought a case for it and stuff so I'm not just
19:28
going to leave leave it in the car but my point I wanted to make is that I carefully considered where these buttons
19:34
are this I think I can hide when I do the carpet I will I'll I got an idea
19:40
here to be able to kind of hide this if you will um but even so I put the iPad
19:45
so it's going to be like this where the buttons are at the bottom so less likely to see it so again even things like that
19:53
I'm considering just to try to make this as as clean a build as possible so as you can see I've got my arrow pointing
20:00
up and therefore my buttons are going to be on the bottom so I've got those
20:05
transferred over onto this piece now I can figure out where I can cut this out and then I'm going to figure out my
20:11
magnets for this for those magnets I'll do a magnets on in this piece here and
20:17
then there will be steel washers that'll attach to these pieces it's just going to be a piece of quarter in um probably
20:24
MDF maybe aluminum um with the design on it and then a piece of clear plexiglass
20:30
over the top uh and that'll kind of magnet in just like the iPad so all right continue with this design all
20:37
right got my design finalized um man I'm a Nut uh so here's what we're going to
20:43
do I'm going to leave this kind of a cross piece here um you'll see why later this is just for the iPad I'll cut away
20:50
these sections and then for the two I'm just calling them unit number panel number one and three two being the iPad
20:58
this all cut away as well on both of these so everything is laid out magnet placements cutaways everything is good
21:06
um that's going to wrap it up for tonight so tomorrow night we'll actually get the saw going and start making some
21:11
dust and mimic this onto a piece of/ in MDF in preparation to get this whole
21:17
thing assembled okay it's a couple of nights later uh last night I started
21:22
working on the basically I I rough cut um the perimeter piece and then
21:29
started routering it and realized I had some issues with it I was a 16th off in
21:34
one dimension which it to me isn't acceptable so I basically scrap that and I'm going to start over I'm going to do
21:40
things backwards from the way I initially intended so I'm going to work from the center out I'm going to first
21:45
build um three mockup pieces uh one that represents the iPad and then two mockup
21:51
pieces um for the outside panels these aren't going to be used in the final
21:57
design um they're just basically for placement and getting everything set up so the first thing I'm going to do is
22:03
I'm going to do this at a quarter inch MDF I'll go ahead and table saw cut these uh and then get the um the
22:11
dimensions basically square or rectangular in this case uh and get everything set up all right even though
22:17
this is just something basic I feel I don't show enough in my videos of me actually doing the work and this I think
22:22
is is pretty important um this is a $99 Harbor Freight 10in saw it's not the
22:28
greatest saw in the world the fence is um you know you can't just lock it and
22:33
expect it to be square you got to measure from both ends and and takes a little bit more time but the point I
22:38
want to make is that you don't need you know a $10,000 shop to be able to put
22:43
turn out good work so
23:12
right you are going to do those two panels I'll double check them for square make sure everything's good and I'll show you the next step I'm also going to
23:19
finish cutting the uh iPad template as well all right this again will give you an idea of the level of accuracy you can
23:25
get even with cheap tools if you take your time so I was going for 10 in we are right there double check this this
23:33
should be 6 and
23:38
1/2 look at that spot on and let's
23:45
see perfectly Square I flip it over there you go so done right even
23:52
with a cheap saw all right time to um finalize the iPad and then I'll show the
23:58
next step for what I'm going to do to round the corners sometimes I need to think outside the box uh especially with these tools I'm using um if you're not
24:05
aware you can put the fence on the left side of the table saw typically you're going to have it on the right side um
24:11
normally this side of the table is going to be wider and I did that because it was the only way I could get enough meat
24:18
there to be able to make that cut so let's go see how it came out okay we are
24:23
good perfectly square right up against the edge
24:29
and you might be asking well why didn't you just tape up the iPad and flush trim
24:34
bit the iPad trust me I thought of it but I didn't want to risk damaging it I just bought it so all right now to deal
24:40
with these Corners uh which I've got a little thing that I came up with all right this is where one of those fancy
24:46
jig sets would probably come in handy but here's my solution I use this template to determine the radius of this
24:55
curve which is a it's a 1 in diameter so/ in radius then I went on Amazon and spent six
25:01
bucks on these they're a 1 in um disc meant for crafts I'll double side tape
25:07
these to this piece and then router this Edge using this as my guide on a flush trim bit um again a lot of work to do
25:16
for a piece that's not even going to go in the car but these are going to be important because they kind of set the tone for the rest of the pieces all
25:22
right got all my pieces on I already did one it cheated uh I'll show you basically how this works flush trim bit
25:29
um I do have to be careful because I can't go I can't start before or after the center of the radius cuz otherwise
25:35
that will start buding into the side ofs so pretty
25:44
[Music]
25:52
straightforward that's it and that gives me a really nice uh
25:59
nice clean C up the ey all right the pieces I'm calling mockups are all set
26:05
while these aren't going to be used for the final piece in the car they will be used as a template that I will flush
26:10
trim uh pieces of aluminum out of that's what these will ultimately be made out of and then a piece of clear plexiglass
26:17
over the top uh so everything came out really nice the edges look great here's this one up against the iPad and again I
26:24
wanted to have all the the uh edges consistent you know so that when you look at it
26:31
take this off now this is what the three of them
26:37
are going to look like so nice and clean and consistent and that's kind of what
26:43
they'll look like so um the other the only other thing I'm going to do and I'll do this later um I'm going to tape
26:49
off a perimeter um the perimeter in the iPad when you power the iPad up it's got
26:55
a black border you can barely see it there it's 5/16 of an inch wide um I
27:01
think I may paint these black as well around there again just to keep it consistent um across all three pieces so
27:08
all right these are done the next step um going on my crazy template here is
27:14
going to be the what I'm calling the fleece inlays I kind of name everything so uh the fleece inlays are basically
27:21
going to be quar inch MDF um and they're what I'm going to use to
27:26
basically um you'll see it's pretty cool I think the way I've got it designed so all right let me get started on that and
27:32
I'll show you what I'm doing there all right it is the next night and we're working on fleece and la so let me go
27:38
ahead and get these rough cut and I'll show you what my crazy Contraption is going to look like here all right this will all make sense in a few minutes
27:44
here so uh I've got these cut for the two side panels then I took my markup piece laid it in the center make sure I
27:50
had exactly a 1-in border all the way around this thing Square I then traced it and I'll do the same thing on the
27:57
other piece now I'm going to take this and I'll rough cut this with the jigsaw
28:02
and we're going to get ready to router it and I'll show you what I'm going to do to make a jig for these Corners all right I got the iPad fleece inlay I'm
28:10
calling it prepped as well uh if you notice this is a little bit wider than this is that is by Design with my
28:16
template because I don't want to go too far down with this because it's going to
28:21
make the angle steeper uh where this is going to be formed you'll see that after I get the fleece on it so I Tred to to
28:28
make this as small as possible but yet keep everything lined up here so this one is prepped as well so now go ahead
28:34
and get this one and the other two pieces rough cut all right now that I got these marked out and I've got a
28:39
pilot hole drilled I'm going to rough cut these with a jigsaw pretty straight forward nothing fancy here just show you
28:46
this
29:01
the objective here is to get as close up to the line as possible without going over and then we're going to router the
29:07
rest of that okay three fleece that's tough to say three fleece
29:14
inlays um are rough cut so you can see again my Edge is still there I keep
29:20
these scrap pieces too I'm super Frugal so I'll keep these even though there's not a straight edge on them and I can
29:25
double side tape a straight edge and either router or running through the table saw and then give myself a reference Edge and therefore still
29:32
utilize this for something so I save all the scrap so all right the next step is where I'm going to build a jig for the
29:38
corners and this is where if you don't think I'm nuts at this point you'll probably think what in the heck is he
29:45
doing for all this it's just a little tiny corner but this corner is critical because I'm going to be using this corn
29:52
this whole Edge is my guide when I cut the carpet when I do the upholstery so all right let me show you what I'm doing
29:57
here here next all right we're going to make four jigs um we starting with 3in x 3 in pieces of Quin MDF and now we'll go
30:05
to the next step okay my next step's going to be to drill a 1-in hole into each of these uh 3in X 3in pieces and uh
30:14
if you notice I've got it clamped in a drill press as opposed to just using a hand drill um this is going to be a lot
30:20
more precise I'm also using a Brad Point bit
30:25
which is going to give me a cleaner cut
30:33
this is a really cheap drill bit set I picked up at Harbor Freight in a
30:39
Bine but again just take my time go nice and slow it's quar inch mvf I'm not
30:45
trying to go through uh steel here or anything crazy
30:58
all right there we go we're through notice I've got a darker backer piece so I can see the
31:04
darker filings coming out so all right that is cut I'll repeat the same thing in the other three pieces all right four
31:10
holes are drilled um again real nice crisp clean cut that's going to be important for my router guide uh you
31:17
might be asking why didn't you just drill a hole here and then you would have had the the radius um I don't trust
31:25
getting the drill bit in the exact place I've done that before and it's either too shy or not far enough this I feel
31:31
it's going to take out slightly longer but it's going to be a lot more precise all right so now what I'm going to do is
31:36
um I'm only going to do a rough cut all four with a jigsaw and then I'm going to
31:42
double side tape a straight edge on each side um hit this with a flush trim bit and I'll have one that's basically good
31:48
to go and then I'll double side tape to create four total rough Cuts complete
31:54
all right at this point I've got a straight edge double side tape on both sides and we'll go ahead and
32:00
router this straight
32:07
[Music]
32:22
edge all righty here we go all right fresh off the router the true
32:30
test there we go so now we got a corner so now I will take this double side tape
32:37
it and get the other three good to go and then we'll get these double side taped on here and get those red four
32:44
corner jigs are complete now we'll go to double side taping them to each of these pieces all right Corners attached and
32:49
I'll go get just the corner areas routered inside Corners complete all right now I got a straight
32:56
edge attached to be able to to router off the inside area on the these flat
33:01
areas here as you can see here we go [Music]
33:46
all right all right pretty solid not bad not exactly perfect again if you had one
33:52
of those pattern jigs you know from like Mobile Solutions uh Brian Schmidt over there there he's got some amazing stuff
33:59
you could do this kind of thing but this again is a onetime kind of a job
34:04
um not too shabby though I'm good with that um now what I'll do is take this
34:12
piece and this is not going to go in here this is just you'll see my kind of
34:18
crazy Creation with when we get into the magnets part um but now for the second
34:23
one I'll just take this double side tape this one Buzz the perimeter and then we're good to go and then I will do the
34:29
same for Corner setup and the straight edge setup um actually that's one there
34:35
I will do that for the iPad and then all of my fleece inlays are good to go flush trim complete for the second
34:42
piece all right all three fleece inlays are done there's the mockup pieces uh
34:48
again these pieces are going to sit a quarter inch higher they're going to sit up and you'll see that when we get to
34:53
the magnet phase of the whole build so all right this part is done we're going to go on to the next part okay it's a
34:59
couple of nights later it's actually Friday night uh my wife is away on business for the weekend into next week
35:06
and there's no projects to be done around the house so it's going to be some serious Misa time and things
35:11
getting done so all right the next phase that I'm going to do is what I'm calling the fleece cleats and I'll show you kind
35:18
of what's going out with that we'll go ahead and get those started all right so referencing my design the fleece cleats are going to be like this they're a/2 in
35:25
um MDF they're going to be two 2 in wide or long this are four here but basically
35:31
they're going to go along this like this and then the fleece inlay that I just built is going to go over the top and
35:38
that's what's going to hold it in place is these what I'm calling the fleece cleats so you'll see how this whole thing kind of comes together so I've got
35:45
a count of all the different cuts I need to make I've already ripped some uh half in MDF to be able to get that cut and
35:51
I'll go ahead and get those all prepped now one other quick thing I want to show you here uh my fancy table saw does
35:57
doesn't have a limiter so I can't just put up a a a stop and basically just whip out a bunch of these I need 20 of
36:03
these uh that are/ in so what I did is use this to determine the curve which if
36:10
you're not aware is the width of the blade the width of the cut that the blade makes on my table saw which is
36:15
exactly an eighth of an inch and then I just laid this out with an eighth of an inch space on this piece so now I can
36:22
just zip through get them all cut and I'm good to go not too shabby for a $99 t table saw if you take your time all
36:29
right moving on to the next part all right the fleece cleats are done that went super quick and easy came out great
36:34
everything looks good so again I'm using my diagram mockup piece here just to lay everything out my next step is to take
36:42
this and transfer all of it draw it onto here and then we're actually going to start building the final um subfloor for
36:50
this panel all right it is the next day uh I started to draw the uh layout onto
36:56
this panel last night I've got it kind of rough cut as well my Dimensions I'll continue drawing the rest of this this
37:02
morning and then we'll start working on the final fabrication of this piece all right got most of this stuff uh penciled
37:09
out here where my magnets are going to go for what I'm calling panels one and
37:14
three in terms of the magnets for the iPad as a reminder if you've been following along the backs side of the
37:22
iPad um has there's actually magnets inside of it that I'm catching which is
37:27
totally toally safe I checked it's safe to use a magnet back here but if you
37:32
notice again just to reminder the placement of the the magnet is very
37:38
particular where it wants to land so if you can see it it kind of moves around
37:44
so I'm finding the place where it wants to stick best that's going to be where the magnets go but if you notice there I
37:51
think all four are in a slightly different these two might be the same but like this one is is uh further into
37:57
to the iPad than this one is so I'll transfer that over onto this piece and get this ready for the next step all
38:03
right everything is drawn out complete I even did a corner radius here because I'm going to router this Edge um to that
38:10
point I could just take a jigsaw blast this out do the same thing again these four sections are coming out so that
38:16
this cross brace remains um I want this to be once again as precise as possible
38:23
um within reason and actually get the car done so I'm going to jigsaw this rough this out much like I did with
38:30
these panels and then I will double side tape a straight edge to each of the
38:35
perimeter here and then we'll router this get it all cleaned up um and have
38:41
that done I'm not going to show the footage of that cuz it's effectively the same thing I did on that and this video
38:46
is getting pretty long if you made it this far thank you you're super dedicated we're almost done with this panel I really want to get in this panel
38:53
uh or in this video this panel basically complete and ready to go so so all right I'll go ahead and knock this out and
38:59
I'll be right with you one little Pro tip I want to show here uh for me if I'm
39:04
going to rough out Cuts like this I like to drill this is just a 5/16 hole I like to do the four corners that way I'm not
39:11
fighting this thing as you know the jig saws I'm getting it in there so thought I'd offer that up and I'll continue
39:16
cutting these out all right rough Cuts complete still matching the pattern which is good so now I'll go ahead and
39:22
router these edges clean all right I'll bring you along for one cut here there's something definitely very satis Ying
39:27
about using a flush trim bit so here we go [Music]
39:41
[Music] [Applause]
39:47
[Music]
40:05
all right set all right looks pretty good right not so fast I had a problem
40:11
um when I was routering this Edge uh I must I had
40:16
plenty of double side tape but there must have been some residual sawdust even though I blew it off this thing
40:22
moved on me as I was routering so this is the way I designed this this is
40:27
supposed to be a 1 in which it is there but over here it's 7/8 so um again is if
40:35
you're following along I show the good the bad the ugly to me this is not Precision it's not it's not right so I
40:43
will fix it um this cross brace is you'll see what I'm going to do with this later it doesn't have to be an inch
40:49
I'm going to cut it down so that this is three quarters and in doing so get this cleaned up so I'll go ahead and do that
40:55
now all set much better and I think I even prefer it now with it being 3/4 um
41:02
I also save more weight right so um couple of quick things with this too um
41:09
if you again if you've been watching up to this point it's exhaustive the amount of time and effort I'm putting into this
41:14
this is again this will be my last build so everything I've got going into this when I run into of problems like I
41:22
just had two things occur it kind of screws up my head because then I'm like well if I make other errors whatever
41:28
I've already screwed up so I've got to stop and fix it or redo or whatever so for me personally paying this level of
41:35
attention that's important the other thing is if you do start to make small errors if this wasn't cut to the right
41:41
size or you know the hole wasn't cut you get into what I call kind of compounding errors where one thing leads to another
41:48
and by the time you get to the end of the build the whole thing is just a hot mess so um good with this I'm back on
41:55
track uh took me about 35 minutes I even time myself to see how long it would take but again now my head's in a clear
42:02
space and I'm I'm feeling really good about it and now I'll continue to the next part I got to check my to-do list
42:07
which I think is going to be drilling the holes for the magnets all right here's what I'm going to be doing for the next part um this kind of is a
42:14
little bit of a mockup for the magnets I'm using two different Siz magnets as you probably have already seen uh these
42:20
smaller ones I'll use for the two side the exterior panels um what I'm going to be doing is a this is a uh number 632
42:28
thread per inch screw this is the screws I'll use they a flathead so they sit flush in here I'm going to be using a
42:36
t-nut and then I'll be using a t-nut also for the iPad bolts so basically what I do is I use a gauge measure this
42:45
find the appropriate drill bit and then we're going to drill these in the drill press when I do something like this too
42:50
I'll take a piece of scrap and do a test drill hole and as you can see I think that's going to work I didn't have to
42:57
force it in there so again it's precisely the right size I'll do the same thing for the larger one this one
43:02
here holes all drilled everything came out good on to the next part okay my
43:08
next step is going to be to cut away as much as I can from the perimeter of this
43:14
just with the jigsaw and then in a couple more steps I will use a router along what I'm calling the perimeter
43:21
Edge again um I have all of this stuff all of my steps are very carefully laid
43:27
out I'll uh I'll do this kind of late at night or super early in the morning when I can't run power tools and get
43:33
everything planned out and hopefully it goes to plan so uh what I've also done is double side tape my again what I'm
43:39
calling my fleece inlays uh which by the way meet up perfectly ironically with uh
43:44
where they should based on the design so uh next what I'm going to do to get this
43:50
perimeter drawn out is I'm I've got a piece of uh 16inch flat bar I'm trying
43:56
to do this one-handed that's going to represent the thickness of the fleece you'll see where that'll come into play later then I've got the
44:02
3/4 in which is representative of the perimeter so I'll basically put this in
44:08
like this draw my line against this Edge um this I know I'm going to cut a lot of
44:14
it away that was again if you look at my paper template you can see I did the same thing there so again I'll draw this
44:20
uh on this perimeter I'm not going to cut away anything here cuz it's basically the same size as what I've got
44:26
there and I'll do the same thing on this end and then we'll go to the next step speaking of things going to plan this um
44:33
I was going to cut away anything extra I had here there's less maybe a 16 not
44:39
even probably a 302 this again I'll router this away later so it's just
44:44
these areas I need to trim and I'll get those cut now okay the perimeter's rough cut and I also put a 45 uh like I did on
44:53
the top of this you'll see why when I put it into the trunk lid uh even that I cut with the router okay here's a little
45:00
teaser um more on the whole carpeted piece later in the next video um but
45:07
this is where it's going to go and this is why I had to cut the 45s otherwise it would hit here um and just kind of
45:14
getting a rough idea as to its placement and so far that looks good but we still have more to do on this wood piece but
45:20
we're almost done all right next step is I started cutting what I'm calling the perimeters I just wanted to show
45:26
something here I went back to double side taping the fleece inlays uh in place and then again I'm
45:32
using some uh 16th of an inch flat bar just to represent the gap for the fleece
45:37
I just wanted to show this though that's Precision everything lines
45:43
up perfectly nice tight fit but I can get this out still but again it's just
45:49
really taking my time even with super cheap tools all right continuing on all right it is Sunday the next day and I
45:55
plan on spending pretty much the entire day out here it's about 9:00 in the morning and I'm going to be putting in a
46:01
long day so this should it should be able to get um The Woodworking done today and get this video done and posted
46:08
for you guys so um I did more of the perimeters here you can see again what
46:13
I'm doing I think I showed this yesterday I basically lopped off a corner on each side just to get it to
46:19
fit in tighter into the um trunk lid that was part of the initial design you
46:24
can see I've got that on my phone foam template um this perimeter is going to be again
46:30
going back to my mockup pieces that I modeled out um it's going to be um/ in
46:36
MDF and then I'm going to be using 8 in Masonite this needs to be slightly higher you'll see why when it's all
46:42
assembled uh so I'm going to continue doing the uh 1/ in MDF strips again you
46:48
can see this is intentional we'll router this off later um I'll get the rest of
46:53
these on and then once the/ in pieces of perimeter are done I'll move on to the E inch get those completed as well all
46:59
right I'm cruising Along on these perimeters but one other quick kind of an illustration of really getting
47:05
precise here this one very nice tight fit but I can pull it out take the same
47:13
one this should fit the same way I've got this one double side
47:18
taped look at how nice that fits so we're we're so tight on these tolerances
47:24
and even though this is something that's going to get covered in fiberglass it's all about being Precision all right the
47:31
first layer of the perimeter is done came out great um this again is half inch now I'm going to replicate these
47:37
out of 8 inch Masonite uh and those are going to get CA glued to these you'll see that just a moment so uh let me go
47:44
ahead and get all of those 8 in perimeters ripped and cut all right when I removed the perimeter pieces I
47:51
numbered all of them although they I demonstrated where they're kind of interchangeable left to right side um I
47:57
also numbered the 1/2 in pieces and then I've cut my 8 in Masonite pieces um
48:03
about a 16th of an inch oversiz next one I'm going to do uh and I won't probably won't show this because I'm I know this
48:10
video is super long and if you made it this far again you're a trooper thank you we're really close we're really
48:15
close to the end here for this video um I'm going to CA glue these together and
48:20
then use a flush trim bit uh router these edges that way they're a perfect match and then we're going to be able to
48:26
install all the perimeters so let me go ahead and get that set all right if you're new to my channel this is the CA
48:32
glue I use the Bob Smith Industries product put a couple of drops of this stuff on spray the activator on the
48:37
other side stick the two together and it Lights Out it's not going to move all right this glue up process is pretty
48:43
simple but I'll show you all I'm on the last one I'm just putting uh a DOT of glue
48:50
every few inches and with the MDF I found it's uh
48:57
kind of soaks in so I'm spraying the activator you got to work really quick with this stuff because you have a very
49:02
short open time making sure that I'm overhanging on
49:07
my perimeter give it some good pressure takes maybe depending on the
49:14
temperature a minute or two and it's cured up I'll give it probably 10 or 15
49:19
minutes before I router just to be
49:24
safe and again you can see I'm just overhanging on my Edge
49:32
there and next I'll flush trim these all right router ring complete look at how nice an edge that gives me uh and we're
49:39
going to go on to the next part we're getting closer all right the next step is to prepare the mounting for the
49:46
magnets so there's going to be magnets that hold these panels in and the iPad
49:51
and I'm using machine stainless steel machine screws and te- nuts
49:57
that'll mount to the back side of this panel uh what I like to do with te- nuts
50:03
is um I don't trust them in MDF so I take a liberal amount of epoxy very
50:11
carefully making sure that I don't get the epoxy in the threads and I'll go around the hole this
50:18
is on the back side of the panel that you've been seeing me build this whole time and very carefully
50:32
put that in get it seated very important that it's seated nice and flush and that's it and I'll repeat that process
50:39
um and I'm using just a quick set epoxy from youest it Harbor Freight Tools all
50:44
right t-nuts are all set now it's going to be on to mounting the perimeter pieces to the panel all right I have
50:51
gone through and just use a little bit of double-sided tape to put all of the perimeter pieces in place very carefully
50:58
checking to make sure I've got my 16th of an inch Gap all the way around and I do now I'll go ahead and Brad nail these
51:05
in place um and get them permanently mounted all right just to be 100% safe I
51:11
still have my uh I'll use my shims these uh pieces of flat bar just to make sure
51:16
everything is good here and we'll go ahead and start getting this nailed the compressor is likely to kick on but
51:36
all right that's the name of the game and I'll just go all the way around and get the whole thing secured perimeters are all mounted now I will carefully
51:42
remove the fleece and Lace from each panel each part all right getting closer
51:48
next thing is going to be to I'm just going to Brad nail the fleece cleats into place all right fleece cleats are
51:55
complete now I'm going to flush trim the Border very carefully because I've got the t- nuts underneath there so I'm
52:00
going to probably build a sled just basically a large piece of uh Quin MDF
52:06
to put underneath it to give me a consistent bottom and then I can flush trim this perimeter okay it was able to
52:12
actually router the perimeter without any problem came out really good uh next is going to be the spacing for the
52:20
magnets I'll show you what I'm going to do here congratulations you made it to the end of the video um holy cow what a
52:26
long video uh what a lot of work this has taken me 2 weeks and about 35 hours
52:32
so far including the Dynamat and the design and all of that mainly I don't really count the hours that I spend
52:39
designing or thinking or tossing and turning in bed at night all right so here's kind of the way this is going to
52:44
work hopefully at this point you can understand um and and see what I got going on so when I go to fleece these
52:52
are just double side taped in in place right now when I go to fleece this I'm going to again the next video is going
52:58
to be fiberglassing this up this piece is just my frame basically so imagine
53:04
there's fleece that comes up to here after I fleece over this the fleece
53:09
inlay these Rings will be pushed in and then stapled into place this gives me a
53:15
nice proper Edge um and I'm going to I'll probably
53:20
tape part of this off and then fiberglass resin everything and then peel the tape off so that I have just a
53:27
finish Edge I don't want to have a rough Edge that was kind of the biggest thing with this fleece inlay um also notice I
53:34
have an eighth of an inch lip here that was intentional and that's because of the Masonite that's where I got that eighth of an inch and I'm going to use
53:41
this this is where the fleece will be plus you know fiberglass resin and kitty hair and filler and all of that to be
53:48
able to work this up so that's kind of the way that that was designed and intended and came out now the next thing
53:55
is these three pieces again are just kind of mockups these will not be the final pieces that I use each of these is
54:02
a/4 of an inch thick um the iPad is exactly a/ quart of an inch thick and
54:08
these final pieces will be made of a a sandwich between 8 in uh aluminum and
54:14
then a 8in piece of clear plexiglass over the top this one you know one of them will display uh like a QR code to
54:22
get to my YouTube channel and kind of some quick stats about the car you know time I took or whatever and then the
54:29
other side is going to have a system diagram kind of like an old school diagram like I showed you at the beginning of the video so right now if
54:36
you notice these are flush what I need to do next is epoxy the magnets in place or excuse me
54:43
the the washers so here's what I've got going on inside um these things are so strong um
54:51
so if you notice I've got a bunch of washers I got three washers right here the currently space this up I will need
54:57
to get longer screws I I miscalculated the length of the screws so I need to get quarter of an inch longer but
55:05
imagine so basically what I'll do next is and and the washers are going to
55:11
allow for a lot of flexibility in terms of the height so if I want to go add something different in here I can these
55:18
panels the intent of these panels is also um I can swap them out like if I'm
55:23
going to go to a big show maybe Sema for example I could do one that's like welcome to SEMA you know blah blah blah
55:30
so they're kind of interchangeable hence the magnets um so now what I'll do is
55:38
I'm going to get the magnets in place notice I got lucky there too everything lines up perfect I'll put epoxy around
55:45
here I'll drop the panel back in place and that will ensure that I'm
55:51
centered later what I'm going to do when I go to upholster this so again this is this is my final Edge my clean Edge
55:59
carpet will go right up to here I'll add more washers to raise this a quarter of an inch so it's basically sitting like
56:06
that and I'll have the carpet come right up against this Edge again if you remember in the beginning of the video I
56:12
showed where if I put the carpet right up against the edge it's a super clean nice crisp Edge and um versus rolling it
56:21
rolling it kind of looks like crap um that again is why this Edge was so particular why I built the jigs for the
56:27
corners and try to get them as exact as I possibly could now I'll carp it over the whole thing take my razor blade run
56:34
it in here and get myself a nice crisp clean cut so um same thing same kind of
56:40
a setup here for the iPad basically the same thing there and
56:45
again we removed some weight I'm hoping this thing's going to be okay when I go to open the trunk lid if I have to I
56:53
will get new gas shocks or who knows maybe motorize it um that's a thought as
56:58
well but we'll see I got to get this car done someday so all right that is going to be it for this video thank you so
57:05
much for watching if you've watched to the end you are an absolute Trooper there will be more content coming for
57:11
Misa um very soon uh as soon as I finish recording this little segment I'm going
57:17
to get right back to work I'll be out here all day um and I will make sure to get more content out quicker and
57:23
probably videos that are not quite as long I my goal is to get this part finished in this video um but there's
57:30
going to be more to do obviously we're going to get this whole thing fiberglass um we're going to integrate a
57:36
Bluetooth speaker as well so that when I'm at shows I can play the iPad and you'll be able to hear me talking you
57:41
know on the videos uh and have audio back there as well so uh thank you very much for watching if you have not
57:48
already please like And subscribe and I will see you in the next video thanks again take care if you stuck around
57:54
here's a sneak peek of what this will the